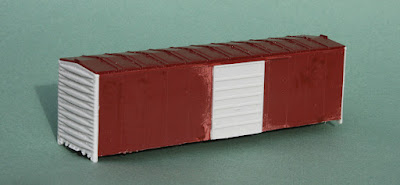
Back in the day, Sunshine Models used to offer “mini-kits” at the annual Naperville meets. These usually contained resin and/or styrene parts so that a commercial kit could be modified to model a specific prototype. This post is about building one of them.
This particular kit is one that I recently discovered in my stash. It was in an unlabeled box, and in tidying up its area, opened it to see what it was. It was a kit to modify a Branchline box car into a model of an EJ&E 1941 AAR boxcar with 10'6" inside height and 8-foot Superior doors.
These 500 interesting cars were built in 1941, when such a wide door was unusual in North America. The first 300 were built by American Car & Foundry, the remaining 200 by Mount Vernon. They were numbered 60400–60899. Below are builder views of one of the AC&F cars. (AC&F photos courtesy Ed Hawkins). Note the 5/5 “W-corner post” Dreadnaught end. Resin ends and doors were supplied in the Sunshine kit.
The kit instruction recommends an undecorated Branchline 40-ft. Postwar AAR Boxcar kit. After trolling the internet for awhile but not finding such a kit, I settled for a decorated one, and used paint stripper to clean up the body. After attaching the new resin doors with canopy glue, I removed the “tabbed” side sill of the original model; the mini-kit supplies the kind of straight side sill visible on the prototype side view above.
The next step is adding weight. As I often do with house cars, I use 5/8-11 steel nuts, attached inside with canopy glue. This has proven to be a strong and durable attachment. In the photo, you can observe that I didn’t locate the nuts at the locations provided by the car body. I want the weights well away from all screws that will come up through the floor.
Next is the attachment of the roof. Assembly is done in this order so that the ends can be fitted right up against the underside of the roof on each end, once it’s attached. Since the roof and body are both styrene, I used styrene cement to join them. After carefully cleaning up and checking fit of the resin ends, they were attached with canopy glue.
Withe basic box completed, I was ready to install the new side sill. But I’ll take up that step and completion of the model, in a following post.
Tony Thompson


No comments:
Post a Comment