Reference pages

Sunday, October 30, 2022

Produce box labels, Part 2

 In the preceding post on this topic, I gave some background on produce shipping boxes and showed some examples of the box labels I have modified to create HO scale labels for shipping boxes visible at packing houses on my layout. (The post can be found here: https://modelingthesp.blogspot.com/2022/10/produce-box-labels.html .)

I had enjoyed modifying these labels, and reducing them to HO scale, as shown in several posts, including the previous one (linked in the paragraph above). Other examples of my modifications may be found in the following posts:

https://modelingthesp.blogspot.com/2011/06/few-words-on-packing-houses-and-produce.html

https://modelingthesp.blogspot.com/2017/08/produce-shipping-boxes-part-2.html

https://modelingthesp.blogspot.com/2017/08/produce-shipping-boxes-part-3.html

http://modelingthesp.blogspot.com/2017/11/produce-shipping-boxes-part-5.html

https://modelingthesp.blogspot.com/2018/01/produce-shipping-boxes-part-8.html

To show just one more example, I chose a box label that was simple enough in design that it would withstand shrinking to HO scale and still at least suggest the original. It happens to be a distributor label, one that could be used as a brand by any of the packing houses working with that distributor.

I simply removed the distributor information at the lower right corner of the label, and replaced it with the identity of my fruit company.

There exist numerous other labels from the locale of my layout, any of which would have been easy to transform into one used by a layout packing house. For example, this one from the prototype Phelan & Taylor Produce Company (located in Oceano in the real world, but on my layout in the town of Shumala):

Incidentally, if you would like to own some original crate labels, there are a number of sellers on line. For a single example, a company selling orange-crate labels, visit: https://thecratelabelshop.com/collections/orange-crate-labels .

Some of the labels I’ve made, like those shown in the five posts linked near the top of this post, are on the layout, attached to stacks of shipping boxes at some of the packing houses. But the HO versions are tiny, not close to readable, and so some of the work I enjoyed doing is invisible. An example is below, with the “Bikini” brand boxes at Phelan & Taylor in East Shumala.

I decided to make a graphic display of my modified labels for the layout room, so that visitors could see a selection of these labels.

I chose the best two labels for each packing house, which in effect represent different brand names, exactly as prototype packing houses did. Then all the images were collected into a display format. They are not all exactly the same size or shape, but these differences reflect the original label shapes. (You can click on the image to enlarge it if you wish.)

The styles of these labels vary widely, from the 1950s-looking “Bikini” and “Starlet” brands, to the 1930s style of “Big Western” and “Pacoast” (actually a label from a Los Angeles distributor, not a packer, and used as a secondary brand by numerous packing houses), to the perhaps 1920s look of the two lemon labels. But it’s known that some packing houses continued to use older labels for years, probably the labels the owner liked.

I then got this image printed out on a high-resolution color printer, at a size that would lend itself to display in the layout room. It’s on a door at the Ballard side of the layout.

I have enjoyed researching and learning about box labels, and also had fun modifying them for my layout packing houses and making up stacks of shipping boxes. But now the layout-room display allows visitors to see clearly what was done.

Tony Thompson

Thursday, October 27, 2022

Desert Ops 2022

Last week yet another well-known pre-pandemic operating weekend emerged into the light, the “Desert Ops” weekend in Phoenix. As always, it was well organized and ran smoothly. Better yet, I enjoyed a bunch of very nice layouts (more on that below). But I want to emphasize that this is an “open” event, not an invitational, and anyone can sign up. If you’d like to try one of these events, look for this one next year. 

The first of the six layout I visited (and there’s not space to show them all) was an “off-site” visit to Paul Chandler’s layout in Tucson, before the regular meet began. Paul models Southern Pacific’s Lathrop Subdivision in the late steam era.I’ve written before about this excellent layout (see this post: https://modelingthesp.blogspot.com/2018/11/desert-ops-2018.html ). Once again, I really enjoyed the excellent scenic treatments as well as the flawless operation. Below is a very nicely and realistically done stockyard, with three loading chutes, justifying multiple stock cars loading here.

I must also admit that Paul has stolen a march on me.  After advocating for prototype-looking bill boxes, but not making them myself (see my post: https://modelingthesp.blogspot.com/2019/05/model-bill-boxes.html ), Paul actually has done it. I gotta catch up on this. But thanks, Paul, for the prod.

Another nice layout is the Scottsdale Club, housed at Railroad Park in Scottsdale. I worked Phoenix yard on the layout, as yard goat, under the direction of Mark Schutzer as yardmaster. Here’s an overview of the yard, with Mark hard at work. It’s a big yard, and a pleasure to switch, with plenty of space to make up or break down full trains.

I also had the opportunity once again to operate on Rick Watson’s excellent layout (SP’s Exeter Branch), the primary quality of which is that it’s very switching-intensive. This layout also is one I’ve described before (see the link for Desert Ops 2018 in the second paragraph of the present post). Some might find it “primitive,” in that there are no scenic materials on the ground anywhere — it’s only painted — and many building are paper stand-ins. You can see a couple of them in the photo below.

But the switching here is demanding and requires careful planning if it’s to be done in a reasonable time. On the backdrop above you can see a schematic diagram of the town I was switching (in this case, Sanger, California). The work really holds your attention, and for someone like me, is great fun, because I enjoy switching assignments like this.

Lastly, David Doiron. His huge layout is always fun and interesting, and as time passes, he has added more and more Arizona scenery. Here’s a single example from the layout. Note how the foreground scenery colors blend nicely with the photo backdrop. This demonstrates an observant eye and the ability to reproduce on the layout, what is seen in the world. Can’t beat that.

This was a fun weekend. As always, it was worth the visit, and congrats again to the organizers, who once again did the good job on this event that we have come to expect.

Tony Thompson

Monday, October 24, 2022

My walking-around list

Awhile back, I described my process for walking around the layout and looking for any work that needed to be done, anything from minor details that might be damaged or missing, up to major layout components that needed to be repaired or replaced. I record these inspection tours, in the form of a “walking-around” list, as I originally explained (see that post at: https://modelingthesp.blogspot.com/2018/07/management-by-walking-around.html ). 

Like nearly everyone, I stopped having public operating sessions during the pandemic (except for a few small session with my granddaughter). That means that such factors as dust on the structures, and track badly needing cleaning, was not a surprise. However, I have hosted three sessions so far this year, and that has been the stimulus to take care of the obvious maintenance.

But beyond ordinary maintenance, as always happens on operated layouts, things do go wrong and need fixing. In fact, I have written a series of posts over the years, in series titles of “Electrical Wars” and “Trackwork Wars” — those series names are good search terms to use (search box is at upper right) if you’d like to see any of them.

But in the present post, I’m not talking about the kinds of things that aren’t essential to operation (as are the topics mentioned in the previous paragraph), but more about “completeness” and appearance issues.

The San Francisco Bay Area, host in odd-numbered years to a weekend operating event called “Bay Rails,” will be resuming that role next year in its normal March time slot. So it was time to pull out the previous walking-around list and see what hadn’t gotten done, and what new things should go on the list.

Here’s an example. The road into the industrial area off of Bromela Road in my layout town of Ballard, between the Nocturnal Aviation and California Airframe Parts companies, hasn’t been completed with a grade crossing. This is a simple job and will enhance the appearance of this area.

I noticed that another grade crossing in that area isn’t done either. It’s an entrance into my Pacific Chemical Repackaging industry, and comes down a ramp from Bromela Road. But of course it needs to turn into a proper grade crossing. I will likely do both of these together. And I have always intended to add fencing along this side of the chemical facility, so that can be put on the list as well.

Another area in Ballard that struck me as not handled very well is the drainage ditch alongside the main line (bottom of photo). Most ditches like this do carry a little surface water, even when it isn’t raining, and that means there should be additional vegetation in the ditch, more than the minimal amount here.

Where my Coast main line runs along a bluff and into a tunnel, it occurred to me recently that there are hardly any fallen rocks in the ditch below the cut. This might just mean it’s really stable rock (not generally true of the Franciscan Formation along that part of the coast) or it could reflect good right-of-way maintenance. But I think I need to add a few more broken rocks along here.

One other area I noticed is the area in front of the Santa Rosalia depot, which has never gotten scenicked. With the new Channel Islands Kelp Products building at left (just its parking lot is visible), and the motor car pull-out at right, this area at the bottom of the photo really calls out for some work. Not sure yet what should go here; maybe a tool shed or some other railroad details.

Now all of these minor issues are specific to my layout, of course. The point I am trying to make is that even if your layout has reached a high percentage of completion, there will almost certainly remain some areas that aren’t finished, or need upgrading. It may be time to seek them out, and correct them.

Tony Thompson

Friday, October 21, 2022

Power balancing

 By “power balancing.” I refer to movements of motive power across one division to another, or even from division point to division point within a division, to bring motive power assignments into balance. This is a more likely occurrence with big power than with small power, and there are plenty of prototype photos of big power operating “light,” that is, without a string of cars. 

(We keep in mind, of course, the definition of a “train,” from the book of rules: “An engine, or more than one engine coupled, with or without cars, displaying markers.” So contrary to what modelers sometimes think, the presence of a caboose has nothing to with making it a train — though of course, a caboose is handy for displaying markers.)

The most common reason for light movement of engines is helpers returning from an assignment, thus commonly seen on mountain grades. Below is a Southern Pacific example I’ve always liked, a Wilbur C. Whittaker photo near Yuba Pass on the west side of the Donner grade, in the summer of 1950: a pair of cab-forwards coupled together, making a train.

But there are lots of other examples. In my interviews with Malcolm “Mac” Gaddis, who worked at San Luis Obispo in the early 1950s, he mentioned that on the Coast Division, power balancing often involved 2-10-2 locomotives, and he even described a 2-10-2 cab ride he made during such a move, from Santa Barbara back to San Luis. (To see that account, use this link: https://modelingthesp.blogspot.com/2011/08/san-luis-obispo-operations-4.html ).

Here is an example of such a move, photographed by John Shaw on a rainy New Year’s Day, 1956,  2-10-2 no. 3672 turning on the Watsonville Junction wye to return light to San Luis, where it was assigned for years. Note the slicker-clad brakeman on the rear tender step, and the snazzy two-tone pickup truck. (You can click on the image to enlarge it if you wish.)

One of the comments by Mac Gaddis that I enjoyed was this one: “I’ve always been on good terms with dispatchers, and I would call up and ask ’em, with some locomotive move like three light engines moving, ‘what’s going on?’ They would say, ‘Oh, we’re balancing power,’ and I’d say, ‘That covers anything, doesn’t it?’ ”  For more on that part of the interview, see: https://modelingthesp.blogspot.com/2011/06/san-luis-obispo-operations-2.html .

This is tempting to reproduce in model form. I’ve written about this possibility and others, under the title “Big locomotives on small layouts,” which you can find at: https://modelingthesp.blogspot.com/2020/03/big-locomotives-on-small-layouts_17.html . In that post, I showed both “cab hop” (meaning engine and caboose) and dynamometer car trains. Both are perfectly credible and well-documented on the SP prototype. But light engines can also be modeled in operation.

 Below I show my Broadway Limited Class AC-4 cab-forward no. 4107, running westward light, just passing milepost 270 on my Coast Line layout.

And I like the idea of two or more light engines running together, as Mac Gaddis mentioned. For example, I can run two of my Class C-9 Consolidations, nos. 2763 and 2752, on such an eastward move, probably to Santa Barbara. (No. 2763 is a Balboa brass model, 2752 a Key engine.) In this view, they are passing the Shumala engine terminal.

Including light engine moves is an interesting extension of mainline activity on my layout. Though I only have space to model a short segment of the Coast main line, I like to have range of options for each operating session.

Tony Thompson

Tuesday, October 18, 2022

Closing Signature Press

 As many of you already know, Signature Press is closing at the end of this year. Throughout its life, Signature has been run by Bob Church and me as equal partners. Bob served as Business Manager as well as overseeing order fulfillment and shipping. I was Editor as well as managing design and print production. I also did layout for about half of our 49 titles, and on the titles I didn’t lay out, I managed layouts by freelance people, via style sheets. Decisions on titles submitted to us were made jointly. 

Very early on, the amount of work involved in doing shipping from homes became overwhelming, and we have used commercial “pick, pack and ship” companies to both store and ship our inventory. But the front end of shipping was order taking and preparing orders for the shipping company. Our long-time (and only) employee doing this work is Kim Stein, and she has done a great job.

Of course, an essentially home business like this involved the support of our wives. Shown below are, at rear, myself and Bob (the tall guy), with Bob’s wife Jeanne at left foreground, Kim in the center, and my wife Mary at right. This was taken at an SPH&TS convention where we had a table and were selling books. This photo has for some years been included on the Signature Press website ( www.signaturepress.com ).

From the very beginning, even before we had done a single book, Bob and I agreed that our primary goal was to publish high-quality books. That means attractive-looking, well-designed, authoritative, and not least, solidly produced by good printers. We knew that this would mean pricing that was not exactly at the bargain level, but we hoped that if quality was perceived, it would overcome any price resistance. And from the beginning, we intended that the business was not primarily to make money, but to do good books, hopefully without costing us money.

Maybe because both Bob and I are authors ourselves, we have always taken the position that “it’s the author’s book,” and though editorial details may need adjustment, the voice should be the author’s, and we tried always to do it that way.

From collaborating on the book Pacific Fruit Express before its publication in 1992, Bob and I learned that we could work together smoothly, and that remained true for our 30 years in business. In the course of those years, we published five additional books by Bob on Southern Pacific topics, and six by me (five of them about SP freight cars). 

In addition, we were proud to publish five of John Signor’s definitive books about SP divisions, to republish books by Richard Steinheimer, Chard Walker and G.M. Best, to publish Jack Burgess’s Trains to Yosemite, and to bring out Ed Kaminski’s fine books on AC&F, Magor, and Pullman-Standard (and his collaboration with Richard Hendrickson, Billboard Refrigerator Cars).

There were books we published despite serious doubt whether they would prove to be commercial, because we believed they deserved to be published. Two of those, Phil Kauke’s Visalia Electric and Bill Kaufman’s State Belt, surprised us by selling well, despite our doubts. This illustrates, of course, that book publishing, whether by small publishers like us or by the “New York giants,” remains hard to predict accurately.

It’s interesting that our first book, Pacific Fruit Express, was our best seller. It was reprinted twice and has sold over 5000 copies. A close second is John Signor’s book, Southern Pacific’s Coast Line. Like all publishers, we too have books that were our favorites, maybe because they came together so nicely, maybe because they just hit some kind of a spot. For me, these included Ed Kaminski’s American Car & Foundry, the two volumes we added to David Myrick’s Railroads of Arizona series, and Harre Demoro’s Sacramento Northern.

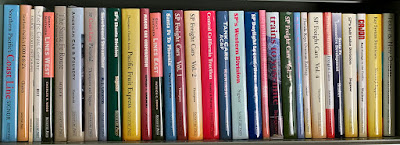
Shown below is a shelf of our first 32 titles (Pacific Fruit Express was revised and corrected for its second printing, so the second edition is shown). All but one are hardbound books.

The remaining 17 titles are shown below. Ordinarily I would refer readers to our website for more information about the individual titles, but as they have been selling out, the website is in flux. The intention is for all the book entries eventually to remain on the site as a helpful reference.

And speaking of selling, we are now disposing of the inventory in a sale, but if you want to order, please be patient, as the flood of orders has been hard for Kim to keep up with. 

Bob and I are both in our 80’s now, and though we still love railroad books, we feel like it’s time to call it a day. We’ve enjoyed the work and have been proud of our books. We know many readers have enjoyed them too, and that’s perhaps the best valediction we could have.

Tony Thompson

Saturday, October 15, 2022

Seasonal operating patterns

 My  layout, which is set in 1953, operates year-round. That is, if we were to operate on October 15, on the layout it is October 15 of 1953. This scheme was chosen partly so that perishable traffic could reflect seasonal variations. I have posted background on that before, so won’t repeat the discussion here. (For example, this post: https://modelingthesp.blogspot.com/2015/09/seasonality-of-crops-and-traffic.html .)

To illustrate, I have an upcoming operating session in December. Obviously my packing houses have to be shipping crops that are harvested in  December. Noteworthy on my table of prototype vegetable harvests in the locale of my layout is that the new crop of broccoli is just emerging into extensive harvest. (You can click on the image to enlarge it if you wish.)

This naturally results in waybills like the one below.

But of course other industries than perishables have seasonal rhythms. I try to take those into account in setting up each season’s operating session. For the upcoming session in December, the four bulk oil dealers on my layout will be getting tank cars of heating oil. 

In the wine business, the grape harvest would have concluded by late September, and grapes would have been fairly promptly crushed and fermented. With only a couple of months having passed since fermentation, the wine (which in most cases is still largely undrinkable) is termed “young wine,” and is now being shipped to buyers who have a vintner on staff and can properly blend such wines. If you’re interested in more background on this topic, you might try this: https://modelingthesp.blogspot.com/2012/02/wine-as-industrial-commodity.html .

Another possible seasonal cargo might be equipment for interior heating. Accordingly, a load of new boilers for heating systems will be arriving on one of the team tracks, shown here in the Guadalupe Local. These two Kewanee boilers are moldings from Resin Car Works (their kit 01).

So these possibilities are only intended to illustrate a few of the ways I try and reflect the actual season in which an operating session takes place. The intention is to make this part of the fun, at least for me, and maybe also for visiting operators who take a moment to read the waybills.

Tony Thompson

Wednesday, October 12, 2022

Produce box labels

An important part of my layout operation is perishable traffic from packing houses, typical California regional products of both fruit and vegetable varieties. I have four packing houses on the layout, and of course they would all have shipped their products in the shipping crates of the time. I model 1953, and that was toward the end of the time of wooden fruit boxes; by 1955, the cardboard carton had taken over. But the packing houses I model all still use wooden boxes.

Two of my packing houses ship citrus, one of them a lemon packing house, the other shipping Valencia oranges in the spring. Both would have used the classic “orange crate,” as they were popularly known; technically they were citrus shipping boxes (internet photo below). For more on this, see the very informative Department of Agriculture Bulletin 2013, which I described in a previous post: https://modelingthesp.blogspot.com/2017/08/produce-shipping-boxes-part-3.html

In this photo, you can see the label on the end of box, both its square shape and the fact that it nearly covers the end. Boxes like that shown above were somewhat over-filled for shipping, and in fact that was on purpose. When the top was nailed on, it made a self-springing support. You can see that below (Sunkist photo) in the crates already loaded.

Note in the photo above that the reefer has been pre-iced, that is, ice placed in the bunkers before loading the cargo. These orange boxes, when loaded, weighed about 75 pounds, and since the standard load was 462 boxes, the typical carload of oranges weighed 34,600 pounds, far below even the oldest PFE reefer capacities of 30 tons. 

A somewhat flatter two-compartment box was often used for lemons, and you can see that shape in many surviving lemon box labels. The photo below shows lemons being packed in two-compartment boxes (Ontario City Library collection; from the excellent book, Selling The Gold, Upland Public Library Foundation, 1999). 

A few years ago, I showed in a series of posts my modifications to actual prototype fruit and vegetable box labels, modifying them for the packing houses and towns on my layout. For one of those posts, this would be a good start: https://modelingthesp.blogspot.com/2017/08/produce-shipping-boxes-in-ho-scale.html . In that post, to choose an example, I showed this original lemon label for the “Sea Breeze” brand:

and I simply modified it for the name and town of the lemon shipper on my layout, as well as changing the quality level from “Red Ball” to the premium level, “Sunkist”:

For another example, I show below a “Big Western” brand label from the prototype Western Packing Co. in the immediate area of my layout locale, which I have modeled as a vegetable packer in my layout town of Ballard. Here is the original label, lacking only the name of my layout town:

and here is my modification:

You will notice that in both these examples, I have striven to retain the “look” of the original design and typography, in a few cases creating letters not in the original, but doing so from segments of the original letters. 

If you are interested in purchasing original labels, there are a great many available, of all kinds and from many growing regions, at such sellers as: https://www.cerebro.com/store/pc/viewCategories.asp?idCategory=12 .

The purpose of these modified labels was to produce something that could be put onto HO scale packing boxes at the packing houses on my layout. I will continue with that topic in a following post.

Tony Thompson

Sunday, October 9, 2022

Ice hatch latch bars for reefers

 Ice refrigerator cars had roof hatches for access to the ice bunkers, and on most such cars, a latch bar was part of the hatch mechanism, to permit latching the hatch cover open for ventilation service. When the hatch was closed, the latch bar lay atop the hatch. A photo of a PFE Class R-40-23 car is below to illustrate this (PFE photo, author’s collection). The car has a Morton running board, and the white dot over the reporting mark indicates the presence of fans in the car.

Models in HO scale can’t always reproduce all of the detail shown above, but latch bars are a pretty obvious component. I realize that some of my PFE car models don’t have latch bars, such as the model shown below, built with a resin-cast roof given to me. Comparing the photo below to the one above is a little embarrassing.

This detail is minor, but pretty obvious because it’s on the roofs of cars. I knew some of my cars didn’t have latch bars, a point that has nagged me for some time without result. Then recently I was at a model railroad meeting and in the vendor’s room, spotted this Plano product that I had not known about. It’s a set of latch bars!

I decided to compare these latch bars to the stand-ins I have used before, namely a length of HO scale 1 x 3-inch styrene strip, attached on edge. The strips are best for hatch covers that are positioned close to the roof level. My primary need for the Plano latch bars is for my upgraded Athearn cars, where the kit latch bars are horribly thick (thus naturally omitted) and the hatch covers do lie above the roof level.

Below is an illustration of Plano levers installed on a kitbashed Athearn car, a Class R-40-14 conversion (for a report of how that work was done you may consult this link: http://modelingthesp.blogspot.com/2013/05/upgrading-old-models-athearn-reefers.html , and also the following post to that one, which can be found here: https://modelingthesp.blogspot.com/2013/05/upgrading-old-models-athearn-reefers_9.html ).

This is of course a rather small project, but corrects things I was aware “weren’t right” in my PFE reefer fleet, and are now better suited to the next operating session. And if you either have any bare ice hatch covers, or some of the grotty Athearn latch bars, the Plano parts are a fine solution.

Tony Thompson

Thursday, October 6, 2022

Heavyweight sleepers, Part 3: roof

 Last year I showed my completion of the body work on kitbashing a Rivarossi Pullman (sold in the U.S. by AHM), from a 12-1 floor plan into a 10-1-1 floor plan. I also explained that my model doesn’t duplicate a prototype 10-1-1 car of a kind used by the Southern Pacific after the Pullman sale, so chose an actual Pullman name, Lake Merritt, for a car not purchased by SP (most “Lake” series cars were 10-1-2). Here is a link to that preceding post: https://modelingthesp.blogspot.com/2021/08/heavyweight-sleepers-again-part-2.html .

The major remaining task is to add air-conditioning ducts to the roof, just as Pullman did in the late 1930s with many of its heavyweight sleepers. I have done this in the past in a variety of ways, but for this model, will use the New England Rail Service set no. 250, ducting parts intended for use with the Rivarossi Pullman. Here is the roof as it came from the model, with window glass included:

The first step is to decide how the ducts should be arranged. Occasionally a full-length duct was applied to these cars, but much more commonly at least one side had a partial duct, often omitting the aisle or restroom areas. For example, here is a 12-1 (12 sections, 1 drawing room) car with a partial duct on the aisle side (Bruce Heard photo, West Oakland, 1959).

Since I am not modeling a specific prototype car, I decided to do the common partial duct on the aisle side, and then to place a full-length duct on the other side; I don’t have any other model heavyweight Pullmans with a full-length duct. I also imagine that this car models one of the sleepers that remained in the Pullman pool, for use by railroads when needed. (See the previous post, link in top paragraph, for more on this.)

The first step in the New England Rail Service instructions is to choose a duct length, then mark the end points and add the duct-end pieces to the roof. They are visible below.

After adding the duct surface between these ends, the comparable process is completed on the other side of the roof, but with the car-end duct terminations for the full-length duct. The duct parts fit the Rivarossi roof well (if not perfectly) and are easy to clean up for a smooth assembly. I used small amounts of the excellent Tamiya Putty to correct some slight gaps. Here it is:

Next came painting. I simply taped over the “glass” areas and sprayed everything else with Tamiya “German Grey” (TS-4). Shouldn’t the color be black? Note the roof color in the prototype photo above. It may have once been black, but certainly is no longer that color in this photo. And nearly all Pullman roofs in Chapter 3 of the excellent reference, Southern Pacific Passenger Cars, Vol. 2, “Sleepers and Baggage-Dorms” (SPH&TS, Pasadena, 2005), are likewise various shades of gray.

Below is the car body with the roof/glazing temporarily inserted. The interior view-blocks (see the previous post, with link provided in the top paragraph, above) are not yet in place, nor are such additional details as diaphragms. The roof color may be compared to that of the prototype photo shown above.

The last details such as diaphragms, along with trucks and couplers, will be pursued in a following post. I look forward to having this Pullman pool sleeper in service on my layout.

Tony Thompson

Monday, October 3, 2022

Layout improvement projects

My layout is approaching completion, though it still has a number of incomplete areas. But that doesn’t mean that everything completed is satisfactory. Naturally some of the areas represent work I did a couple of decades ago, and now I may want something better. And an occasional walk-around always shows things that need correction or improvement.

The one I want to talk about today is a tool house area near the mainline tunnel on my layout, just railroad-west of Shumala. This tool house was placed here for two reasons: first, because Southern Pacific often maintained tool houses near one or both portals of tunnels, and second, because I originally surface-mounted one of the early “slow-motion” switch machines here, and wanted to conceal it with a structure. 

Below is shown the scene as I wanted it to look, and as it has looked for quite a few years. Some visitors imagine that this is a train-order office, but it’s merely a tool house.

The tool house itself was removable, because I expected I would need to make adjustments to the stall-motor switch machine. This was fine for a time. But eventually the motor stalling behavior led to its burnout, and I had to remove it from the site. I don’t remember who made the device, but it was fine while it lasted.

When I pulled out that switch machine, I wanted to maintain positive electrical contact for the curved switch in the mainline track. I adopted the contact assembly from a twin-coil switch machine mount to do the job, and it works fine. Here is the site with the structure removed (you can click on the image to enlarge it if you wish).

The problem needing solution now relates to the two “walkway” pieces that I had created to cover the gap between the tool house and the track. I made these removable, for the same reason as the structure, and you can see their location at trackside in the above photo, where they should lie atop the two balsawood blocks. When the two pieces of walk were present, the walkway looked like this, with a gap for the switch linkage:

The problem here is that I made the walkways so that they lie just below the railhead, and almost touch the rail. Whether this is a realistic arrangement, I don’t know, but there have been many instances during layout operation in which a projecting sill step or locomotive foot board has hit one of these walkways. Upon reflection, the solution was obvious: set the walkway pieces lower, and outside the ends of the ties. 

The photo above that shows the site without the tool house, also shows the two wood blocks near the track that are the walkway supports. I simply took a razor blade and shaved these down lower, then trimmed the width of the walkway pieces so they can sit farther from the track and still abut the house. Now the walkway is lowered to the height of the ties, and is glued down. Rails are restored to the deck in front of the speeder shed.

This small modification should remove a nagging performance problem. I will of course be keeping an eye on it to make sure it’s really fixed!

Tony Thompson