I’ve discussed in several prior posts the approach I have taken and continue to take to developing a freight car roster. In particular, there are two parts to the problem: the mix of foreign cars, and the proportion of home-road cars. I follow the Gilbert-Nelson idea for my fleet of foreign cars (see my post at: http://modelingthesp.blogspot.com/2010/12/choosing-model-car-fleet-2.html) and have settled on about one-third of all freight cars to be home-road cars, based on conductor’s time books for the Coast Line (using data presented, analyzed and described previously at: http://modelingthesp.blogspot.com/2011/03/modeling-freight-traffic-coast-line_11.html ).
But beyond the railroads which are chosen, what cars and car types should that fleet of foreign cars contain? In this post, I discuss my approach to analyzing my various groups of foreign cars.
Gilbert-Nelson tells me what proportions of foreign cars to have, but does not tell me which cars. My choices, then, are based on several factors. First, numerically important car groups of various foreign railroads. Just as Gilbert-Nelson suggests that the total number of cars of a foreign road should be in proportion to their proportion in the total national car fleet, it seems reasonable to assume that the more numerous groups of cars would similarly be most visible. Second, available models: in most cases, I am not sufficiently fascinated by foreign roads to want to scratchbuild freight cars for them, though kitbashing is within the bounds of feasible work, to me.
A third factor is car types. Gilbert-Nelson, as often observed, ought only to work for free-running car types, meaning box cars, gondolas and flat cars, provided of course that the cars have no special equipment. Other car types have to be selected based on what is known from photographs and time books, along with expected industrial needs on my particular layout, leavened with some sense of what is a rarity and what is merely unusual.
For example, I have a photo of San Luis Obispo yard in the 1950s which includes a MKT stock car; similarly, there is a Morris Abowitz photo at Los Angeles in the late 1950s of an empty Reading hopper car. I conclude that both are genuine rarities, and I have decided to model neither car.
On the other hand, despite the absence of specific photographic evidence, I know from interviews and other documents that domestic coal (widely used on the SP in the 1950s for everything from section houses and cabooses, to depots, foremen’s houses, and sandhouse sand driers) came largely from eastern Utah and western Colorado. The mines were served by D&RGW, UP, and Utah Coal Route (UCR), and most of this traffic at this time was carried in drop-bottom (GS) gondolas. I am developing a number of such cars to handle my layout coal shipments.
(I made this point about coal traffic and GS gondolas in my post about my freight car fleet of gondolas; see the post at: http://modelingthesp.blogspot.com/2011/04/choosing-model-car-fleet-8-gondolas.html. That post also contains a photo of a UCR gondola.)
My basic roster analysis is to break down my fleet by railroad, and look at what I have (and plan to have) for each individual road to see if it makes sense. I will use D&RGW as an example. Though a Western road, it had a tight relationship with Western Pacific and Missouri Pacific for long-distance traffic, and thus minimal interchange with SP. But of course its cars still carried traffic into SP territory, and California photos do confirm the presence of D&RGW box and stock cars, as well as coal cars, in the early 1950s.
My roster, existing and planned, for D&RGW looks like this. I have a Westerfield single-sheathed box car, representing the 1916-built cars which were a mainstay of the Rio Grande fleet, and a Sunshine kit for the 1941 steel box cars, which may be enough for that car type. My stock car is an illustration of the pitfalls of trying to achieve accurate models. Combining reading about Rio Grande stock cars, and looking at a variety of photos, I concluded that I could model one of the cars D&RGW modernized with steel ends and roofs.
Here’s what I did. The sides of the modernized Rio Grande cars look a lot like the Athearn stock car, but as is well known, the Athearn stock car’s diagonal-panel roof has a reversed panel arrangement, and in any case is too new for the D&RGW cars, as are the Improved Dreadnaught ends of the Athearn model. I simply cut the sides from an Athearn stock car and from an Athearn box car, and put the stock car sides into the box car ends and roof. Why is this wrong? What I didn’t realize from the photographs I had examined is that the Rio Grande cars had corrugated ends, not Dreadnaught ones like the Athearn car. Sigh. Here’s a photo of my model:
I had to carve off the Athearn molded-on lettering boards, and decided to model a single broken board just left of the door. (Though I’m not sure a car inspector would have passed such a car.) The car continues in service on my layout, but is definitely a stand-in.
I have three cars for Utah coal, a pair of MDC triple hoppers (not quite correct but adequate stand-ins) and a 47-foot GS gondola, a brass W&R model. The old Ulrich D&RGW GS gondola I used to employ as a stand-in is only 40 feet long and thus not at all correct for the D&RGW cars, and is in my “sale” pile.
This is a comparison of the 40-foot and 47-foot cars. The proportions are quite different.
I’ve added an InterMountain early covered hopper and a Proto2000 53-foot flat car to round out my D&RGW fleet. So to me it looks like finishing that Sunshine boxcar kit will complete an adequate Rio Grande car fleet. I don’t have anything really surplus (except that Ulrich car) and don’t need any additions.
This kind of analysis is slowly being extended to other railroads, in each case looking to see whether I have too few or too many cars. The ultimate goal is a fleet of foreign freight cars which is at the same time representative of each foreign railroad, of an appropriate size, and of appropriate car types.
Tony Thompson
Sunday, November 27, 2011
Tuesday, November 22, 2011
Waybills, Part 15: Managing bills
I have alluded in prior posts to the ways I manage waybills on my layout, but have not been very specific about it. This post addresses the matter directly.
As I mentioned in describing the role of the local agent in my operating scheme, including waybill management (see the post at: http://modelingthesp.blogspot.com/2011/10/operations-role-of-agent.html ), the use of a “bill box” at a station location can substitute for a person acting as agent, for example in a location with limited aisle space. I’ll repeat the photo I showed then, with a bill box in place on the shelf below my town of Shumala:
This not only emphasizes a prototype arrangement, but also removes aisle-side racks or other “display” arrangements which are less prototypical.
This bill box is a standard office item, a storage box for “index cards” or 3 x 5-inch cards, 3 inches deep. Years ago, oak boxes like this were available at any stationery store, but today one needs to seek them out on line, for example at Hedberg’s site, http://www.successimage.com/cat--Card-Files--CardFiles (and there are other sources, readily discovered). If need be, one can obtain hardwood index-card boxes deeper than 3 inches, and one can also buy sizes suitable for “mini-bills” or modern waybills 4 inches high, such as 4 x 6-inch card boxes, again of varying depths. Each layout may need a different set of such boxes to serve as bill boxes at different locations.
You can of course use the molded plastic versions of these boxes, much cheaper and more readily purchased locally, though I find them clunkier than I want. And in the greater scheme of layout expenses, the cost difference is not significant.
Within each card box, I have index tabs for the industries in town, for my own convenience in managing waybills, but the “business” part of the box is the front, where I put a packet of waybills for the next-arriving local freight crew, and any accompanying message needed to direct their work. Here is the Ballard box interior (index tabs are temporary hand-written versions), including a supply of blank Bad Order Bills:
Note that there is enough “head room” in the box that my waybills and sleeves can stand upright.
My off-layout cars and car sleeves are on shelves (some cars are packed in boxes, but the most active cars are shelved). When one of these cars is needed to go into action, its sleeve is right with it. I plan to show my shelving system in a future post.
But there are additional sleeves for the non-shelved cars, and lots of waybills not currently in use. These I keep in a file box designed for baseball cards. These are available from several suppliers; I use BCW (visit http://www.bcwsupplies.com/products/corrugated-storage-boxes/ for more info; there are four pages of box listings). They call it a “Shoe Storage Box,” and it is indeed reminiscent of a shoe box. Note that it has a lid.
You can see that at present, I’m using less than half of the space in this box, and I find the remainder is useful for supplies. They do offer both smaller and larger versions of this shoe-box style. Here’s a closer look at the index tabs (I use the “Trading Card Dividers” from BCW). These are “writable” plastic dividers, but I have labeled them with the same clear Avery labels that I use for waybill sleeves. Stored car sleeves are in the front of the box, filed by car type; waybills toward the back, filed by industry.
I also use a smaller box from BCW to store sleeves and waybills for my staging tracks. This box is what BCW calls a “200 Count Storage Box,” and it is available in several sizes (it comes with a lid, but I cut the lid off for convenient access.) Here again I use index tabs for each track number. These numbered index tabs are standard stationery-store items, cut down to fit the box. In this box, the car sleeves lie on their sides behind each tab.
I often keep a few Bad Order Bills and Empty Car Bills in the front of this box, but have removed them for this photo.
Here is a side view of the box itself (that’s the Ballard depot behind it):
In this view, some of the empty bills, and a train pack, are in the front of this box. This is usually the pack for the next local due out.
The train pack envelope is just made from a standard envelope, 3.5 x 6.5 inches, in manila, by cutting into two parts just off-center, leaving an offset, so each envelope half has a “back riser,” as you see here. Then the flap is glued closed.
These drop into a shirt pocket and are a convenient way for a train crew to carry their waybills.
This system evolved from a similar set of arrangements for the old Doug Smith/Allen McClelland car cars (3 x 5 inches), in use for several years on my old layout, and has simply been adopted to suit the smaller baseball-card size waybills. It’s been working well on my layout.
Tony Thompson
Saturday, November 19, 2011
Route cards — 4
An important detail of the locations of route card boards for my modeling is for PFE steel refrigerator cars. (This follows my previous post on route card boards, linked here: http://modelingthesp.blogspot.com/2011/11/route-cards-3.html .) I have quite a few PFE cars on my layout, and they need to have correct locations for route cards and the occasional placard. When I looked into this topic, it turned out to be a little complicated.
It turns out that PFE changed location of placard boards, though not of route card boards, on almost every class of steel cars in the transition era, that is, up to 1955. (I model 1953.) I will illustrate this point with photos of the various classes (much more information and additional photos are in the book, Pacific Fruit Express (2nd edition), Anthony W. Thompson, Robert J. Church, and Bruce H. Jones, Signature Press, 2000. The photos I am showing here were chosen to show the route card board locations, not as outstanding portraits of the various classes. The book generally has much better images to illustrate the classes.
The first PFE steel ice cars were built in 1936 and 1937, Class R-40-10. As was common for reefers of many owners at the time, these cars had no placard board. Their route card board was on the side sill tab at the left bolster (PFE photo, author’s collection):
As pointed out in the previous post on route cards, many car types had this left-bolster location for route card boards.
The following class, R-40-14, was built in 1941. These cars continued to have their route card boards at the left bolster, as is just visible here (click on the image to enlarge it), but a placard board, painted black, was applied to the right of the car door (R.H. McFarland photo, Arnold Menke collection):
The next class, R-40-20, was built in 1945. Now a smaller board was added to the left of the door, with the placard board still on the right. The route card board was again installed at the left bolster (General American photo, author’s collection):
Only two years later, in 1947, PFE’s largest class of steel cars was built, Class R-40-23, and now the placard board was moved to the left of the car door and a little higher, and the smaller board seen on Class R-40-20 was omitted. And once again, the route card board was applied at the left bolster (Wilbur C. Whittaker photo, author’s collection):
A route card is visible on this car’s board.
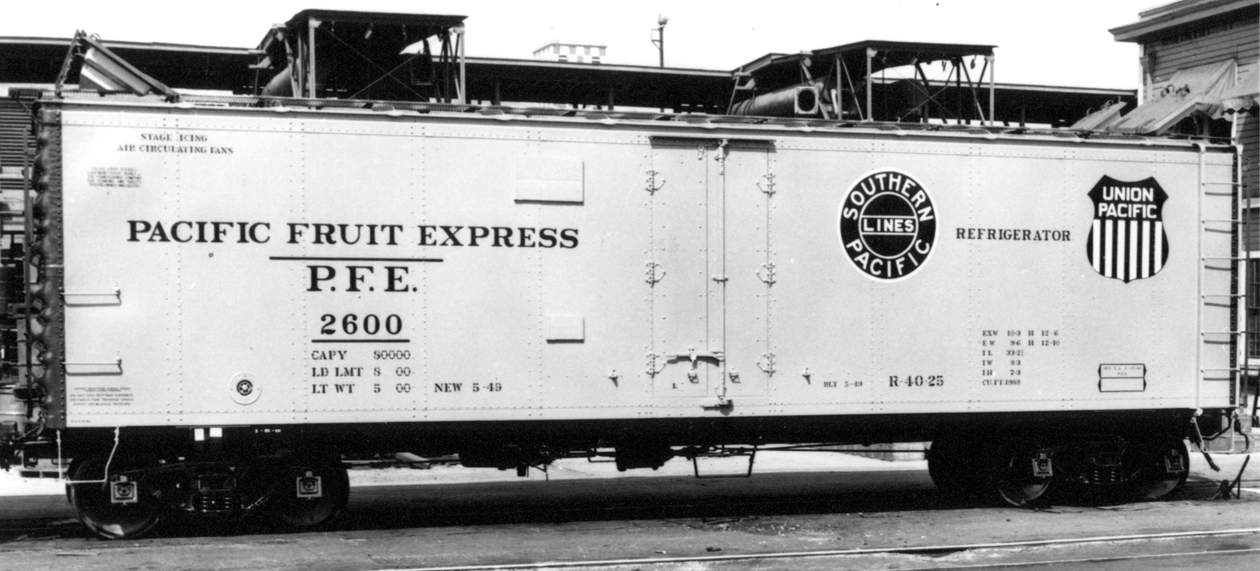
Two more years elapsed before the construction of Class R-40-25 in 1949. Now the placard board remained as in Class R-40-23, but was joined by a smaller board below it. Both boards were now painted orange. The bolster location of a route card board was retained, as can be seen in this view at Los Angeles Shop (PFE photo, author’s collection):
The last class of any size in my pre-1955 discussion was Class R-40-26, built in 1952 and the first class built new with sliding doors. This class had board locations duplicating those of Class R-40-25, including the route card board; all boards were now orange (PFE photo, author’s collection):
It’s worth mentioning, by the way, that all these views are of as-built cars. When a car was shopped in the years after its construction, it normally would have its placard and other boards applied or moved in accord with current practice at that time. Thus older cars in a year like 1953 would mostly have updated board locations. In particular, older cars with paint schemes from later years should definitely have placard board patterns matching the era of the paint scheme.
What about models in HO scale? Without putting too fine a point on it, the simple fact is that few models of steel PFE cars have had a route card board at the bolster (only one I know of is the InterMountain or IM R-40-10 model), and many have lacked or had incorrect placard boards as well.
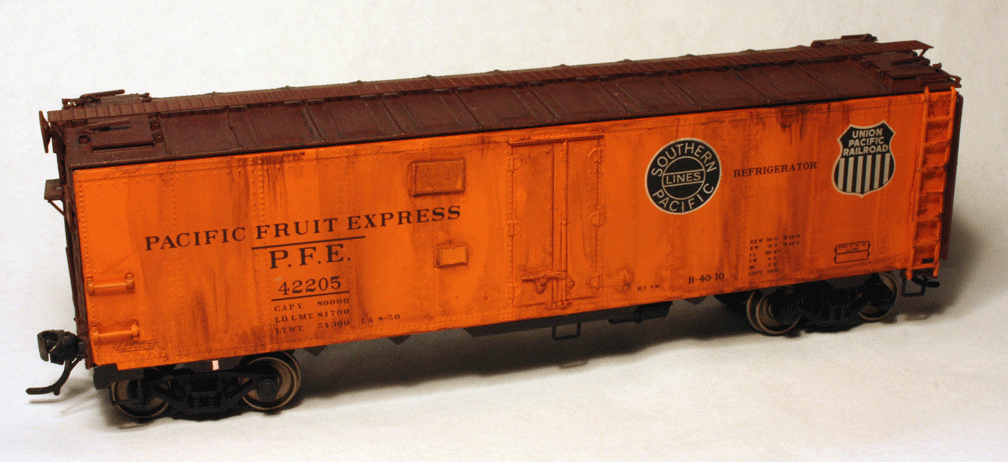
Here is a photo of an IM model of the R-40-10, having black-white heralds and thus also having the post-1949 placard boards (painted orange); the IM versions of R-40-10 representing as-built cars correctly have no placard boards. I have added a route card to the model’s board, located on the side sill at the bolster.
If needed, placard boards are easily added with thin styrene sheet. The prototype placard board was 16 inches high and 24 inches long, often tongue-and-groove construction so without a visible separation of the boards, or in later years sometimes plywood. I have occasionally scribed the board separations but in most prototype photos they are not visible. The smaller boards on reefer car sides varied, but were often about 8 inches square. The same appears true of the route card boards on steel box car doors.
This model shown below is an old Athearn plastic reefer, representing Class R-40-23, which has had some visible upgrades, including a etched-metal Morton running board, wire grabs, and fan shafts; in addition I have added the placard board originally applied to this class, painted black at that time, and a route card board at the bolster.
Correctly locating placard boards and route card boards is part of my effort to model PFE cars as accurately as is reasonable. After all, when placing route cards on models, they should be in the right place on the car!
Tony Thompson
Friday, November 18, 2011
Upgrading old models, Part 4: an update
In a previous post, I described the first part of the work I did to upgrade an old Athearn metal box car in HO scale. The idea was not to claim any special significance to this particular model, but to show the kind of process needed with older models to sustain consistency with modern freight car models and, of course, modeling standards. Here’s a link to that previous post on the model work: http://modelingthesp.blogspot.com/2011/09/upgrading-old-models-4.html .
The Athearn model represents a 1937 AAR standard box car, but as shown in the previous post, was numbered and lettered as an Illinois Central postwar car, which should have had different ends, among other things. So to make the car number consistent with the prewar model car body, it needed to be renumbered. I chose IC 18545 as its new number.
I had used a decal set from Jerry Glow to renumber the car, and corrected its built date to 1940 (consistent with the car number). If you’d like to get one of these sets, it’s the 10'4" IH set for IC; scroll down on Jerry’s web page ( http://home.comcast.net/~jerryglow/decals/full.html ). Then with all model work done, I weathered it. I used my usual acrylic weathering method, which is essentially a wash (see the joint clinic handout prepared by Richard Hendrickson and me for a clinic at the Lisle 2011 meeting, available at: http://modelingthesp.blogspot.com/2011/10/weathering-clinic-handout.html ). Since the car is being modeled as a prewar car, it can be presented as pretty dirty.
Upon completing the weathering coat, I covered the old capacity data and reweigh date with rectangles of boxcar-red decal sheet, included in the Sunshine decal sets for reweigh data, and added fresh capacity numbers, using the ones in the Jerry Glow set. This particular group of Illinois Central box cars had 80,000 pounds capacity, not the 100,000 pounds that is typical of most 1937 AAR box cars, so the Jerry Glow set is essential in providing those data. The set also includes a reweigh symbol of JSTN, for Johnston Yard in South Memphis, a busy place on the IC and a likely candidate for a reweigh symbol.
Here is a snapshot of the completed car, including a few chalk marks made with a Prismacolor white pencil and both placard and route card on the door.
This has been an interesting challenge of a project, and though there are no doubt easier ways to arrive at this final result, I have enjoyed solving the various problems associated with this upgrade. I’m pleased to have this veteran model now suitable for service on my layout.
Tony Thompson
Thursday, November 17, 2011
Operations: demand-based car flow-3
There are several ways in which computer techniques can be applied to a waybill system. I’ve already written about the computer applications I use for my waybill preparation. But this post is about computer usage in car flow management. I will just describe a couple of examples, rather than try to be comprehensive.
One issue sometimes raised is the waybill selection process. Simply drawing the next waybill for a particular industry from the front of a stack, and returning used ones to the rear of the stack, strikes some as too much of a fixed sequence. One can of course shuffle the waybill stack from time to time, but there are those to whom the resulting overtones of a card game are bothersome. I experimented with a computer method to select upcoming waybills. Here is how it works.
For a particular industry, say a packing shed, a certain number of waybills has been created, let’s say 22. These are all outbound loads of produce and so are essentially interchangeable. We now want to select one of those 22. In Microsoft Excel, one can set up to do this with random numbers. For this simple example, this is pretty easy to do. Excel contains a random number generator, and if you don’t have an Excel manual or after-market guidebook, there are on-line directions for how to set it up. Here is a link to one example: http://www.mariasguides.com/2007/06/28/random-number-generator-for-excel/ . You can readily Google others.
This method delivers a number, between 1 and 22 in this example, which corresponds to one of the 22 waybills. This of course implies that the waybills are numbered for each industry, and for convenience in use, would need to be filed in numerical order. Then locating bill 17, if that number is selected, is a quick process.
But this example, the 22 waybills for outbound produce loads at a packing shed, is pretty simple. Most industries, including packing sheds, do have other traffic (such as shipping boxes inbound at a packing shed), and so waybill stacks may have to be sorted by car type or by inbound vs. outbound. Those kinds of details are present in the tables I show below, and in fact I have separated inbound and outbound traffic waybills for a couple of my larger industries. That means that the Excel method has to be refined a little further.
To illustrate the coding I used, I show a table from the prior post on waybill scheduling (at: http://modelingthesp.blogspot.com/2011/11/operations-demand-based-car-flow-2.html ). This contains 10 days of inbound car movements for two towns, each having three or four industries and a line for “random” or unusual waybills
The first step is to code the industries and car movements. Here’s what I did. I gave the industries arbitrary numbers (510 series for Shumala, 520 series for Ballard), and for each car requirement, created a two-digit code. The first digit has the values of either zero, one or two, denoting no move, an empty car, or a loaded car. The second digit has values 1 to 9, denoting car types. I won’t list them because they are indicated in a footnote to the following table. Then the exact same table as shown above looks like this:
Though presented as a text table, these are the entries in my Excel file, with each cell shown as presented. With the foregoing descriptions of codes, you can see that this is the same as the table shown above. The one thing that may appear different is that in the upper table, “random” entries are present for a third town, Santa Rosalia (SR), and those are omitted in the Excel table.
I ran a number of experiments with this Excel set-up, and was pleased to find the random-number-generator approach worked fine and did deliver waybill numbers in a satisfying and varied way. But it’s worth mentioning that a relatively random selection of waybills can be accomplished just by grabbing a waybill from somewhere within a filed stack. For limited numbers of waybills, this may be less effort than formally generating random numbers.
I should further emphasize that the Excel technique described above is only a method of randomizing the selection of waybills, not a waybill creation method nor a scheduling method. Waybill creation directly in the computer is being explored by a number of modelers around the U.S. In most cases I’m aware of, they are using Excel. A serious limitation (to my way of thinking) is that the scanned railroad graphics I use at the head of my waybills can’t readily be inserted into Excel waybills. I very much like the effect of the actual railroad graphics and it’s become a feature I especially value about my system.
I know of at least one person who is using the random-number generator in Excel to do scheduling, that is, to identify industry car demand by a random number. To me, this misses the entire purpose of a demand-based car flow approach: to duplicate the regular or periodic patterns in car movement as well as the relatively random ones.
This Excel experiment was only intended to illustrate how a very large layout, with large numbers of waybills and industries, might go about pulling the waybills to fulfill a schedule. On my relatively small layout, I don’t have any difficulty or delay in simply consulting a paper copy of my distribution schedule.
Tony Thompson
One issue sometimes raised is the waybill selection process. Simply drawing the next waybill for a particular industry from the front of a stack, and returning used ones to the rear of the stack, strikes some as too much of a fixed sequence. One can of course shuffle the waybill stack from time to time, but there are those to whom the resulting overtones of a card game are bothersome. I experimented with a computer method to select upcoming waybills. Here is how it works.
For a particular industry, say a packing shed, a certain number of waybills has been created, let’s say 22. These are all outbound loads of produce and so are essentially interchangeable. We now want to select one of those 22. In Microsoft Excel, one can set up to do this with random numbers. For this simple example, this is pretty easy to do. Excel contains a random number generator, and if you don’t have an Excel manual or after-market guidebook, there are on-line directions for how to set it up. Here is a link to one example: http://www.mariasguides.com/2007/06/28/random-number-generator-for-excel/ . You can readily Google others.
This method delivers a number, between 1 and 22 in this example, which corresponds to one of the 22 waybills. This of course implies that the waybills are numbered for each industry, and for convenience in use, would need to be filed in numerical order. Then locating bill 17, if that number is selected, is a quick process.
But this example, the 22 waybills for outbound produce loads at a packing shed, is pretty simple. Most industries, including packing sheds, do have other traffic (such as shipping boxes inbound at a packing shed), and so waybill stacks may have to be sorted by car type or by inbound vs. outbound. Those kinds of details are present in the tables I show below, and in fact I have separated inbound and outbound traffic waybills for a couple of my larger industries. That means that the Excel method has to be refined a little further.
To illustrate the coding I used, I show a table from the prior post on waybill scheduling (at: http://modelingthesp.blogspot.com/2011/11/operations-demand-based-car-flow-2.html ). This contains 10 days of inbound car movements for two towns, each having three or four industries and a line for “random” or unusual waybills
The first step is to code the industries and car movements. Here’s what I did. I gave the industries arbitrary numbers (510 series for Shumala, 520 series for Ballard), and for each car requirement, created a two-digit code. The first digit has the values of either zero, one or two, denoting no move, an empty car, or a loaded car. The second digit has values 1 to 9, denoting car types. I won’t list them because they are indicated in a footnote to the following table. Then the exact same table as shown above looks like this:
I ran a number of experiments with this Excel set-up, and was pleased to find the random-number-generator approach worked fine and did deliver waybill numbers in a satisfying and varied way. But it’s worth mentioning that a relatively random selection of waybills can be accomplished just by grabbing a waybill from somewhere within a filed stack. For limited numbers of waybills, this may be less effort than formally generating random numbers.
I should further emphasize that the Excel technique described above is only a method of randomizing the selection of waybills, not a waybill creation method nor a scheduling method. Waybill creation directly in the computer is being explored by a number of modelers around the U.S. In most cases I’m aware of, they are using Excel. A serious limitation (to my way of thinking) is that the scanned railroad graphics I use at the head of my waybills can’t readily be inserted into Excel waybills. I very much like the effect of the actual railroad graphics and it’s become a feature I especially value about my system.
I know of at least one person who is using the random-number generator in Excel to do scheduling, that is, to identify industry car demand by a random number. To me, this misses the entire purpose of a demand-based car flow approach: to duplicate the regular or periodic patterns in car movement as well as the relatively random ones.
This Excel experiment was only intended to illustrate how a very large layout, with large numbers of waybills and industries, might go about pulling the waybills to fulfill a schedule. On my relatively small layout, I don’t have any difficulty or delay in simply consulting a paper copy of my distribution schedule.
Tony Thompson
Monday, November 14, 2011
Route cards — 3
I have received a very pertinent question via email, namely, where were route cards posted when the board for them isn’t obvious? Particularly for older models, on which these details were often omitted, it might not be very clear where they should go.
When there was a placard board on the car door (on a box car) or next to it (on a steel reefer), the route card board is usually not far away. And on a wood-sheathed car, it was often assumed that car clerks would staple onto the wood somewhere, and no route card board might be provided.
But there are exceptions, which I’ll now describe. First, railroads had the option to locate the route card board wherever they wished, and that choice might not be the usual one. For example, several classes of Union Pacific steel box cars had the usual placard boards on the doors, but located the route card board at the left bolster, as shown in this Wilbur Whittaker photo:
Models of some UP box cars have faithfully omitted the route card board on the car door, but have not provided it at the bolster location, so it needs to be added.
In most cases, these boards were eight inches high and 12 inches long, but sometimes they were different sizes or different proportions. A prototype photo is your best guide.
A second point to recognize is that on open-top cars, it was very common to put a route card board near or at the left bolster location, near the bottom of the car side, as in the UP box car above. But many exceptions can be found. Here is an SP gondola, in an SP photo, which despite its wood sheathing does have a route card board, two side panels to the right of the bolster:
But note that the car clerk has ignored the board and tacked the card near the bolster!
And sometimes SP chose to put the route card board all the way to the right end of the car (shown here in another SP photo). This was done on some classes of SP ballast hoppers too. You may click on either of these photos to enlarge them to see details.
Again, prototype photos are essential to correctly locate route card boards on cars other than house cars, and even on house cars like the UP box car shown above.
On models which don’t have a route card board, or which have one located incorrectly, I just use styrene strip, of scale 1 x 8-inch size, and cut off 12-inch lengths. Of course when a prototype photo shows a route card board of different size or proportion, I try to approximate it by appropriate trimming of the same strip styrene.
I added such a styrene route card board to an Ulrich metal GS gondola model, modified for SP’s Class G-50-12 with two-level Dalman trucks (from Tahoe Model Works). The load in the car is a Chooch product. As you can see, I located the board in accord with the prototype photo shown above.
As is obvious in the photo, I have not chosen to replace the cast-on grab iron representations with wire grabs. That Ulrich white metal is hard stuff!
I will mention in passing that the most common car types to lack route cards in prototype photos are open-top cars, so my recommendation would be to “card” most house cars, but maybe only half or so of your open-top cars: gondolas, hoppers, and flat cars.
Lastly, I should mention a usage seen even on cars which did have route card boards: car clerks just stapled the route cards to any exposed wood on the car, such as the edge of tank car walkway (as long as the walkway was wood), or the edge of a flat car deck. Here’s an SP tank car example, in a George Sisk photo taken at Kansas City in 1959:
Note that the car does have a route card board, just to the right of the ladder, above the walkway, but the clerk ignored it and placed the route card where he thought it would do the most good. Here is my version of it, using a W.A. Drake brass model of the same SP tank car class as the prototype photo (O-50-14):
I used yellow paper for this one.
Route cards add visual interest to freight cars, even though they are quite small, because they are light colors and are eye-catching. And I believe it is interesting to model both standard route card locations (on the board provided), and also the different kinds of route card locations which are not on the boards. If you haven’t applied any route cards yet, give it a try and I think you’ll like the effect.
Tony Thompson
Route cards — 2
The question has arisen as to what route cards looked like. I don’t have any collection of them, but can provide two examples. The general size was mentioned in the prior post on this topic, at: http://modelingthesp.blogspot.com/2011/11/chalk-marks-and-route-cards.html .
Both these examples are from the book by E.W. Coughlin, entitled Freight Car Distribution and Car Handling and in the United States (AAR: 1956), an extremely helpful and informative book for those interested in car movements. For anyone who wants a copy, they have been readily available used on the Internet.
This Missouri Pacific form was printed in triplicate, the bottom copy of which was a manila card to be attached to the route card board on the freight car. Its first two copies were for clerks’ use.
Like many kinds of Empty Car Bills, this can serve for moving foreign empties homeward, or directing cars to locations which needed empty cars.
Coughlin also discussed the use of “switching cards,” which could be applied in a terminal yard to direct cars to local industries, or could be applied to cars being picked up at those industries. The example I’m showing would be to direct a card to a switching “zone,” Zone 300, and to industry 313 in that zone. He doesn’t state the origin of the example, but note that it identifies Portland Terminal on the card.
Again, this is stated as a manila card, but can be any color of card stock which the railroad may have felt achieved a useful color coding. I mentioned in the prior post that careful examination of color photos shows white, yellow, blue and pink examples along with the classic manila color, and light green examples are also known. These are still conventional colors today, for colored paper and card stock, so are readily available at any stationery store.
The ambitious modeler might use switching cards with even bigger numerals than the one shown above, and rely on operating crews to read them--but personally I doubt that’s practical in HO scale with indoor lighting. It might be a practical idea in S or O scales.
So in HO scale, which I model, since I consider any card as small as this to be unreadable, I simply use small blank pieces of colored paper, in the area of 6 scale inches square. Photos show that many route cards were rectangular, so most of mine are that shape.
Tony Thompson
Subscribe to:
Posts (Atom)