Center Lines. The first thing I had to recognize was that in 1953, when I model, California used only white for center lines of roads. There are numerous sources on the web for information about standards such as these. Jack Burgess, a retired city engineer, directed me to several of these. Some are pretty technical; the most informative ones were a Wikipedia entry, at http://en.wikipedia.org/wiki/Road_surface_marking , and a more detailed one with information about the MUTCD (Manual on Uniform Traffic Control Devices), in use nationally since 1935 and widely used by traffic engineers, at: https://ceprofs.civil.tamu.edu/ghawkins/MUTCD-History_files/MarkingColorEvolution.pdf .
The standard for most classes of roads was stripes 4 to 6 inches wide, and 15 feet long, with 25-foot gaps between stripes. No doubt these standards are for higher road speeds. I have reduced these dimensions somewhat so my relatively small layout roads look okay. A couple of my roads from the old layout had yellow center lines, so these were re-masked to be repainted.
My procedure was to lay out the lines using drafting tape (much preferable to masking tape, as it has distinctly less “tack”).
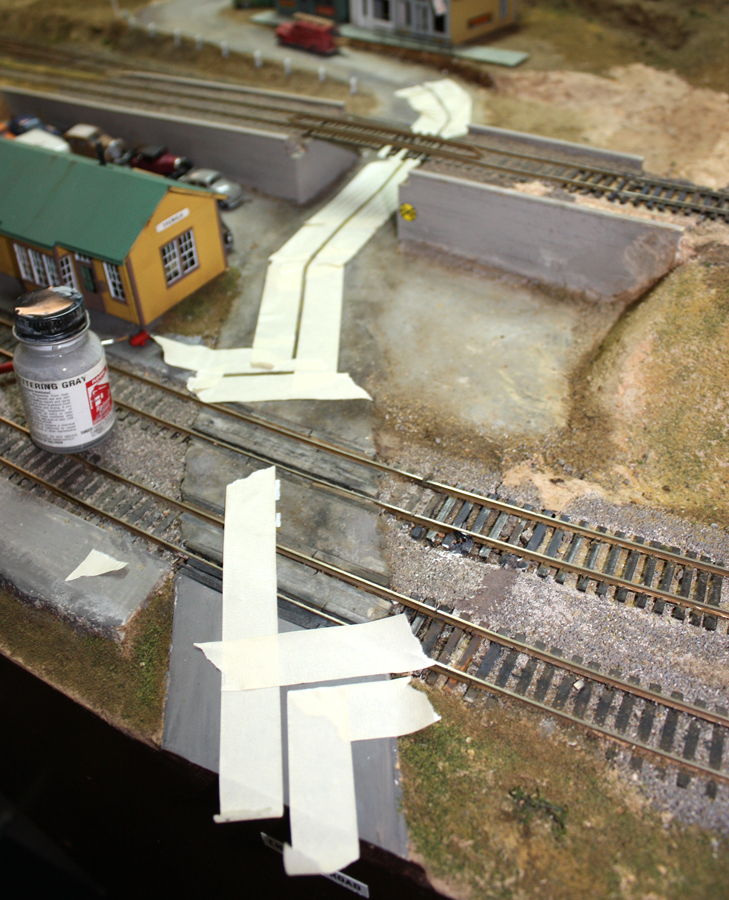
My first cut at this used pure white, but this looked far too clean, so I tried Floquil “SP Lettering Gray,” a rather light gray, and it worked much better. I did dry-brush it with some white acrylic paint to lighten it toward the front of the layout. Here is an overhead view of the result, along with some oil stains and tar patches.

Warning signs. California used red for boulevard stop signs in 1953 and in fact had done so since the 1920s. Some states still had yellow stop signs in 1953, but not California (you can research the state you model to find out what you need to do). My boulevard stops are mounted on scale 4 x 4-inch white posts (see below). This photo was also used in a previous post about signs (at: http://modelingthesp.blogspot.com/2013/02/signs-for-structures.html ).

Roads should also have diamond-shaped warning signs as needed, for example indicating sharp curves. I do have a need for such a sign on Chamisal Road at Shumala, as is evident from photos of this road, such as the one above. Here are some standard yellow warning signs of the kind that I mean.

Street signs. Another subject worth exploring is street signs, even at intersections for country roads. Accordingly, I have also been adding street signs to road corners on the layout. At the intersection next to the store at Shumala, for example, the paved Chamisal Road bends toward the backdrop, while the dirt road which runs alongside the railroad tracks is called Railroad Avenue (there is a similarly located Railroad Avenue in nearby Oceano). I simply printed out these names on glossy paper using a high-resolution printer, and mounted them to a scale 4 x 4-inch styrene or wood post. Here is the sign for an intersection on the Shumala extension.

Crossbucks. The signs warning motorists at railroad crossings, both crossbucks and other signs, ought to be very visible alongside our tracks. As mentioned, I will discuss them at some length in my next post on this topic.
In this post I have talked about road center lines, and the various warning and other street signs, which are definitely needed for realistic roads on the layout; after all, practically everyone is a motorist, and we not only know but expect these typical accompaniments of the roadside. This is just one of many details which are essential to convey the reality that you are trying to depict on your layout.
Tony Thompson
No comments:
Post a Comment