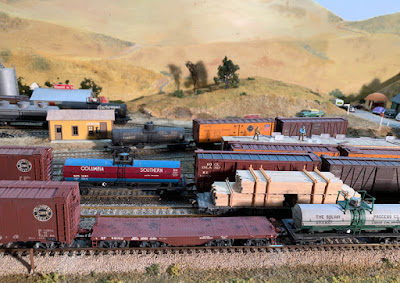
In the previous post, I completed all model assembly steps of this Funaro & Camerlengo kit (this is not a complex model), and mounted “interim truck support blocks” on the model for painting. You can read that post at this link: https://modelingthesp.blogspot.com/2020/05/sp-200-ton-flat-cars-part-4.html .
I have long used one particular paint for Southern Pacific freight cars, an ancient Floquil color called “D&H Caboose Red,” that is a remarkably good match to the SP color drift panels for freight car red. Some years ago I was lucky enough to come across several bottles of this color at a hobby shop and bought them all. I am working through them steadily, and still have a little in reserve.
I simply apply the paint with an airbrush. As it is a solvent-based paint, it goes on very well on resin and adheres. I added a coat of gloss finish on the car sides (the only part that will be lettered).
The kit decals are quite complete, and include lettering for different eras, so you may select what is appropriate for your modeling period. I chose to number the car as one of the 1941-built cars, SP 44092, and thus having pre-1946 lettering. Word of warning: the decals do have a pronounced tendency to fragment in water. Luckily I had only a couple of pieces do this, then painted the whole decal sheet with Microscale “Liquid Decal Film.” The rest of the lettering process then went fine.
The next step is weathering, particularly making the deck look used. Cars like this with steel decks sometimes had chocks or hold-downs welded right to the deck, and not all such additions would always get removed. But the decks were built with very many through holes, to facilitate bolting, so most blocking and restraining materials would be bolted to the deck. Welding was more trouble than bolting, and of course unwelcome to the car owner, since even some serious work with cold chisels would leave scars. I added a few areas of “raw steel” color to suggest such events.
I used my typical method of acrylic washes, and tried to create some areas of the deck where there may have been spills, or paint damage leading to rust. (If you would like to read more about my acrylic weathering method(s), you can find an extensive write-up in the archived “Reference pages” shown at the top right column of this post.) Here is the car, moving empty in a passing train on my layout:
This is a simple resin kit, with nicely designed and produced parts. It does need the addition of some weight when it’s under construction, but other than that is a kit that is quite straightforward to build. I look forward to preparing and assigning some interesting and dramatic loads for this car, too, and the process of preparing such loads is already underway (see my post here: https://modelingthesp.blogspot.com/2020/05/impressive-flat-car-loads.html ).
Tony Thompson


No comments:
Post a Comment