I have for some time favored the Bitter Creek design of turnout controls (for hand-thrown switches), because they are smaller and have a much lower profile than the familiar Caboose Industries ground throws. I have discussed this topic before (see for example: https://modelingthesp.blogspot.com/2017/03/choosing-ground-throws.html ), and below is a comparison photo used previously. (Bitter Creek product installed at left, the big ole throw it replaced is at right.) Part of the packaging for the Bitter Creek part is shown in the background.

There do remain a few switches near the front of the layout, that is, along the aisle and easily reached, that could probably accept Bitter Creek installations. In the past, I had not replaced the Caboose Industries throws at those switches because of limited access space for big 1:1 fingers to manipulate the Bitter Creek throws.
I decided I could excavate around these throw bars enough to go ahead with replacement, and make enough room for the Bitter Creek throws to operate. The photo below shows the first of these areas in Shumala that I wanted to work on, the ground throw at the left of the photo.

With a slight slope behind the track along this area, tie cribbing had been used to create a level spot for the ground throw. But you can see here that the space is limited, especially to the right of the throw.

My first step was to remove the old throw, and install a Bitter Creek throw in accordance with its directions. Below, you can now really see the space problem at this location, especially at the right of the throw. In recognition of the issue, I have already begun to excavate to the right of the existing cribbing, but the original cribbing is all in place, clearly showing the original problem with the throw area. The material of the bank is paper mache, which I could excavate with a hobby knife.

The only solution was to enlarge the area leveled by the cribbing against the bank, extending the area shown above to that shown below. The cribbing that was removed was then restored at far right, using canopy glue, and the white areas of paper mache that were exposed were painted Rust-Oleum “Nutmeg,” as I usually do for a basic “dirt” color.
Additional soil and ballast will also be added, and perhaps some weeds in the area where the cribbing is not in place. But there is now enough room to throw this switch comfortably. You can also see in the photo below that I have softened the dead black of the stock ground throw with some dark brown.
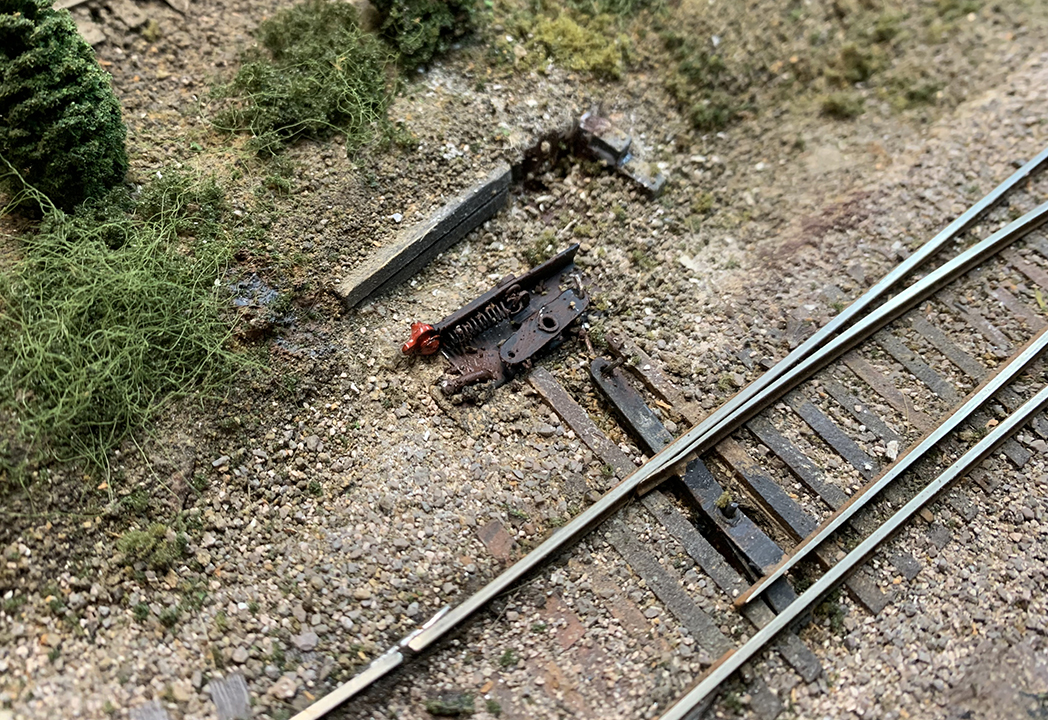
The reason for showing this in detail is that I originally didn’t want to try to install Bitter Creek ground throws where there was minimal room. Simple solution: make more room. And the new ground throw works fine.
Tony Thompson
Tony, I'm confused. Several photos show, in addition to the device and its linkage, a hole under the throwbar along with an actuating wire from below as one would see when a Tortoise or similar is employed. Can you enlighten me?
ReplyDeleteI understand what you mean. That wire connects to a pair of contacts underneath, which make sure that the switch rails have the correct polarity. But the switch still has to be hand-thrown.
DeleteTony Thompson