On the current layout, as on the one in Pittsburgh, active layout segments beneath the location of Ballard preclude supports except at the sides and back of the entire board, which is about 8 feet long and 34 inches wide. For that reason, it was built upon 3/4-inch plywood, the quality grade (ACX 7-ply) to provide maximum stiffness. A standard 1/2-inch Homosote sheet, well attached with carpenter’s glue, covers it. This structural approach worked well in the Pittsburgh layout and I could measure little deflection at the center of the front edge (farthest from supports) even with a 50-pound weight sitting in that area.
The problem I faced in the current arrangement is that the staging table (discussed in previous posts, such as: http://modelingthesp.blogspot.com/2011/02/staging-trackage-installation-4.html) is more than 7 feet long and lies directly beneath Ballard. Thus I designed three supports along the back, and two wide supports at each end. Here is an illustration of the west end:
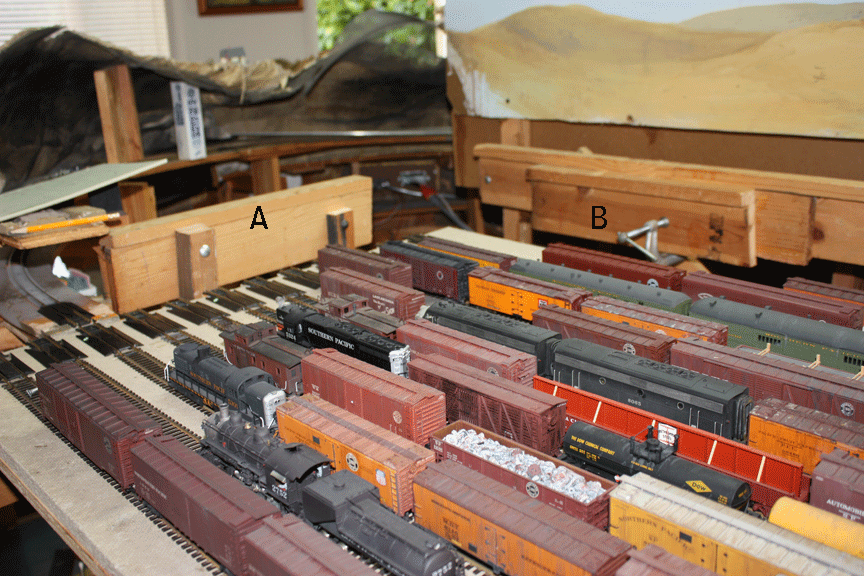
Letters A (end support) and B (left back support) show support locations. Also evident is that only inches of clearance above the staging are possible, but of course the staging table slides in and out, so access to all tracks remains possible from the aisle even when this is covered.
Here is the east end, much the same approach:

Letters C (right back support) and D (end support) again identify locations. An overview of the entire staging area, with trains or rolling stock on most tracks, shows all the supports, most of which are only clamped only at this point to permit final fitting under a level Ballard track board before attachment with screws or bolts.

A problem emerged in preparing for installation, in that the distance from end support to end support in the current layout structure is greater by a few inches than in the Pittsburgh layout structure. Not a problem, I thought, until I realized that previously I had spliced the east-end joint by having the Homosote overlap the plywood by about 7 inches. Thus if I installed the board as it was, there would have to be a splice over the staging, undesirable in terms of clearances.
I chose to use a technique I had used in my Pittsburgh layout in a location of close vertical clearances. I used light 1-inch aluminum angle, available at most hardware stores, to act as bridge members. When in place, they are considerably more stiff than wood structures alone.
I simply cut two pieces, each a foot long, and drilled four holes in each. A pretty straightforward pair of parts to fabricate:

Then each angle was screwed to the supporting plywood at the edge, like this. Any tendency to bend this plywood assembly at the joint will be ably resisted by these 1-inch angles, but with virtually no loss in overhead clearance for the staging.

Here you can see the two plywood pieces, the new one on the right, and the edge of the Homosote top layer is just visible. Note it overlaps the joint by about 6 inches.
The Ballard track board was now ready to install. More later when it gets done, hopefully pretty soon! I can hardly wait to resume switching at a whole bunch of industries in Ballard.
Tony Thompson
No comments:
Post a Comment