The answers that have been offered over the years range from just using a clear but clouded material, to make it slightly less transparent, to simply using an oversize screen so as to suggest what is really supposed to be there, even if far too big. Modelers have seized upon many different kinds of fine screens for this purpose, as a quick check of the indexing of any model railroad magazine will tell you.
I had simply avoided this topic for years, on account of not having a solution I liked, until recently, when I replaced the coffee filter basket in my coffee maker. These screens are relatively fine, and here was one right on my kitchen counter, begging to be tried out. Otherwise, it was headed for the trash can. I decided to give it a try.
First step was to use some strong shears to cut the screen away from its frame. This worked fine, and I think any solid pair of scissors would work too, though perhaps at some cost in the sharpness of the scissors, Here is the frame with its screen cut out.

Next I wanted so see how this material would stack up when used as a window screen for something on my layout. I happened to have a candidate on my work bench. Work has been progressing slowly on an old Train Miniature work car, being modified to serve as an SP car on my layout, and it was an opportunity to try the coffee screen.
I had bought the car at a swap meet, with a number of changes already made by a previous owner, including wire grab irons (good) and filled window openings (not necessarily good). I simply cut a rectangle of the coffee screen to fit an open window, and glued it in place with canopy glue (if that adhesive isn’t familiar to you, and it should be, you may wish to read my write-up from a few years ago: http://modelingthesp.blogspot.com/2013/05/a-few-words-in-praise-of-canopy-glue.html ). Here is how it looked, as installed in the opening to the right. (You can click on the image to enlarge it if you wish.)
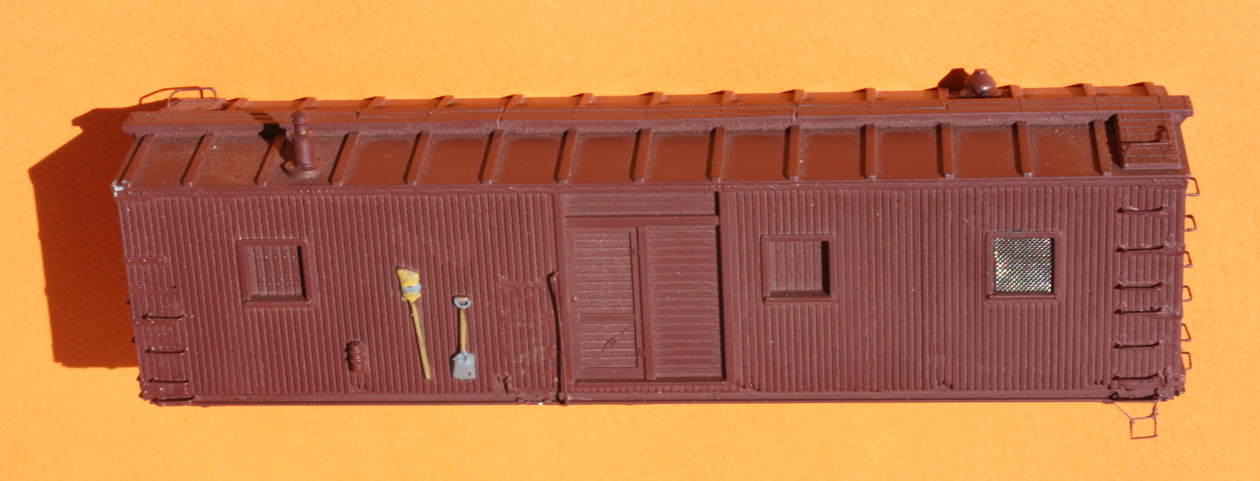
The screen is pretty shiny here, but with a coat of flat will look better, though still rather silvery. Better still might be to airbrush the screen with a flat light gray.
Of course, the one advantage of real screen is that it can let some light through, if there is any light on the other side of it. In this work car, there will be little, so probably the screen will look better on an internally-lighted structure or comparable application. I have a couple of test applications to try on some of my layout structures. But I think the real conclusion is that I like this coffee filter screen well enough to use it on future projects.
Tony Thompson
Hi Tony,
ReplyDeleteGreat tip, thanks! You might also want to try the material used for the teabags at St*rbucks, should you ever drink tea, of course! I'm English and I rarely drink their tea but I noticed what useful stuff this material is. Cheers, John.
Hi Tony, some premium teas come in a mesh bag that is the finest I’ve ever seen. Keep your eyes peeled for them. Cheers, Rene
ReplyDelete