I have written about this topic before, and in the present post, am adding more examples, in part to show a different technique. Crated loads on flat cars and in gondolas are prototypical and relatively simple to make, and offer variety in what your open-top cars carry. I showed a variety of crate and box types in my first post on the topic, some years back (see it at: https://modelingthesp.blogspot.com/2012/03/open-car-loads-crates-and-machinery.html ).
I expanded my ideas on this topic a bunch of years later, and treated it as a “Part 2” of the same topic, helpful in finding the predecessor, as it’s linked therein: https://modelingthesp.blogspot.com/2021/05/open-car-loads-crates-part-2.html . This post was about building some large crates as hollow styrene boxes, and the project completion was described later: https://modelingthesp.blogspot.com/2021/06/open-car-loads-crates-part-3.html .
The present post is about still another approach. I recently came across some hardwood offcuts from a project, and immediately thought of crates, but they were not square all around. On each one, the cut on one side was not square to one other pair of sides. But these could easily be braced to level them in use. I began by painting them light gray, then carefully examining them for any places that needed a little modeling putty, often lines of wood grain. I used Tamiya putty for this.
With the putty well dried and sanded smooth, another coat of paint made the boxes ready for use. Next came leveling them. Using a small square, as shown below, enabled me to identify exactly what size of stripwood or styrene to use as a level on each block.
Each wood block was different in what it needed. But the important part is that the styrene piece need not exactly fit at the extreme end, but could be placed at an intermediate point, sufficing to level the block. An example is shown below.
With each block leveled in the way just described, I then added outside trim to hide the angle. For the block shown above, I used styrene HO scale 1 x 10-inch strip. The bottom of the block is shown below. When upright, of course, this is hidden.
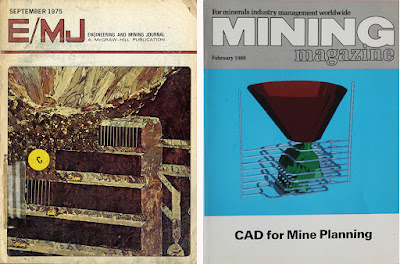
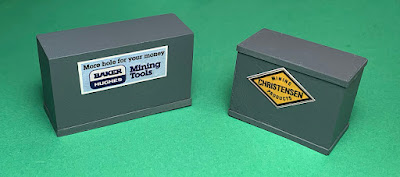
I then painted the trim to match the block. Next came a choice of label or emblem on the load. Many shippers added a prominent name or logo on shipments like these, and this makes the load interesting too. One can of course browse the internet for emblems of famous companies; this is what I once did in making an emblem for an appliance carton (see: https://modelingthesp.blogspot.com/2017/10/cardboard-cartons-part-2.html ), using General Electric. For the present project, I decided to use mining equipment, and where better to look than the ads in journals for that industry, like these:
Next came scanning of appropriate ads, reduction to a useful size for HO loads, and printing out on a high-resolution color printer at my local copy shop. Then the paper labels can be glued to crates or boxes with canopy glue.
It may be noted that the labels are added on the upper part of the crate. This is a deliberate choice so that they are visible when used as gondola loads as well as when they are flat car loads: see below. (You can click to enlarge.)
It might be asked, “Why mining loads? There’s no mine on that layout.” That’s true, but there was mining in the vicinity, as I’ve explored previously (see my post at: https://modelingthesp.blogspot.com/2016/10/modeling-mining-in-your-locale.html ). These crates can be destined to my off-layout mining company, Monarch Mining, which produces chromite ore. I have written a bit about this company and the ore (the post is here: https://modelingthesp.blogspot.com/2016/10/modeling-mining-part-2.html ).
With the completion of these loads, I have some additional crates to add to my freight car operations. Now to make some suitable waybills for the movement of these products . . .
Tony Thompson


