In the preceding post, I gave some background on the Shake ’n’ Take projects, invented by the late Greg Martin as features of the annual Cocoa Beach, Florida “Prototype Rails” meetings, which were long directed by the late Mike Brock.
I am describing the construction of a project to build a Seaboard Class AF-1 40-foot automobile car, modified from a Bowser body for a PRR X31 box car. This project was the work of Steve Hile. That previous post, showing replacement of ends, is here: https://modelingthesp.blogspot.com/2024/02/the-2022-shake-n-take-seaboard-box-car.html .
In that previous post, I had removed the Bowser ends and substituted new resin ends. Meanwhile, I was working on the underframe. An Accurail underframe was provided to the project. I added the Accurail brake parts and rigging, then used canopy glue to attach my usual car weights, 5/8-11 steel nuts, on the top side. (Those are just interim trucks.) I followed Steve Hile’s lead and didn’t detail the underframe beyond what you see.
Also needing work were the styrene doors supplied by Bowser. The doors have the type of Camel rolling-lift mechanisms correct for the Pennsylvania X31 box cars that Bowser models, but the Seaboard cars had a later style of this equipment (see the first post in this series, linked in the top paragraph above, for a prototype view). I used curved riffler files to clean up the Camel mechanism levers preparatory to adding new levers. In the photo below, the two center doors have been cleaned up, the two outer ones show the moldings as supplied. (You can click on the image to enlarge it.)
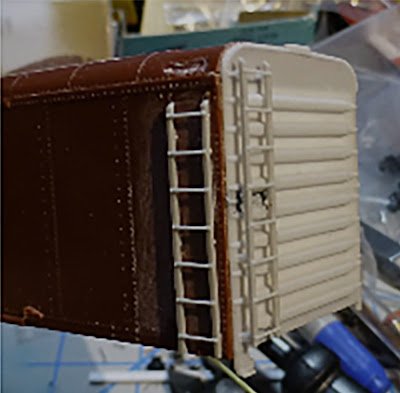
With the doors ready to install, I decided to add them at this point, as they are not fragile relative to later work. Then I could begin work on the body details. I began with the side and end ladders, partly because they need to be in place to position B-end brake details. As I have begun to do in recent years, I used canopy glue to attach these. I have been impressed with the tenacity of this glue when set.
Below is one of Steve Hile’s photos at the stage I am at in the project. The side ladders are seven-rung and the end ladders are eight-rung; both are cut from the Des Plaines Hobbies ladders, and placed so that the rungs line up on side and end. The reason for this, if you think of a trainman on one or the other ladder, is obvious.
I continued with other details. I like to get the B end all put together before doing the A end or the sides, just getting all those parts done and out of the way. For attaching the grab irons, rather than drill holes to receive their locating pins, I simply cut off the pins and attached the parts with canopy glue, on both sides and ends. It worked fine.
I also decided to fill the holes in the roof, using Tamiya putty. When dry, this was sanded flat. A perfect fill wasn’t needed, I just didn’t want there to be voids underneath the running board. Here is the body at this point, almost ready for paint. Missing parts here are, of course, the running board, and the grab irons above the side ladder (those were bent from wire to fit the space). Trucks and couplers are temporarily installed.
The Kadee running board supplied for this project is an exquisite part, but it has no running board supports, nor does the Bowser body. The project box included Tichy running board supports, but they are intended for a peaked roof. Rather than fuss with sanding them down, I added the supports as styrene scale 2 x 4-inch strip, attached to the bottom of the running board.
It seemed logical to me to attach them to the running board before putting the running board on the body, rather than try to align them perfectly on the roof prior to running board installation. The underside of the running board can then be painted along with the body. With Steve Hile’s comment that the Seaboard color was “on the brown side of boxcar red,” I painted the running board with Tamiya “Red Brown,” color TS-1. Its underside is shown below.
One further note: though the running board is a good length for the Bowser body, the lateral boards are not located at the right point to fit the body’s roof. I will slice the two lateral boards off, install the main board, and then come back and glue on the lateral boards later, all with canopy glue.With the running board about ready to install, and the body ready for paint and lettering, I’ll close this post, and continue in a future post.
Tony Thompson


No comments:
Post a Comment