Sunday, May 31, 2020

Riley layout book published!

The title refers to a book just published by Kalmbach Books, entitled Realistic Layouts, by my long-time friend, CJ Riley. The subtitle of the book is “Use the Art of Illusion to Model like a Pro.” That reflects the title that CJ wanted for the book, which was “The Art of Illusion.” He of course means the many subtle techniques and tricks we all use so that our relatively tiny slices of modeling will look like the world around us.
     The cover is shown below. I liked the subtle (there’s that word again) treatment on the cover, in which what appears at a glance to be solid color is actually a sea of trees.


This is the standard Kalmbach paperback book, 8.5 x 11-inch pages, softbound, 96 pages, and it maintains their standard price point, $21.99.
     My friend Riley has been working toward this book, on and off, for over 20 years, so I am really pleased to see it finally out in the light of day. Kalmbach’s high standards of quality production serve the material well. The book contains many of Riley’s photographs, both model and prototype, along with a good sprinkling of photos by others to illustrate particular points. And I like the gracious foreword by Tony Koester, which kicks off the book in suitable style.
     Strikingly, Riley’s background as an architect gives the book a distinctly artistic and creative content, making it a book that probably ought to be on one of your shelves right next to Lance Mindheim’s book, entitled Model Railroading as Art (which I reviewed in an earlier post; see that review at: https://modelingthesp.blogspot.com/2019/06/lance-mindheims-fine-new-book.html ). Most of us don’t have any art background, so both books can teach us a great deal.
     The book comprises ten chapters. The first is entitled “Planning a realistic model railroad,” followed by two chapters on “Secrets to life-like backdrops” and “Planning realistic scenery.” A high point is Chapter 4, “Mirrors for illusion.” The text then proceeds through chapters on “Installing accurate bridges,” “Modeling structures,” and “Weathering,” all topics that are components of the overall theme. Concluding chapters on “The importance of color,” and on “Setting the mood,” bring everything together .
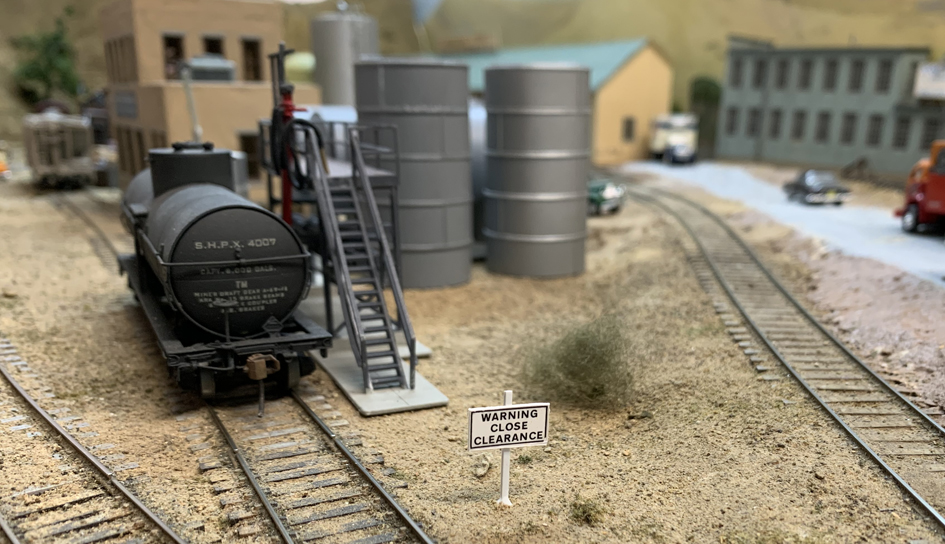
     I have copies of a number of CJ’s slides from his layout in Shadyside (Pittsburgh) and show one below. His photographic skills, in my opinion, are on a par with his modeling ability.


The structure at left is the Pocahontas Coal dealer featured in the book’s frontispiece.
     The book happens to be dedicated to the Iron City Ferroequinological Society (ICFS) and its three members in addition to Riley: Larry Kline and me, and, joining the original three, Jim Ruffing. I have written about ICFS in several prior posts, and if you're interested,you might like to read some general comments (at this link: https://modelingthesp.blogspot.com/2013/07/that-red-icfs-truck.html ). Also relevant might perhaps be my tribute to Larry Kline after he passed away in 2014 (that post is here: https://modelingthesp.blogspot.com/2014/04/in-memoriam-larry-kline.html ).
     It’s been a long wait for this book, but all the more welcome for all that. I congratulate CJ on this fine accomplishment, and am happy that a much wider audience can now discover and absorb his many insights into realistic layout design, building, and completion.
Tony Thompson

Thursday, May 28, 2020

SP 200-ton flat cars, Part 5

In the previous post, I completed all model assembly steps of this Funaro & Camerlengo kit (this is not a complex model), and mounted “interim truck support blocks” on the model for painting. You can read that post at this link: https://modelingthesp.blogspot.com/2020/05/sp-200-ton-flat-cars-part-4.html .
     I have long used one particular paint for Southern Pacific freight cars, an ancient Floquil color called “D&H Caboose Red,” that is a remarkably good match to the SP color drift panels for freight car red. Some years ago I was lucky enough to come across several bottles of this color at a hobby shop and bought them all. I am working through them steadily, and still have a little in reserve.
     I simply apply the paint with an airbrush. As it is a solvent-based paint, it goes on very well on resin and adheres. I added a coat of gloss finish on the car sides (the only part that will be lettered).


     The kit decals are quite complete, and include lettering for different eras, so you may select what is appropriate for your modeling period. I chose to number the car as one of the 1941-built cars, SP 44092, and thus having pre-1946 lettering. Word of warning: the decals do have a pronounced tendency to fragment in water. Luckily I had only a couple of pieces do this, then painted the whole decal sheet with Microscale “Liquid Decal Film.” The rest of the lettering process then went fine.


   The next step is weathering, particularly making the deck look used. Cars like this with steel decks sometimes had chocks or hold-downs welded right to the deck, and not all such additions would always get removed. But the decks were built with very many through holes, to facilitate bolting, so most blocking and restraining materials would be bolted to the deck. Welding was more trouble than bolting, and of course unwelcome to the car owner, since even some serious work with cold chisels would leave scars. I added a few areas of “raw steel” color to suggest such events.
     I used my typical method of acrylic washes, and tried to create some areas of the deck where there may have been spills, or paint damage leading to rust. (If you would like to read more about my acrylic weathering method(s), you can find an extensive write-up in the archived “Reference pages” shown at the top right column of this post.) Here is the car, moving empty in a passing train on my layout:


     This is a simple resin kit, with nicely designed and produced parts. It does need the addition of some weight when it’s under construction, but other than that is a kit that is quite straightforward to build. I look forward to preparing and assigning some interesting and dramatic loads for this car, too, and the process of preparing such loads is already underway (see my post here: https://modelingthesp.blogspot.com/2020/05/impressive-flat-car-loads.html ).
Tony Thompson

Monday, May 25, 2020

Freight car graffiti, Part 15: more cement cars

This series of posts about application of graffiti to post-1980 freight cars is partly an exploration of technique on my part, and also has a component of helping a fellow modeler improve his freight cars. That modeler in this case is Seth Neumann, whose Union Pacific layout models the San Francisco Bay Area in 1999, after the UP takeover of SP. To find prior posts in this series, the easiest approach is to use “freight car graffiti” as the search term in the search box at right.
     Many of the earlier posts were about cement cars, and in the present post I want to describe what was done to some additional representatives of this group. I will begin with a model of the Pullman-Standard PS-2 type design of covered hopper, though considerably enlarged from early models of the PS-2, having over 2900 cubic feet capacity and nominally 100 tons weight capacity.


This model carries the large BN emblem of the 1980s. Shown below is the left side of this model, with graffiti applied, one red piece from T2 Decals and the other from Microscale set 87-1534. You can also see here that some modest weathering was applied, along with tags alongside and on top of the graffiti.


The right side has a graffiti piece from Microscale set 87-1534, and as shown here is also weathered and tagged.


     A second car in this group is an AC&F “Center Flow” design. This is also a 100-ton design and dates back to the 1970s.


Here the relatively smooth sides permitted some freedom in choosing size and type of graffiti to apply. Shown below is the left side, with a blue piece from T2 Decals. At the right of the car side is a large “NESTA” graphic, a paper overlay taken from a photograph made here in the Bay Area (for those who don’t know, this is the middle name of musician Bob Marley and a popular theme for graffiti). A brief summary of the paper overlay method was included in an earlier blog post; you can find it at the following link: https://modelingthesp.blogspot.com/2020/01/my-latest-column-in-mrh.html .


The right side of the car received two Microscale decals, from sets 87-1533 and -1534. Both of the car sides shown had been weathered and tagged when photographed. As with any of these photos, you can click on the image to enlarge it if you wish.


    Finally, there was one more Calaveras Cement car to do. I have already written about this company and its cars in a previous post about graffiti application (see it at: https://modelingthesp.blogspot.com/2020/03/freight-car-graffiti-part-9-even-more.html ), so here I will just show the final results on the weathered car. First, the left side, with decals from T2 Decals and Blair Line set 2257 (I really like the “Rail Heads” one; you can click to enlarge):


The right side also has two graffiti decals, one of them from Microscale set 87-1523, the other one (the word “bonus”) from Blair Line set 2262. You can see in both these Calaveras photos that there is some cement spillage suggested.


     This completes this set of additional cement cars. They have been an interesting challenge and taken as a group, have called for several different techniques on my part.
Tony Thompson

Friday, May 22, 2020

Healing the sick

No, no, it’s not another coronavirus post. I’m referring to sick freight cars. Anyone who operates his or her models, either personally or in operating sessions, will occasionally find defects arising in car performance. A previously correct coupler height may have drooped; a coupler may have lost its knuckle spring; something on a car has begun to interfere with truck swing; and so forth. Note I’m describing defects that can arise over time. Obviously these and other defects, if present, should have been corrected before a car was put into service.
     Now it’s true that most people with operating layouts will have developed some sort of “bad order slip” to report defects. I have had various versions of such a form for years. When something acts up in car performance, I (or a visiting operator) usually fill out a slip. And often these slips remain with the car until it gets corrected. But note the words “usually” and “often.” No further emphasis needed.
     With our current “stay at home” circumstances, and working around the layout and my two workbenches quite a bit, I became aware that there are a substantial number of “sick” freight cars here and there, naturally no longer with companion bad-order slips (if they ever had them). Otherwise, of course, they would have been repaired long ago (uh-huh). So it was time to dig into this mini-fleet and get corrections made.


Above you see one part of this fleet of “sick” cars, and it may be obvious that there are no bad-order slips visible.  Here’s another example:


A few of these are construction projects, but most are out-of-service cars needing work.
     How to approach this problem? The first step is to re-check the “freight car standards,” along the lines I have outlined in previous posts (for one example, see this post: http://modelingthesp.blogspot.com/2011/03/model-freight-car-standards.html ). This means the performance part of the standards described in that post: trucks and couplers.
     I have written previously in some detail about exactly how couplers have to perform (that post is at: https://modelingthesp.blogspot.com/2019/10/maintaining-model-couplers.html ). My test set-up has two Kadee gauges on a length of track, with an Atlas re-railer in the center to make it easy to put cars on to test, all attached to a wood strip (this was designed and built years ago as a gift by Jim Ruffing).


     Trucks likewise have to be carefully checked, and I included that as one part of my  “rookie test,” a procedure I described earlier (view it here: https://modelingthesp.blogspot.com/2018/07/the-rookie-test.html ). In many cases, at this point I have already discovered what was wrong with a “sick” car. But not always. A way to check further is a switching test.
     Nowadays a challenging switching test, intentionally more challenging than normal operation, has become part of my rookie test. I described it in a prior post (that post is here: https://modelingthesp.blogspot.com/2019/06/rolling-stock-upkeep.html ). Here is a repeat overhead view, of the sequence of track switches, through which I push and pull strings of cars at various speeds, up to pretty high speeds, even up to the locomotive maximum. This does identify cars with stubborn performance problems.


The diverging legs of the two #5 turnouts at photo center are preceded (out of view at left) by the curved part of a #6 switch. Any tendency for truck swing or performance to cause a derailment surfaces quickly in this test (and sometimes couples with inadequate range of swing can do so too).
     For the present effort to “heal” more of my backlog of out-of-service cars, I made up a table to be filled out (the form of the table is shown below, though the one I actually use is hand written). The first column is coupler swing and knuckle action, the second is coupler and trip pin height, the third is truck swing and tram, and the fourth, freedom of wheelset rotation in sideframes. Then the fifth is that switching test through chained turnouts (see last post cited in previous paragraph), sometimes followed by a sixth: tests of switching in a couple of different layout industry spurs that involve grades into the spur or other challenges.


In the sample table above, the first two cars have passed all tests and many not need to be subjected to the test listed in the final column. The lower three cars were still in process of testing at the moment shown for this table.
     It has been satisfying to dig into the backlog of “sick” cars that had stealthily grown way too big, thus to clear cars to return to service, and interesting in making sure I am systematic about the testing, and that I can keep the test records for any of these cars, should they act up in the future. And one of these days, these cars will be available when we have operating sessions again!
Tony Thompson

Tuesday, May 19, 2020

Impressive flat car loads

Awhile back a friend sent me a link to a site that is offering 3-D printed versions in HO scale of steel castings from Bethlehem Steel, some of them very big. The company is Multiscale Digital LLC (see their products at this link: https://multiscale.digital/ ), and I bought a few to try out. I received them and was very pleased. Here is one of them, of the three pieces I bought, called a “double bearing support”:


     I had not gotten any further with preparing any of these loads for use, when I went off to the annual freight car get-together at Cocoa Beach, Florida, last January. There I saw models displayed by Eric Thur, and his explanation that he had purchased a CD of Bethlehem photos of large steel castings years ago, and not seeing easy ways to make them himself, had contacted Multiscale Digital and gotten their agreement to print them. That’s how they are now being produced.
     Below is one of Eric’s photos of the prototype for the casting you see above. The workman alongside is a vivid indication of the size of the casting.


Eric also mentioned that he had not worked on the loads much, because he was also waiting for better heavy-duty flat car models to carry them, but several good candidates were recently introduced as kits by Funaro & Camerlengo (F&C). Eric brought his development of this same casting to the exhibit at Cocoa Beach, shown here on a heavy-duty flat car from F&C. (You can click on the image to enlarge it if you wish.)


     I like this light green “machinery” color. Taking Eric’s description as a starting point, I used Model Master “Interior Green” (FS 34151) — a disturbingly institutional green — and added about one-third white. So the way I painted my model looks like the one above of Eric’s. Note that the interior of the bearings is painted aluminum.


To place a load like this on a flat car, blocking needs to be added, but I will postpone discussion and modeling of that blocking to a future post.
     Another product that I purchased from Multiscale Digital is the crosshead for a really large hydraulic press, modeling one produced at Mesta Machine in Pittsburgh (actually West Homestead). Mesta, founded by George Mesta in 1898, was one of the premier suppliers of heavy machinery in the U.S., especially to the steel industry; at one point,  more than 500 mills had Mesta machinery in them. That’s why, at least as late as 1970, Mesta equipment was both legendary and ubiquitous in the steel industry. This crosshead model was painted the same lightened green color that I used above.


The cast-on name “Mesta” is upside down here, because the bottom of the crosshead is uppermost. This is how the prototype crosshead was photographed, and has some detail on this surface. The other side had none.
     And you may note that I only painted the faces of the crosshead, since that is how I remember the paint scheme of the large hydraulic presses at Alcoa’s Vernon Works, where I was employed a couple of summers during college.
     This load too will have to have some kind of blocking and load restraints added, a topic to which I will return. And both these would be quite heavy loads, calling for special flat cars to move them. As it happens, like Eric, I too have been working on a couple of heavy-duty flat cars (for example, see this post: https://modelingthesp.blogspot.com/2020/05/sp-200-ton-flat-cars-part-4.html ). It will be nice to bring together these dramatic loads, and some appropriate flat cars, and they will be fun to operate on the layout, too.
Tony Thompson

Saturday, May 16, 2020

One last Paul Lyons model

The late Paul Lyons, excellent modeler, long-serving member of the Southern Pacific Historical & Technical Society’s Board of Directors (and terms as its president), and professional architect, left a legacy of superbly built model freight cars. After he passed away, some of them were auctioned off by Paul Koehler, and I managed to get three of them. This post is about the last of them.
     Two of the Lyons cars I purchased were SP box cars built from Sunshine kits. They were beautifully built but not painted. I recall Paul saying that he didn’t have confidence in getting paint to look correct and the colors right. Whatever the reason, the cars came to me unpainted. Below is one example, from the Sunshine kit #32.21 for SP Class B-50-28.


     I immediately set about checking the various specialties on the car models (that’s the railroad term for items manufactured by other than the car builder: brake gear, running boards, doors, trucks, etc.). When SP was buying large batches of cars, it was common to split the order for each specialty among several suppliers. Luckily these splits were recorded by SP, and for box cars, they are fully reported in my book (Volume 4 [revised edition], “Box Cars,” from the series Southern Pacific Freight Cars, Signature Press, 2016).
     By identifying the specialties Paul put on these models, I could identify the number series of the prototype cars that would be correct for having those specialties. This last model I am finishing, a Class B-50-27 box car, Sunshine kit #32.20, has a Morton running board, Miner handbrake, and Superior door. Of these, the most restrictive, that is, the specialty applied to the fewest cars, is the Miner hand brake. It limits the car numbers for this model to SP 101875–102099, or T&NO 59625–59749.
     Next came paint. I have a specific paint color that I like for Southern Pacific freight cars, an ancient Floquil color called “D&H Caboose Red,” that is quite a good match to the SP color drift panels for freight car red. I once had the good fortune to come across several bottles at a hobby shop, and bought them all. I am working through them, and still have a little in reserve. Here’s the B-50-27 model, painted that color (the trucks are “paint shop trucks,” and won't remain on the model).


     I lettered the car with the Sunshine decals provided with the kit. Since Mr. Lyons was a proud Texan, it seemed appropriate to choose the T&NO version of this class. I had a builder photo to use as guidance in applying decals (SP photo, repeated below from my box car book, citation above), though not from the group with the Superior door.


     The photo above shows the car as delivered. By my modeling era of 1953, the car was about three years old, and accordingly would have acquired some mild weathering and a few chalk marks. The photo below shows the model as lettered (compare the prototype photo above). A couple of decal chalk marks are added too. Note that the Sunshine decals used 9-inch lettering for the reporting mark, which was the correct size at the built date of these cars.


     Just as a comparison, the photo below shows the other Paul Lyons model I acquired unpainted, a Class B-50-28 car with a 7-foot door. (It is the completed model shown in the first photo at the top of this post.) This car is newer (built in the spring of 1951, compared to the early 1949 built date on the B-50-27 model), thus lightly weathered, as it appears in service on my layout. This shows how a car like this would look with a little weathering.


     I still feel great respect for Paul Lyons and his modeling, and am very proud to have two of his box cars on  my layout.
Tony Thompson

Wednesday, May 13, 2020

Freight car graffiti, Part 14: extending overlays

In my article in the January 2020 issue of Model Railroad Hobbyist, which was about graffiti for post-1980 freight cars, I included some description of how I make paper overlays for graffiti images. A brief summary of the method was included in the blog post I wrote about that article (it can be found at this link: https://modelingthesp.blogspot.com/2020/01/my-latest-column-in-mrh.html ). Subsequent posts may be readily found by using “freight car graffiti” as the search term in the search box at right.
     The present post describes further development of the overlay method. Essentially, my overlays start with a photo of an actual graffiti piece, then scaled for HO, printed out on plain paper, and glued to the car.
    Those overlays were primarily intended for smooth-sided models, such as “Center Flow” covered hoppers, though I did show in the article that I applied an overlay to a box car model with outside ribs of modest height. But as I have  continue to work on rib-side ballast hoppers for Seth Neumann’s 1999 layout, I decided to see if I could make overlays work on top of deeper ribs.
     I began by trying something small, that could be placed over a single rib on these Walthers 100-ton hopper models. I had a graffiti piece (shown in the MRH article), and chose from it the letter “O” at the left end of the piece:


As with other paper overlays, I cut it out of the paper sheet, sanded it thinner, especially at the edges, and applied with canopy glue. The key was to get one edge of it down flat in one “bay” between ribs, press it into the corner of the base of the rib, fold over the top of the rib, and press into the next corner. Here is how it turned out. Somewhat to my surprise, it worked fine.


In the photo above, you see the dark blue letter “O” at the left edge of the large piece, on top of it (a common practice in the graffiti world).
     Next I wanted to try something a little bigger, spanning more than just one rib, to see how far the technique could be pushed. My next choice was a slightly larger piece I had photographed on a wall in my local area, perhaps spelling out “chek.”


Again, this was scaled, printed out, trimmed, sanded, edged with marker, and applied with canopy glue, in the same sequence: filling one bay to the rib, carefully wrapped over a rib, fill the next bay to the corners, wrap over rib. etc. This one covers three ribs, and again, worked very well.


     Gaining confidence, I decided to try an overlay that would span five ribs. If I could manage three ribs, as above, why not five? The graffiti piece chosen is taken from page 175 in the fine book, Freight Train Graffiti, by Roger Gastman, Darin Rowland, and Ian Sattler (Abrams Books, 2006). Here it is applied to a hopper car, as yet unweathered:


(For the rest of Seth’s SP rock car fleet to which I have applied graffiti, you can view this post: https://modelingthesp.blogspot.com/2020/05/freight-car-graffiti-part-13-sp-rock.html .)
     I did have a really large piece that I wanted to apply, if I could somehow just do a little bigger overlay yet. The piece was found on a freight car, part of a string of HLMX cars. They were tough to photograph behind the fence, as you see with HLMX 75313. (The HLMX mark is owned by Helm Financial, a major railroad equipment leasing firm.)


But one of them happened to be near a hole in the fence, and I was able to get this shot of car HLMX 75307. A photo like this can be squared up in Photoshop and then printed out on paper in the usual way. I went ahead and did that, even though shadows of some of the ribs are evident.


     This piece was printed out to be somewhat bigger than it is on the prototype car, and by working quickly and carefully, I was able to apply the entire thing in one process. (This is the opposite side of the SP hopper shown above.)


     It has been an intriguing challenge to apply such large paper overlays across multiple ribs of cars like these rock hoppers, but it does work quite well, and much more easily than I expected. I now have confidence that any graffiti piece that I want to apply in paper form will in fact be practical.
Tony Thompson

Sunday, May 10, 2020

Yet more “freight car guy” stuff

I explained the background to the term “freight car guy” in an earlier post, along with some personal history to go with it (you can view that post at this link: https://modelingthesp.blogspot.com/2019/10/whats-freight-car-guy.html ). I followed that post with some specifics about Model Die Casting “old time” refrigerator cars I refinished for Bill Kaufman’s 1944 layout (see that one at: https://modelingthesp.blogspot.com/2020/04/more-freight-car-guy-stuff.html ).
     In the present post, I take up two more refinishing projects for Bill, who. as I explained in the previous post, is not himself very deeply concerned with freight car accuracy, but is pleased to have “better” cars in his fleet. And I am one of those helping to do that.
     The first project is about what for many readers will be a familiar model, the old Athearn “Blue Box” wood-sheathed refrigerator car, in this case decorated as a Pacific Fruit Express car owned by Western Pacific. Here is a photo of Bill’s car as it was.


There were indeed PFE cars owned by and marked for Western Pacific, but this model is seriously bogus for several reasons. First, it has a steel roof and ends, which none of the WP cars operated by PFE ever did. Second, its sides are yellow, something WP as well as PFE reefers actually did have prior to 1929, but after that date, like all PFE cars, they became light orange. So the car sides need to be PFE orange, and then completely relettered.
     By the way, minor points, but the WP scheme can’t be saved in any case; WP’s PFE cars never had a herald with a colored feather, as this model has. And the car number, 36302, corresponds to PFE Class R-30-13, an entirely different car body, and has nothing to do with WP’s actual car numbers in PFE service, which occupied a 50000 series. Lastly, the model exhibits one of my own pet peeves, the unpainted “tab” above the door, which should be the color of the car side. As I said, bogus in many ways.
     I began the upgrade by disassembling the car and giving the sides a light coat of gray primer. This is not only a good base for PFE orange but reduces the contrast of any lettering on the original car surface. The side “tab” at the roof center was likewise masked and sprayed light gray. Once that was dry, I airbrushed both parts with Star Brand “S.P. / P.F.E. Daylight Orange” (STR-27), which is a good match for PFE Light Orange and SP Daylight Orange (identical color chips).


     Meanwhile, I examined the car ends. The Athearn ends for this reefer are Improved Dreadnaught ends, typical of post-1944 practice, thus not suitable for Bill’s layout. What could be done with them? The simplest visual fix is to remove the narrow “intermediate” ribs between the large ribs, thus making the end resemble a previous-style Dreadnaught end. Below you see, at left, the original end with its intermediate ribs. At right, I am using a curved “riffler” file to grind out that intermediate rib. This is only cosmetic, because the major ribs still are not the right shape, but it’s an improvement.


     So what am I aiming to make this car into, to serve in 1944? It can be a stand-in for one of PFE’s very numerous 60000-series rebuilds, which had steel roof and ends. In particular, if numbered as an early Class R-40-19, it fits 1944 and can keep its (admittedly clunky) steel running board. I went ahead and lettered the car that way with Microscale set 87-414, following the superb PFE lettering information by Dick Harley in the SP Historical & Technical Society book, Southern Pacific Freight Car Painting and Lettering Guide (SPH&TS, Upland, CA, 2016).
     The last step was to brush-paint the side hardware and side sill black. This sounds fussy but in fact only takes about 10 minutes. Here is the UP or right side. It’s still an Athearn reefer, but looks far more credible than what Bill started with.


     The other car is an old Train Miniature (TM) single-sheathed box car, which is a model based on the ARA standard design of 1924. Among the things it could become, as a stand-in, is a version of the SP Class B-50-16. This was a modified ARA 1924 design, though six inches taller, and had a Dreadnought end not too different than the TM model. Again, as a stand-in, not terrible.
     I cut off the door claws, added wire grab irons, and discarded the inferior running board casting, replacing it with stripwood segments and cast plastic lateral boards. Trucks were changed to T-section, like these cars originally had. When the B-50-16 cars received AB brakes in the 1940s, many also received vertical-wheel geared hand brakes, and that is how the TM model is made.
     That only left the lettering. Microscale set 87-911 (revised in 2007) for SP single-sheathed box cars was my source for car initials and numbers, Then further light weathering was added to an already weathered car.


     This has been, again, an interesting challenge to recognize “freight car correctness” for 1944 instead of my own modeling era of the early 1950s, and to paint and letter accordingly. The two models produced are certainly stand-ins, but much closer to reality than the models they are replacing. I think it’s a step forward.
Tony Thompson

Thursday, May 7, 2020

SP 200-ton flat cars, Part 4

I began this series of posts with a description and photographs of the Southern Pacific prototype heavy-duty flat cars of 200-ton capacity, all riding on four 100-ton trucks under span bolsters. (That initial post can be found here: https://modelingthesp.blogspot.com/2019/11/southern-pacifics-200-ton-flat-cars.html .)
     I then followed that with two posts about modeling these cars, one of them about the Athearn HO scale model, which has a number of defects from the viewpoint of prototype accuracy, though some of them are readily correctable (see that post at: https://modelingthesp.blogspot.com/2019/12/sp-200-ton-flat-cars-part-2.html ).
     The next post was about the first steps in building the new Funaro & Camerlengo kit for one of these cars that was based on a General Steel Casting (GSC) one-piece cast steel frame. My focus was the span-bolster trucks (the post is located at: https://modelingthesp.blogspot.com/2019/12/sp-200-ton-flat-cars-part-3.html ). In the present post, I resume construction.
     At some point early in the kit assembly period, one is bound to notice that this car is not going to weigh very much. Even with the metal wheelsets I used, as mentioned in Part 3, the combined weight of body, trucks and span bolsters is only about 1.5 ounces.
     I added small rectangles of lead sheet, 1/16-inch thick, cut from a one-foot-square piece of roofer’s lead that I bought decades ago (and I still haven’t used a fourth of it). The little rectangles of soft lead can be gently tapped with a hammer to shape them to fit where they are going. These were glued into the frame recesses with canopy glue. You can see these in place below. In all, I only was able to add one additional ounce of weight, but that will help.


     Following kit directions, I added the grab irons, two on each side and two on each end. Next I added the couplers. Here there are difficult choices. One can again drill into the not very thick deck and attempt to keep from breaking through, then use a bottoming tap to achieve a screw attachment.
     The alternative is glue. In the past, I have been successful in attaching a coupler box lid with CA, then attaching the box itself (with coupler inside) with canopy glue. If it were ever necessary to re-open this coupler box, the canopy glue will soften with water and permit removal.
     I decided to start out trying the method with screws. It turns out that a 1/4-inch long 2-56 screw is just the length of the Kadee coupler box plus the depth of the car deck. This is a Kadee #158 whisker coupler.


     With those additions, the car is nearly ready for paint (really only missing the vertical-staff hand brakes, and the corner sill steps). Here is the car on its span bolsters, to see the overall look and to check trackability.


     Everything went well in the tracking check, so I installed the sill steps with CA. They are surprisingly solid. I also installed the vertical-staff brake wheels, using some brake wheels I had in my stash instead of fussing with the resin ones provided. Shown below is the car on “interim truck support blocks” (for a description thereof, you might like to read this prior post: https://modelingthesp.blogspot.com/2014/11/interim-truck-support-blocks.html ).


     The model is now ready for the paint shop. I will return to this model when its painting and lettering is done.
Tony Thompson

Monday, May 4, 2020

Trackside details: signage, Part 2

This post follows up an earlier post, reviewing some of the signage I have along the tracks on my layout. You can find that earlier post here: https://modelingthesp.blogspot.com/2019/10/trackside-details-signage.html . The present post has several signs I have added to my trackside areas.
     An important sign for safety is the sign indicating that a track does not have enough clearance for a man on the side of a car. Of course a local train crew, working practically every day in the same area, would know well where there were clearance problems. Nevertheless, signs were often posted.
     (Anyone wanting some background on what it’s like to switch in an urban or congested district, and would also enjoy a very informative and detail-filled book, should obtain a copy of Westsider, by Dan Rehwalt (Grizzly Press, Oakridge, OR, 2004). The title refers to the Southern Pacific’s West Side lines and branches in Oregon, and the various jobs switching them were called the “West Sider.”
     (Dan writes about all of that in the book, but the really interesting part for me was his chapter about the switching district, the Jefferson Street Branch, on the west side of the Willamette River in Portland, an industrial area when Dan worked there as a brakeman.)
     My clearance signs are from Microscale decal set 87-206, called “Railroad Way Signs.” I simply apply the decals to 0.010-inch styrene sheet, give it a coat of flat finish, and cut out. These can then be applied to structures or to something like a 4 x 4-scale inch styrene post.
     One place this is certainly needed is at the ice deck in my layout town of Shumala. The photo below shows the clearance (incidentally, most prototype ice platforms would be farther from the rail than this; that is why they used those little portable ice bridges — like the one you see near the end of the platform in this photo).


For this situation, I used one of the vertical-lettered signs in the Microscale 206 set, and attached it with canopy glue.


     Another place I could use a vertical sign like this is at the Western Packing house in my town of Ballard. (This industry was described in the August 2019 issue of Model Railroad Hobbyist and summarized in a blog post, which you can find at this link: https://modelingthesp.blogspot.com/2019/08/my-article-in-new-mrh.html ). In this case, the building itself is set back from the track, but a brakeman riding the sill step would not clear the loading platform. Here is the sign, again applied with canopy glue, at the far right edge of this photo.


     One additional place that side clearances are tight is along Track 3 in Ballard, where both loading docks and tank car unloading platforms are close to the track. For this case, I made the kind of sign that is on a post. The decal sign, applied to the styrene sheet, was simply glued to a 4 x 4 styrene post.


     These instances of clearance signs are part of the realistic signage that you can have in support of layout trckage. I am looking for more possibilities for sign applications along my own tracks.
Tony Thompson

Friday, May 1, 2020

Freight car graffiti, Part 13: SP rock cars

This lengthening series about application of graffiti to post-1980 freight cars has mostly described cement covered hoppers and, recently, rock or ballast hoppers (in particular, see the previous post about the Granite Rock cars: https://modelingthesp.blogspot.com/2020/04/freight-car-graffiti-part-12-granite.html ). Subsequent posts may be readily found by using “freight car graffiti” as the search term in the search box at right.
     The present post also addresses the same Walthers model of a 100-ton Greenville hopper as the Granite Rock cars, but in this case the cars are lettered for Southern Pacific. Again, these are cars that are active in rock service on Seth Neumann’s 1999 layout depicting UP in the Bay Area.
     The older paint scheme on these cars looked like the photo below, typical of 1980s and later SP rolling stock, to show a single example, SP 465541.


     The dark color of these models required careful selection of graffiti decals to show up well on this background. This was done for several models in turn. First, the car shown above; here is its left side with no weathering yet applied. This decal is from Microscale set 87-1536.


Similarly, the right side also received a colorful piece, this one from Microscale set 1533. Also applied here is a paper overlay (the dark blue letter “O,“ and this side of the car is shown weathered and tagged (you can click to enlarge if you wish). I will return to paper overlays in a future post.


     Here is another car being worked, SP 465014. First, the left side of the car, graffitied with Microscale set 87-1523 (yes, that is the word “barf”), and weathered and tagged.


The right side, by contrast, was given a really large piece, as does sometimes show up on prototype cars like this; it spells out "inko" though the meaning is unknown. The origin is Microscale set 87-1534. This side also is tagged and weathered.


     Finally, the fleet included one model with a post-UP-takeover paint scheme, with SP reporting marks still used but in UP lettering style and with a UP emblem, SP 466329. As a more recent repaint, this car was not as heavily weathered nor given as complete graffiti coverage. Here’s the left side, with two graffiti pieces, from Microscale sets 87-1535 and 1536:


The right side has a decal from Blair Line set 2262.


     These three cars are not the entire group of SP rock hoppers among the Seth Neumann fleet I’m working on (there is one more car, an interesting example to be covered in the following post about freight car graffiti), but it’s most of them, and I wanted to present them together.
Tony Thompson