
Just out of sight at right is a tunnel, and the track coming from the tunnel is obviously separating into a siding off the main. A section house is just visible at far right.
Another view of the area in the upper photo, this time from the side, with a mainline train behind SP 2-10-2 no. 3688, shows the section house well. Note also at the side of the tunnel opening that there is a black rectangle. In this is the tunnel number in white letters. This was standard SP marking for tunnels.

One of the features in this area is the milepost marker, which SP made visible by painting white the bottom half of the telegraph pole on which it was mounted. I spoke in more detail about that kind of sign in a post several years ago (the post can be found here: https://modelingthesp.blogspot.com/2014/03/milepost-markers.html ). I might mention in passing that in that post, I mentioned planning to donate the San Luis Obispo 252-mile marker to the railroad museum in San Luis Obispo, and I have now done so. Here is a view of my model marker:

Another detail in the photo above is the speed signs that SP used, seen at lower photo center, marking locations where the speed limit(s) for either freight or various passenger trains were changed. My post about it is here: http://modelingthesp.blogspot.com/2014/03/speed-signs.html . My model sign was made by simply reducing the SP drawing for the sign to HO scale, then placing it on a post. The two speeds in the upper, white part of the sign are for passenger and freight trains, respectively, while the speed in the lower, yellow part is for streamlined passenger equipment.
Another relevant kind of signage is the yard limit sign. According to timetable, both ends of the yard at Shumala on my layout are located out of sight, beyond the layout, but the branch line to Santa Rosalia does have a limit sign. I described making it in a prior post (you can find that one at: https://modelingthesp.blogspot.com/2015/08/small-mdodeling-project-yard-limit-sign.html ). Here is how it looks, to the right of the track:
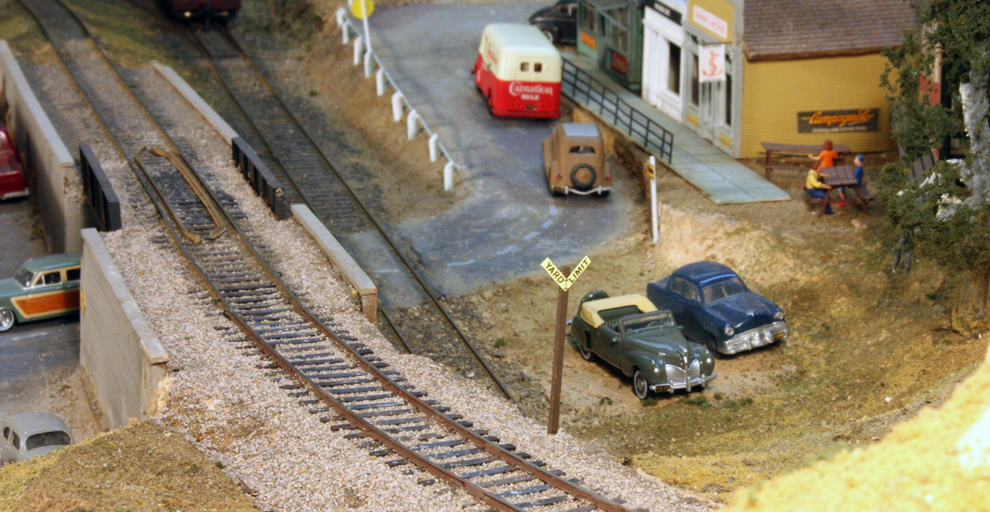
Although not railroad signage per se, the marking at road crossings are necessary and distinctive. I have described those in several previous posts. First, the pavement markings, which include a painted “stop” line for motorists to remain clear of the crossing, and then the crossing signs, the familiar round yellow warning signs (both of these are discussed here: https://modelingthesp.blogspot.com/2013/03/streets-roads-and-all-that.html ). Lastly there should be crossbucks, and I am still working on a sufficiently sturdy crossbuck for layout use — I will come back to that in a future project.
I should also mention other road signs, such as those at the end of dead-end streets. I have already researched those for my era, and added them on the layout (you can read my post about that project at: (https://modelingthesp.blogspot.com/2013/03/streets-roads-and-all-that.html )
All these kinds of signage, though railroad-specific or state-highway-rules specific, as well as era-specific, are readily researched and are a vital part of a realistic model railroad scene.
Tony Thompson
Making scale sized signs sturdy enough to survive occasional snags on an operating layout is almost impossible. A flexible mounting method avoids having to replace them frequently.
ReplyDeleteOne way is to attach a string that passes through the scenery to the bottom of the sign post. Fasten a small weight to the string under the layout. This will hold the sign upright but will allow it to move without damage if bumped.
Another way is to fasten a very small magnet to the post and place a steel tack or nail in the scenery.
Suitable magnets are available from K&J Magnetics https://www.kjmagnetics.com/products.asp?cat=1
Either method will also work to secure other items in areas subject to giant hand action on a layout. Examples include lamp posts, signals, mailboxes, trees, smokestacks, fence posts, figures, etc.