Sunday, January 29, 2023

Layout fascia evolution

In model railroad layouts, the term “fascia” can mean either a treatment along the ceiling to conceal lighting, or, more commonly, the treatment of the layout structure below the level of scenery and track. For my layout, both as originally constructed in Pittsburgh, PA and as it now is, I have used Masonite sheets for my fascia treatment. 

I decided early on that I wanted to retain the natural color of tempered Masonite, and sealed all the sheets I used with shellac. This provides good sealing and makes a semi-gloss finish that has turned out to be resistant to scratching. For more on the overall layout appearance, you may view this post: https://modelingthesp.blogspot.com/2013/02/layout-fascia-my-approach.html .

As the layout has been extended and various parts completed, I have continued the use of natural Masonite. I have mentioned in the past that I had saved all the fascia sheets from my Pittsburgh layout which was larger, so that I have a fair amount of material on hand. An example showing some of my additions to the new layout was posted (if you wish, you can see that post here: https://modelingthesp.blogspot.com/2015/02/layout-fascia-additions.html ).

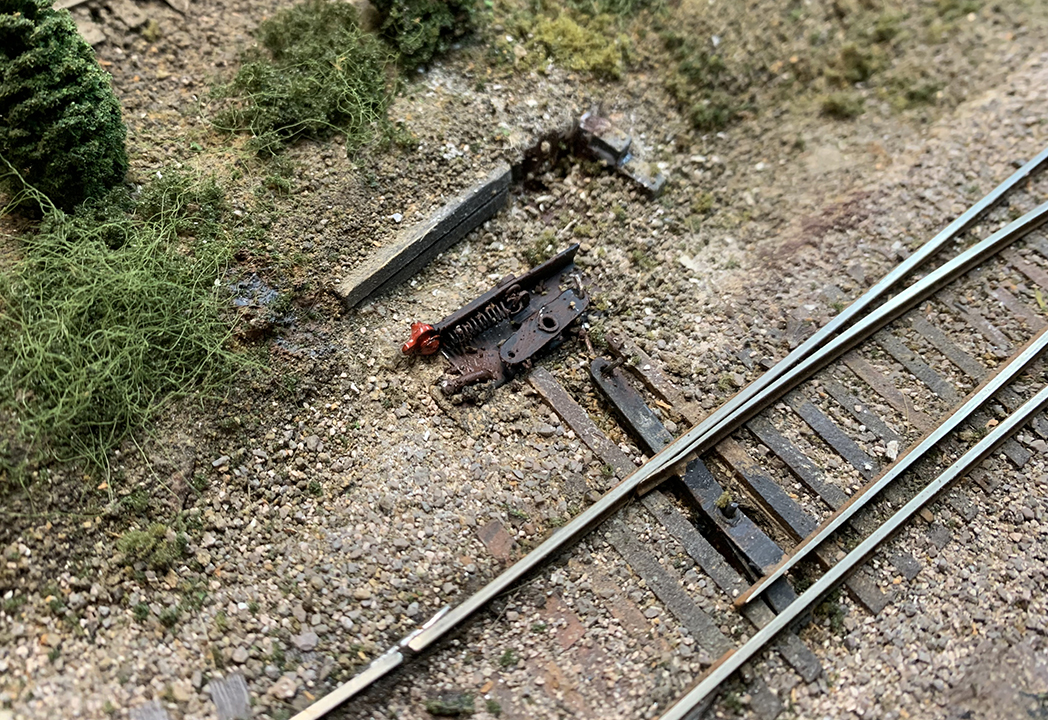
I realized recently that my fascia at Santa Rosalia (shown in the post cited in the paragraph just above) was unnecessarily narrow. I had made it that way because of the placement of a staging track under Santa Rosalia, and I needed access. But that staging track has since been disabled as not useful, and so I can revisit the existing design. It’s shown below. I’d like to hide the great empty space underneath. And having removed the panel that was previously at lower left ( https://modelingthesp.blogspot.com/2023/01/electrical-wars-part-19-more-juicers.html ), I need to make some kind of change anyway.

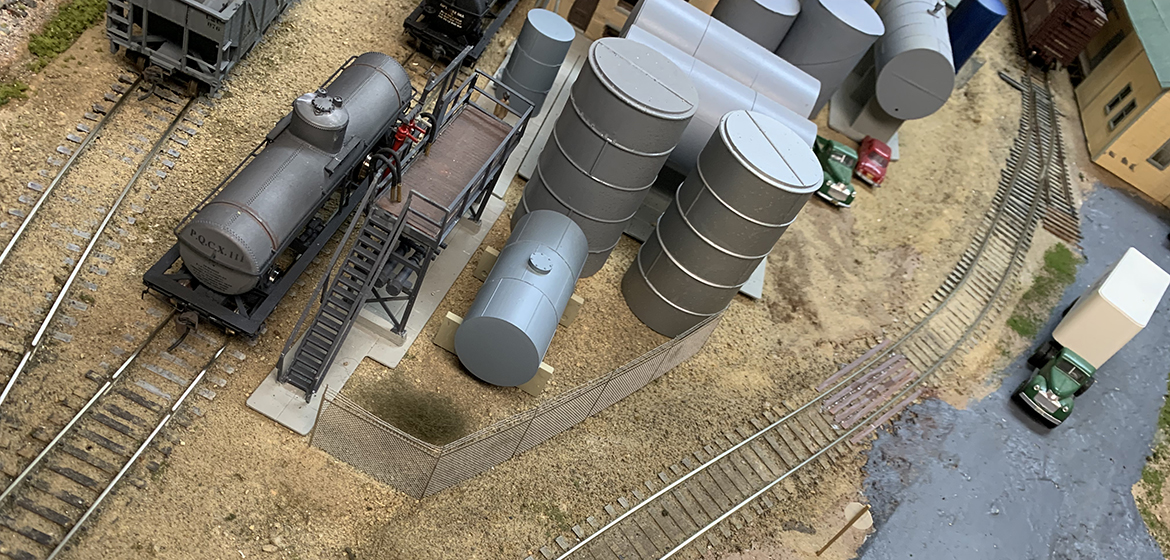
I chose a wider piece that would have about the right length, and after removing the fascia piece at right in the photo above (and a little bit of the piece at left), I simply attached the new piece with the old screws into countersunk holes into the wood base of Santa Rosalia. There were some additional holes in the new piece, from its previous life, and I simply filled those with paper mache. Here’s a wider view. The Kelp Products industry has been moved out of the way.

One nice thing about Masonite strips like these: when they are installed in a curved shape, as is the case here, they are very stiff. They don’t need any support underneath.

Since the removed fascia strips were also host to the relevant area signage (the white pieces on the fascia in the upper photo), I had to make new copies of the signs to attach to the new fascia piece. I have described elsewhere the ideas behind my fascia signage, and how it was designed and made (the post about that is at: https://modelingthesp.blogspot.com/2013/03/layout-fascia-part-2-signage.html ). They are attached with canopy glue.

Next, I had to paint the paper-mache-filled areas to match the Masonite. The closest paint color to most Masonite sheets (they do have individual color shading) is Raw Umber acrylic tube paint, a medium brown color, lightened as needed with Raw Sienna (an ochre color). I also needed to touch up the paper mache on the ground areas where I adjusted the contour to match the new fascia height (one is just above the large fascia sign). That was done with my “standard” dirt color, Rust-Oleum “Nutmeg.”

With those touch-up tasks done, I added the same “J-strips” to hold waybills that I have used elsewhere on the layout (for background, see this post: https://modelingthesp.blogspot.com/2018/09/j-strips-for-waybills.html ). One commercial name for these is “frame strips.”

The last addition to the new fascia was some Velcro strips so crews working here have a place to put the throttle they are using. I have done this in several places around the layout (I’ve discussed this feature before; here’s one example: https://modelingthesp.blogspot.com/2016/03/changing-throttle-connections.html ). All my radio throttles have the hook type of Velcro on the back, and several places around the layout have the loop type glued onto the fascia, usually with canopy glue.

In the view above, I have included a couple of waybills to illustrate how they can be placed in the J-strip. This keeps them off the layout surface but handy to a switching crew.

This completes my modification of the layout fascia at my town of Santa Rosalia. It’s an overdue change and one I look forward to sharing with visiting operators.

Tony Thompson

Thursday, January 26, 2023

Alco S-2 and S-4 switchers

Southern Pacific was one of the best customer for the Alco (American Locomotive Company) diesel switcher. This began during World War II, when the War Production Board dictated which diesel models each manufacturer could produce, and how many. GM’s Electro-Motive Division (EMD) was restricted to production of FT road diesels, and Alco to the production of diesel switchers. SP, needing all the switchers it could get, obtaining 57 of them during 1942-44.

After the war, EMD prioritized building road diesels (F3 and F7 models), and deliveries of their switchers had long lead times. Again, SP continued to purchase Alco switchers because they could be delivered sooner, even though they would have preferred the EMD models. Their fleet of Alco S-2 models, beginning with the 57 mentioned above, grew to 122 by 1950.

(For a thorough history of all the Alco switchers that SP owned, I recommend Joe Strapac’s Volume 18 in his magisterial series, Southern Pacific Historic Diesels, Shade Tree Books, 2013. I will freely quote from his information in this post.)

The Alco S-2 was a 1000-horsepower locomotive with sturdy General Electric traction motors. One of its distinctive spotting features was the truck design used, a proprietary one known as Blunt. Many Alco customers believed this truck to be superior on rough or degraded track. But others were bothered by the differences from the so-called “AAR switcher truck” used by other builders, and eventually Alco agreed with AAR requests and replaced the Blunt trucks with the General Steel Castings version of the AAR switcher truck.

Below is a nice in-service sot of an Alco S-2 at Ogden in September 1952 (Wilbur C. Whittaker photo). I should mention that this is a slightly oddball S-2, in that it is one of only a few S-2 engines built in 1944 that had horizontal radiator shutters at the front. Otherwise it’s a good view of the right side of an S-2. This is, of course, the famous “Tiger Stripe” scheme of orange stripes on a black body.

For a good view of the left side of an S-2, and to show some other details, I include below a color view taken in San Francisco on June 20, 1957. (Dave Sweetland photo, Al Chione collection). The white portions of the handrails are evident, as is the tan canvas sun shade on the cab. This engine has vertical radiator shutters, as did nearly all S-2 models. Incidentally, the “radio-equipped” lettering on the cab side arrived in the mid-1950s, after my 1953 modeling era.

To model these very numerous switchers on the SP, I chose SP 1389, a switcher assigned to Coast Division in July 1952. My model is an Atlas Model Railroad Co. product from before the days of DCC. I made a few modifications to the stock model, painted and lettered it, and wrote an article for Railroad Model Craftsman magazine about the project (the issue of May 1988, page 54 to 57). More recently, a decoder and sound have been added. Here is a photo of this model.

The Alco replacement for the Model S-2 was the Model S-4. It was in most respects identical to the S-2, but had AAR switcher trucks. Cab and body were still riveted construction, and many details were identical to the S-2. Below is an Alco builder photo from November 1951, of part of an order delivered to SP that year. In contrast to the 122 S-2s on SP, there would eventually be 64 S-4s purchased.

For models, Atlas has just recently released a run of Alco S-4s including the SP Tiger Stripe version. I signed up for one, and nowadays, of course, it comes with DCC and sound. I simply added a coat of flat finish and used acrylic washes to tone down the paint (and to darken the stack). Here’s the engine spotting up a freshly loaded car to be iced, in my town of Shumala.

These are interesting switchers and an integral part of SP locomotive history in the transition era. I’m glad to add an S-4 to my switcher fleet, and look forward to its use in my next operating session.

Tony Thompson

Monday, January 23, 2023

Electrical wars, Part 19: more Juicers

 In this blog, I have described previously my projects to rebuild aging track switches for better electrical operation, and the use of Tam Valley Depot’s Frog Juicers to power them. [For more on their products, you can visit their site at: http://www.tamvalleydepot.com/support/whichfrogjuicer.html .] 

For a complete, illustrated description of my rebuilding process, you may read this: https://modelingthesp.blogspot.com/2016/12/electrical-wars-part-12-new-turnout.html . A follow-up, for a different switch problem on the layout, was summarized here: https://modelingthesp.blogspot.com/2021/08/electrical-wars-part-18.html .

The current topic is a somewhat different one, the three-way Peco switch in my layout town of Santa Rosalia. As I previously explained, this switch is designed to have its electrical needs taken care of with a Peco switch machine. Not wanting to have to bury one of these machines in the layout, I originally devised a way to electrically serve this switch, using a pair of toggle switches. I described that process, and the finished trackwork, in a blog post. (See it here: https://modelingthesp.blogspot.com/2017/01/electrical-wars-part-13-three-way.html ). 

The final result was a small control panel, which I showed in the post just mentioned, and below is a repeat of the photo from that blog that showed the panel.

The problem with this was that the electrical controls, and the switch point rail settings, could be combined in a way to create a short. I think there are nine possible combinations of switch point choices on the track, and electrical choices in the panel shown, and only one creates a short. However, it has not been particularly uncommon in operating sessions for crews to find that one combination that makes a short.

So although I do give crews a short tutorial on how not to make a short with this panel (set both toggles to center-off, choose the track you want by throwing the points, then power that track electrically with the appropriate toggle), this instruction obviously fail sometimes; and even when it works, it’s a degree of operating fussiness I would rather avoid.

Shown below is the switch as installed. At top is the Santa Rosalia depot, with its freight platform at left. You can see the dark bits at rail joints, showing the dimensions of the switch itself.

It was my friend Jim Providenza who said one day, “Couldn’t you power this with Frog Juicers?” Not having thought of that, I replied that I had no idea, and Jim, challenged, said he would cogitate about it and send me a wiring diagram. He did, but I wasn’t convinced, so put the project to one side. But the realization that there might be a good solution to replace the panel shown above kept nagging at me.

Finally I decided to dive into the electrical rabbit hole (note again the title of this series of posts). It didn’t actually take long to realize that Frog Juicers (a) certainly could work, and (b) that Jim’s idea that it would only take two of them was right. I thought it might take three, because there are three frogs, but the key is in the original Peco drawing showing the three wiring leads they provide (the drawing is flipped so that this is the view from above).

Note that they themselves show frog leads 2 and 3 as combined.  And when you spend a little time tracing the connections, it turns out that this is correct. There are three possible routes, but each one is part of a division between two possibilities. The Frog Juicer powers route choices, in effect, so it should only take two of them. One of them powers the choice of routes 1 or 2, the second powers the choices between routes 2 and 3. Those frog leads are the wires at lower right in the drawing above.

So I cut the wires from the panel toggles (shown at the top of the present post) and connected them to a pair of Tam Valley Depot Frog Juicers. The Juicers aren’t yet mounted to a supporting panel, and in this view still just hang from their wiring connections, but they certainly operate, and all three routes through the three-way switch work fine.

What a nice result! No more giving tutorials to operating crews, no more waiting to see if they find the one combination in nine that makes a short, and no more panel switches to look at and puzzle over. Thanks again, Jim, for the idea, and of course to Tam Valley Depot for the terrific product.

Tony Thompson

Friday, January 20, 2023

My new column in Model Railroad Hobbyist

The January 2023 issue of Model Railroad Hobbyist or MRH has just come out, and my latest contribution to the series of columns by a group of authors, “Getting Real,” is included. It’s entitled “Modeling Southern Pacific Heavyweight Passenger Cars.”  

(A reminder: older issues of MRH are available online, to read or download, for free, at their website, www.mrhmag.com . However, since they introduced the “Running Extra” part of the magazine a few years ago — which includes the “Getting Real” columns — that part of MRH has to be purchased. You can buy any single issue, or subscribe for considerably less cost per issue.)

Some will recognize that I have written several series of blog posts about SP passenger modeling, and indeed, many links to those posts (or to the concluding posts of each series of them) were provided in my talk handout of 10 days ago (for my talk at Cocoa Beach 2023). You can see all that material by going to: https://modelingthesp.blogspot.com/2023/01/handout-for-sp-passenger-equipment-talk.html .

That handout, reflecting the talk, contains material on both heavyweight and lightweight passenger cars. For the MRH article, though, the heavyweight information filled the available space. So the primary distinction between the new MRH article and the thrust of the talk handout is the lightweight cars. 

One reason for writing the MRH piece was so that the information about heavyweight cars, though to some extent duplicated in prior blog posts, is now all brought together in one place. It ranges from the original Thomas C. Hoff method of modifying Rivarossi (or AHM) “1920 Pullmans” to floor plans other than 12-1 (12 sections, 1 drawing room), to modifications such as adding air conditioning and diaphragms and improving couplers, and to painting and lettering.

I did include a more extensive discussion of interiors for heavyweight sleepers than I have done in previous blog posts. I also took new photos of some of the completed cars, photos that haven’t appeared in any blog, such as this view of SP 12-1 Inyo, pictured at the depot in my layout town of Shumala.

I also made mention of the excellent heavyweight Pullman kits, originally produced by Branchline Trains (now owned by Atlas Model Railroad Co. and available ready-to-run from time to time). The example I included is Rock Bay, an 8-1-2 floor plan, which I built from a kit. These make beautiful models, though requiring more time to build than an AHM conversion, and really not looking significantly better in a passing train than the AHM modification (their greatly superior underbodies aren’t very evident in a passing train).

In the photo above, you may note the more olive tone in the paint, compared to the preceding Inyo photo. Inyo was painted with a lightened Pullman Green, accomplished by adding some light gray to paint, so that it would look in indoor lighting, like Pullman cars looked in sunlight. Rock Bay presents a good version of SP’s standard Dark Olive Green color, and in model form represents a recently painted car, as was true of many of the Pullmans purchased by SP in the 1948 divestiture sale.

For a prototype example, shown below is one of the 12-1 cars SP purchased, Marblehead, photographed by Bruce Heard at Oakland in 1958, on a day that was either cloudy or had a marine layer overhead at the time of the photo — note how soft are the shadows. This is the kind of look for both car sides and roof, that I have tried to accomplish in my modeling.

In the article, I didn’t have space to say too much about how these passenger cars are operated on my layout, but commonly in an operating session, at least one passenger deadhead extra does run. An example is below, with a single baggage car at the head end, followed by a Pullman-owned 8-1-2, Rock Pass, a 14-section tourist sleeper, and SP 12-1 Serra in Two-Tone Gray paint. It’s on the siding at Shumala, perhaps clearing a mainline train.

This was an interesting article to write, in that a great deal of photography and modeling descriptions could be mined from existing blog posts, but at the same time gaps in the full story had to be filled in, and in a number of cases, new and better photos needed to be taken. Overall, I feel like the article does what I wanted it to do.

Tony Thompson

Tuesday, January 17, 2023

Installing more Bitter Creek turnout controls

 I have for some time favored the Bitter Creek design of turnout controls (for hand-thrown switches), because they are smaller and have a much lower profile than the familiar Caboose Industries ground throws. I have discussed this topic before (see for example: https://modelingthesp.blogspot.com/2017/03/choosing-ground-throws.html ), and below is a comparison photo used previously. (Bitter Creek product installed at left, the big ole throw it replaced is at right.) Part of the packaging for the Bitter Creek part is shown in the background.

There do remain a few switches near the front of the layout, that is, along the aisle and easily reached, that could probably accept Bitter Creek installations. In the past, I had not replaced the Caboose Industries throws at those switches because of limited access space for big 1:1 fingers to manipulate the Bitter Creek throws.

I decided I could excavate around these throw bars enough to go ahead with replacement, and make enough room for the Bitter Creek throws to operate. The photo below shows the first of these areas in Shumala that I wanted to work on, the ground throw at the left of the photo.

With a slight slope behind the track along this area, tie cribbing had been used to create a level spot for the ground throw. But you can see here that the space is limited, especially to the right of the throw. 

My first step was to remove the old throw, and install a Bitter Creek throw in accordance with its directions. Below, you can now really see the space problem at this location, especially at the right of the throw. In recognition of the issue, I have already begun to excavate to the right of the existing cribbing, but the original cribbing is all in place, clearly showing the original problem with the throw area. The material of the bank is paper mache, which I could excavate with a hobby knife.

The only solution was to enlarge the area leveled by the cribbing against the bank, extending the area shown above to that shown below. The cribbing that was removed was then restored at far right, using canopy glue, and the white areas of paper mache that were exposed were painted Rust-Oleum “Nutmeg,” as I usually do for a basic “dirt” color. 

Additional soil and ballast will also be added, and perhaps some weeds in the area where the cribbing is not in place. But there is now enough room to throw this switch comfortably. You can also see in the photo below that I have softened the dead black of the stock ground throw with some dark brown.

The reason for showing this in detail is that I originally didn’t want to try to install Bitter Creek ground throws where there was minimal room. Simple solution: make more room. And the new ground throw works fine.

Tony Thompson

Saturday, January 14, 2023

Layout origins, Part 4

This post continues the saga of rebuilding the hill at one end of the layout, which had been cut down for moving to California. This hill separates the Shumala and Ballard sides of the layout. In the previous post, I showed the reconstruction of the hilltop and, especially, the damaged and partly missing hillside that faces toward the town of Ballard. You can see that post here: https://modelingthesp.blogspot.com/2022/12/layout-origins-part-3.html .

My first task, after what was shown in the post just cited, was to improve the contours of what I had created with Plaster Cloth from Woodland Scenics. I used my preferred paper mache products, both Sculptamold and the taxidermists’ mixture, Brandt’s. After a couple of iterations, after each of which I made further refinements, it looked like the photo below. Note there are still some unrepaired areas.

Next I wanted to re-locate the tunnel portal and blend the area around it with the hillside work already completed. I followed the same sequence of Plaster Cloth and paper mache.

Once these contours were all satisfactory, I painted all the fresh surfaces with my usual medium brown dirt color, and began to add Woodland Scenics ground foam, in colors to match existing layout areas. Next, I supplemented that with vegetation in the bottoms of gullies, where water lingers the longest in this Mediterranean climate, with its long, dry summer. This is a familiar scenic feature in coastal California.

One very evident feature here is the two rock outcroppings on the hillside. These are plaster rock castings and were placed early in the process, but are less visible in the white/gray surfaces in photos above. For more details on all this work, you can consult: http://modelingthesp.blogspot.com/2013/12/repairing-ballard-hill-part-4.html .

But the scene still needed some larger trees at the bottom of the hillside, since it’s much closer to the viewer. With those added, and the large buildings that go in this area also placed back in position, the hillside becomes more of a backdrop, as originally intended. 

It may also be interesting to compare this hillside appearance with the version that was on the Pittsburgh layout, shown in the top photo of the Part 2 post in this series; see it at: https://modelingthesp.blogspot.com/2022/08/layout-origins-part-2.html .

Finally, I want to show the trees that were added at the base of the hill, a valley oak and a palm tree. You can see them above, but not very clearly. Here is a different viewing angle, also showing Cienega Creek winding away from the hillside.

It was a bit of a slog, getting all the repairs and contour re-creations done to re-establish the hill as it ought to be, but it’s now been in service several years, and rarely needs further work. As a vital scenic component of the layout arrangement, I’m always happy to see it doing its job.

Tony Thompson


Wednesday, January 11, 2023

Cocoa Beach 2023

 Once again, the Prototype Rails meeting at Cocoa Beach, Florida’s Hilton Hotel was held in the first week of January. This event started in 2001, but was not held in 2021 on account of the pandemic, so this was the 22nd meeting. Not present at the meeting was its founder, Mike Brock, and after the meeting, we learned why: he had passed away on January 2.

Many will know Mike as the founder and long-time “sheriff” (list owner) of the Steam Era Freight Cars email list. He instituted two requirements which, from the beginning, have made the list, overall,  a polite and congenial place: first, that all posts were to be signed with the person’s full name, no “anonymous” posts or internet “handles;” second, that criticisms of individuals were prohibited. Would that more social media followed the same rules (or had Mike as the “sheriff”).

Mike was a very organized person, and ran the Cocoa meeting (and many other things) efficiently and effectively. And he was a wonderful meeting host, always generous with his time and most welcoming to everyone attending. He had a knack for noticing a new attendee, and would make a point of talking to that person. Below is a photo I took in 2016 at the meeting, in the Hilton ballroom. Mike is at left (in one of his signature Hawaiian shirts), and next to him, Marty Megregian, his long-time “assistant manager,” who will now take over the meeting.

They are talking to Steve Funaro and Sharon Camerlengo, proprietors, of course, of the Funaro & Camerlengo (F&C) resin kit business, who have attended most Prototype Rails as vendors. Coincidentally, in the background between them is Tony Koester. Here’s a photo across the same ballroom during this year’s meeting. The ballroom is now better lit and a lighter color.

But news of Mike’s passing did not reach us at the meeting. The usual clinic program, organized by Jeff Aley as always, was excellent, everyone greatly enjoyed the renewal of acquaintances, especially after the pandemic, and Florida came through with lovely weather. I always especially enjoy the model displays, and show a few examples below.

I will begin with one of a group of excellent loads by Eric Thur. The loads themselves are made by Multiscale Digital (visit: https://multiscale.digital/   . . . and if you do, note the photo from my layout!), some of them from information and photos submitted by Eric. The load is a flywheel gearbox for a Loewy hydraulic press. The P&LE flat car is from F&C.

Another example of a model I really liked was this rendition of graffiti on a box car, model by Preston Stinger (though exhibited by Jim Hopes). The dirt around the door and the excellent roof rusting made the model come alive for me.

A classic era model by Bruce Smith, a Pennsylvania GRA gondola, is modeled in work train service, specifically as part of a wire train serving the PRR electrified region. The wire reels are shown as empty, full (with paper cover), or partly used. Lovely work.

Last but far from least is one of the many boxcar kitbashes and upgrades displayed by longtime Prototype Rails participant Al Brown. It’s a simple-looking model, but here’s what Al told us about it: it’s a Red Caboose kit with InterMountain roof and doors; Plano running board; Tichy bracket grabs; and Tahoe trucks. And the painting is interesting too: the black roof was lightened by a light dusting with Tamiya Gunship Gray. The body color is Scalecoat II boxcar red and decals are Speedwitch.

Once more, an outstanding meeting at Cocoa Beach. I have been to practically every one, often as a speaker (as I was again this time), and am delighted to contribute to this fine event in that way. I just wish it was within driving distance so I could bring one of those model displays that occupy a full table!

Tony Thompson

Sunday, January 8, 2023

Storage tanks, Part 2

 In the previous post, I mentioned a Walthers “Modulars” set of various storage tanks, and showed all of them assembled. I also showed two of them in the locations I chose for them on the layout. That post can be found here: https://modelingthesp.blogspot.com/2022/12/adding-storage-tanks.html.

The other tanks now have also been placed around the layout, and I’d like to show those locations, not for any intrinsic importance but to illustrate the kinds of needs for tanks that a layout may have. Shown below is the larger of the two horizontal tanks, placed among many other tanks at my chemical processing industry, Pacific Chemical Repackaging.

You will notice the chain link fence in the photo. This was made from a product  of Bernie Kempinski’s company, Alkem Scale Models,  that I have shown before (see that post at: https://modelingthesp.blogspot.com/2020/01/chain-link-fence.html ). I decided I needed to have some fencing around this company that handles chemicals, and am still working to complete the circumference of the property.

The smaller of the two horizontal tanks was added to the variety of tanks already in place at my Associated Oil Company facility in Shumala. Many photos of bulk oil dealers show a wide variety of tank shapes and sizes, so I thought this location would be appropriate. 

It stands next to a small vertical tank, the top of which is just visible. The dealership itself was described in my column for the March 2014 issue of Model Railroad Hobbyist; see: http://modelingthesp.blogspot.com/2014/03/associated-oil-co-modeling-oil-dealer.html .

I showed the larger vertical tank in the previous post (see link in first paragraph, above), used for diesel fuel at the Shumala engine terminal, and have placed the second tank, the smaller of the two, at the Union Brass foundry in Ballard. The foundry is built from a Classic Miniatures kit.

Finally, the larger of the two tanks on pedestal supports was painted blue and added to the tank farm at Pacific Chemical Repackaging, where a variety of tank colors have been added, something practiced by some chemical companies. It’s shown below. Actually, I find this dark blue a little too prominent, and will weather it with some light gray to soften and lighten the color. By the way, the long background structure at photo center was a kitbash reported earlier: https://modelingthesp.blogspot.com/2013/03/kitbashing-background-structure.html .

Adding these tanks has improved every one of these sites, in my opinion, and I am trying to decide if I need to add any more tanks at my various industries. I have a nagging feeling that yes, I will, but that’s for later posts if it happens.

Tony Thompson

Thursday, January 5, 2023

Handout for SP passenger equipment talk

This post is a handout for a talk about Southern Pacific passenger car modeling. The talk concentrates on sleeping cars, both heavyweight and lightweight. Much of the modeling described in the talk is included in articles I wrote for Model Railroad Hobbyist (the January and October 2023 issues). 

My core idea, for this part of the SP passenger car equipment fleet, is using the sleeping car models produced by Rivarossi in Italy, and marketed in the U.S. by AHM (Associated Hobby Manufacturers). The most useful one is the “1920 Pullman” car, as AHM sold it, since it models the most common single floor plan in the original Pullman fleet: a “12-1,” as they were called, 12 sections and 1 drawing room. 

There also exists an AHM “1930 sleeper” model, which is essentially a 10-6 (10 roomettes and 6 double bedrooms), probably the most common lightweight sleeping car floor plan. It can be repainted for Lark service, as I have done, and given upgraded details. Below you see one of these cars, with an AHM heavyweight Pullman conversion right ahead of it, passing the depot in my layout town of Shumala.

The AHM heavyweight Pullman can readily be kitbashed into a number of other floor plans, as shown in a superb series of articles in Mainline Modeler, in five issues during 1981. Magazine issues can be hard to find, on-line or elsewhere, but a perhaps easier source for these articles are the verbatim reprints of all five articles, contained in the Mainline Modeler reprint book shown below.

An essential source of information and photographs, for the Southern Pacific modeler, is the five-volume series of books entitled Southern Pacific Passenger Cars and published by the SP Historical & Technical Society. For the present topic, Volume 2 on sleeping cars was vital.

In addition to the many important pieces of information about individual cars in the book shown above, there is another SPH&TS book of great importance also, the painting and lettering guide. Both can be purchased on-line and the latter from the Society at its website.

Here are references for the five most important books mentioned in the talk: 

___________, The Best of Mainline Modeler’s Passenger Cars, Volume 1, Hundman Publications, Seattle 1991.

Cauthen, Jeffrey Alan, and John R. Signor, Southern Pacific Painting and Lettering Guide (“Locomotives and passenger cars, 1913–1996”), SPH&TS, Upland, CA, 2019.

 Ryan, Dennis and Joseph Shine, Night Trains of the Coast Route, Four Ways West, La Mirada, CA, 1986.

SPH&TS, Southern Pacific Passenger Cars, Volume 2, Sleepers & Baggage-Dormitories, SPH&TS, Pasadena, 2005.

Wayner, Robert, Pullman Company Descriptive List of Cars, 1950, Wayner Publications, New York, NY, 1985.

In the talk, and in the MRH articles mentioned in the first paragraph, I showed a variety of sleeping cars  cars that I was able to build from the AHM sleeping car models. The MRH articles contain extensive bibliographies. Much if not all of the material was previously shown in my blog; links are below.

First, some links to basic passenger car modeling, the concluding posts in each series:

https://modelingthesp.blogspot.com/2014/09/modeling-sp-passenger-cars-sleepers.html

https://modelingthesp.blogspot.com/2014/07/modeling-sp-passenger-cars-heavyweight.html

https://modelingthesp.blogspot.com/2018/02/my-pullman-projects.html

https://modelingthesp.blogspot.com/2018/05/the-problems-of-dark-olive-green.html

https://modelingthesp.blogspot.com/2022/11/heavyweight-sleepers-conclusion.html

https://modelingthesp.blogspot.com/2023/10/modeling-sp-passenger-cars-part-18.html

I have also written extensively about passenger car diaphragms, full width and otherwise:

https://modelingthesp.blogspot.com/2014/06/modeling-sp-passenger-cars-part-5.html

https://modelingthesp.blogspot.com/2021/05/passenger-car-diaphragms-part-2.html

https://modelingthesp.blogspot.com/2021/08/full-width-diaphragms-part-2.html

https://modelingthesp.blogspot.com/2021/08/full-width-diaphragms-part-3.html

https://modelingthesp.blogspot.com/2021/07/passenger-car-diaphragms-part-4.html

Among the other blog posts that may be informative, here are two about the Lark:

https://modelingthesp.blogspot.com/2021/07/modeling-sp-passenger-cars-part-11-lark.html

https://modelingthesp.blogspot.com/2021/07/the-challenge-of-full-width-diaphragms.html 

With these links, it should be possible to see the background modeling in more detail than was possible to present in a single talk, or for that matter, in the two MRH articles. In addition, most of the above posts that are linked contain significant prototype information too.

Tony Thompson


Monday, January 2, 2023

Another fine new freight car book

In 2022, another really interesting and instructive book was published by Kalmbach Publications (now called Kalmbach Media), authored by Keith Kohlmann. This one is about loads for open-top freight cars, and as one would hope, is very plentifully illustrated. Us freight cars guys are delighted! and for anyone else, there is really a lot to learn here. 

It’s the usual Kalmbach softbound format: 8.5 x 11 inch size, 110 pages, $21.99 price point. And as we’ve come to expect, very handsomely produced. Here’s the cover:

Inside are eight chapters, organized by the type of material that is loaded. Beginning with “Steel, metal products, and scrap,” the list continues with “Farm machinery and heavy equipment,” “Cranes, shovels, and hoists,” “Vessels, transformers, and oversize loads,” “Buses, trucks, autos, and other vehicle loads,” “Forest products and building materials,” “Military equipment,” and finally “Maintenance-of-way and railroad service.”

Author Keith Kohlmann has included a considerable number of good model photographs of these various loads, sometimes a way of getting a color photo to accompany the many archival black-and-white images. But the collection of prototype images is really excellent. Here’s an example (Bruce Meyer photo, Joliet, Illinois, 1958):

These are Allis-Chalmers oil circuit breakers, on a Pennsylvania flat car. The box at the near end of the car is an electrical cabinet; the radiators are packaged at the far end of the car. And in the background is one of the Elgin, Joliet & Eastern’s big Baldwin center-cab diesels. This one, no. 920, had been repowered by EMD by the time of this photo.

And many of author Kohlmann’s N-scale model photos are excellent too. An example is below, a Micro-Trains model modified to represent a Pennsylvania Class F35 flat car.  The boiler section load was made with various scrap parts. And the blocking and tie-down arrangements look very good also.

There are also a number of photos that contain information that can aid realistic operation. One of them, accompanied by a prototype waybill for a similar loading situation, is this Southern Pacific Class F-70-7 flat car, photographed in Ithaca, NY on April 16, 1950 (credited in the book to “Kalmbach Media,” but the print I possess is from the Arnold Menke collection):

The partial load indicates that part of the cargo was already unloaded, and that the remaining six Allis-Chalmers tractors will head off to another destination for final unloading. Note the wires hanging over the car side where the first four tractors have been unloaded and dunnage left on the car. (You can click on the image to enlarge it if you wish.)

Really a wonderful book, one that I continue to page through and enjoy the photos over and over. And it certainly gives me additional ideas for loads I can model.  I think anyone interested in freight cars would feel the same. Highly recommended.

Tony Thompson