Showing posts with label Electrical. Show all posts

Thursday, September 18, 2025

Cleaning an NCE throttle

In my recent post about my preparation actions for upcoming operating sessions on my layout, I mentioned cleaning my NCE throttles (you can find that post at this link: https://modelingthesp.blogspot.com/2025/09/an-op-session-check-list.html ).

I promptly received an email, asking “what the heck do you mean about cleaning throttles?” or words to that effect. So I will show briefly what is involved, an easy maintenance task but one which is very definitely necessary from time to time.

Let’s begin with the back of a dogbone NCE throttle. The arrow indicates the three screws at the bottom of the throttle — don’t remove these. Remove the other seven. (I added the Velcro at the top.)

When these 7 screws are out, you can gently turn the throttle over and lift off the top of the case. It’s shown below at left, next to the circuit board and the rest of the bottom half. Don’t disassemble the part on the right any further! 

Now examine the gold-colored rectangles that underlie buttons that are used the most (usually the forward-reverse button). If it’s been balky, it probably has a round dirty spot on it, as you see below at upper left. This is the image of the button that presses on it. Several other of these rectangles or pads have some dirt; might as well clean all the pads while the throttle is open.

At this point I make a bowl of soapy water (more on that in a moment) and used a Q-tip wetted with the water to scrub each pad clean.

Next I clean the rubber “keypad” (NCE calls this a “membrane keypad”). This is the shaped rubber piece that fills the inside of the lid of the case, as you see below. The round black things touch the pads you just cleaned.  

This is simply plunged into the soapy water and washed with your fingers. I mean, really put that pad into the water and use your fingers to vigorously wipe all surfaces. Here’s the pad, wet and in the process of cleaning. When that’s done, rinse with clean water.

Let the pad dry well (I like to put it outside in the sun, this time of year), and then reassemble your throttle. You will find that those buttons that were balky before now work fine. Just repeat this process next time the throttle isn’t performing as it should.

Tony Thompson 

Sunday, October 1, 2023

Electrical wars, Part 21

This particular post in the series isn’t really one of my classic confrontations with an electrical failure on the layout, but more of the maintenance that needs to be done on the electrical front. (If interested, you can easily find the past members of this series by using “electrical wars” as the search term in the search box at right.) Still, it’s definitely electrical, so I’ll include it.

In preparing for an operating session, I routinely clean all track, then operate locomotives through all switches. Inevitably there are one or more switches for which the point rails aren’t making adequate contact with the stock rails. Of course, the obvious remedy is to clean the inside of the stock rails and the outside of the point rails in the areas where they contact.

In the photo above, taken at the switch into the industrial spurs at East Shumala on my layout, I am using an abrasive stick to clean the areas mentioned. This is just an ordinary emery board, as you see below; as I wear out and dirty the ends, I cut them off to bring fresh abrasive to the end. Over time, of course, the board gets shorter and shorter.

Often this kind of cleaning is sufficient to take care of the problem. But sometimes, as in the case of the switch I am showing here, it did not. In that case, it’s essential to check what’s going on, using a multi-meter. With that tool, I was able to isolate the problem quickly.

What I found was that the rail connection leading into the switch was not conducting consistently. (Yes, this was one of those super-annoying intermittent faults.) It was the rail nearest the camera in the view above. A little work with moving the rail joiner restored consistent conduction. Had that not worked, I would have soldered a jumper wire across the joint. 

Then, of course, the ultimate testing tool is a locomotive. Meters can mislead,  but not locomotives. (Of course, I am just talking electrical here. Locomotives can have faults of their own, like dirty wheels, but if the locomotive is running well, it’s the final test of track.) So after any work like this on a switch, I run a locomotive back and forth at different speeds to verify that the problem is fixed.

With this work, I restored dependable electrical behavior in this switch, needed for an upcoming operating session. As it turned out, this electrical problem, though quite real, was not the entire issue with this switch, but dealing with the remaining problems, which weren’t electrical, will be the subject of a separate post.

Tony Thompson

Thursday, August 3, 2023

Electrical wars, Part 20: one more time

Sigh. You can tell from the series number of this post that I do have electrical issues from time to time on my layout. (Previous ones, if of interest, are most easily found by using “Electrical wars” as the search term in the search box at right.) I’ve called this installment “one more time” because it addresses a particular switch that I’ve replaced once and then rebuilt after that.

This is probably the most-used switch anywhere in my trackwork, or at least roughly tied for first. It’s both the switch off the Southern Pacific Coast Division main line, onto my modeled Santa Rosalia Branch, and is also the lead into the yard trackage for my town of Shumala. It is used many, many times in every operating session that includes Shumala.

Below is a photo of the switch in question. At left is my trusty multi-meter. I’ve written this comment many times, but will repeat once more: I have absolutely no idea how anyone can build and operate a layout without one of these in frequent use (but I do know of examples). The edge of the turntable pit is visible at top.

I have, in recent op sessions, begun to have one of the point rails in this switch (the one nearest the camera) become dead — intermittently, the worst kind. Partway through my most recent session, it stopped being intermittent and became continuously dead. This one I could diagnose provisionally, because the switch had been rebuilt for DCC and has a jumper wire from each stock rail to each point rail. Earlier, when I had the intermittent “dead-ness,” I re-soldered that jumper. Or thought I did. 

Very careful visual examination, and meter use, showed that it was now disconnected. Possibly the solder joint had not actually been re-soldered that previous time, but only pressed into contact, which would account for the intermittent dead behavior. I now very carefully cleaned the wire and rail, and re-soldered, being sure to check for mechanical connection. So that was fixed.

But there was still a problem. The Frog Juicer with which this switch is equipped did not consistently trip. This was complicated to trace, but eventually I concluded that it apparently was due to the styrene block in the gap at the front of the frog, sticking up and lifting locomotive wheels over the gap, thus not allowing said wheels to contact both sides of the gap at once. 

When a locomotive wheel does touch both rails at such a gap, and the rails are of opposite polarity, there is a short. The Juicer is triggered by that brief short, and reverses the frog polarity and removing the short, but if there is no short, the Juicer doesn’t trip. That offending gap is visible above — if you know where to look. Here’s the same photo with a helping arrow:

Carefully cutting the height of this styrene block down sort of damaged it, so I pulled it out entirely. I don’t know why it had gotten raised up, perhaps displaced by a derailment at some point, but no matter. I replaced it with a fresh little piece of styrene. Now it all works fine.

Let me hasten to say that this theory of the gap behavior, and the failure of the Frog Juicer to trip, is still just a theory. It seems to fit my problem, and is consistent with what appears to be the solution of the problem, but is nevertheless just a theory. I would appreciate comments from anyone who knows more about this technology that I do (likely most of you readers). 

Is there a moral to this story? Probably not, if you’re an “electrical ace” and rarely have such problems. But the gap-filling styrene problem and the Frog Juicer behavior is kinda subtle, and if all else fails in your next electrical misbehavior, it could be worth a look to see if you might have this kind of thing, too.

Tony Thompson

Thursday, March 16, 2023

Powering a few more switches, Part 2

In the preceding post, I described a project I am undertaking to power some layout track switches that are awkward to operated manually, at the boundary between my layout towns of Ballard and Santa Rosalia (here is a link to that post: https://modelingthesp.blogspot.com/2023/03/powering-few-more-switches.html ). 

 An important part of this project is to design and build a new control panel, where the new electrical switches for these switch machines will be located. 

My first effort to use an MP1 linear-motion switch machine (as I had described in an earlier post: https://modelingthesp.blogspot.com/2019/02/powering-turnouts.html ) gave rise to this obviously temporary and rather clunky panel, showing the selection of either Track 7 or the main line (it’s just a scrap piece of Upson board):

Now, of course, I was going to re-locate the switch you see above, and add to it at least two more switches. I realized I could also perhaps power the switch between main and siding in the town of Ballard, which would be good to plan for. So I grabbed a piece of scrap card stock, eyeballed the approximate size that would fit the space where the clunky panel (above) was located, and sketched what might work.

Here I tried to reproduce the curvature of the mainline track in this area, just using a kitchen mixing bowl upside down to make a curve of the right size. I drew rough circles where each electrical switch could be located, four in all. Then I experimented with labels, making up a few to see how they would look, and how they should be arranged. I used the Hamilton type face, in 16-point size, which is what you see above.

Based on my experience, I know that the simplest way to do a track diagram is to start with the base color (in my case, I chose yellow) and use masking tape to make the track. Then over-paint with a final panel color (black). So the first step was to reproduce (approximately) the sketch above. Here is my piece of yellow-enameled Masonite, with tape applied. Note that I would now have to re-make the labels shown above, to be yellow letters on black.

 I then oversprayed this panel with Tamiya Matte Black (TS-6) and let it get mostly dry, then stripped off the tape. Tape will come off more cleanly at this point than later, in my experience. Here is the result:

Next, I re-made the labels you saw above, to have yellow lettering on black (easy in Photoshop). These labels were printed out, cut to size, and applied with canopy glue. Then holes were drilled for the four SPST switches (though only three would be installed at this time, as shown below). Also visible are the two wood screws attaching the panel to a support behind.

Incidentally, the empty hole at left is intended for the control of the track switch I showed in the previous post, the one that is operated by a Caboose Industries ground throw far from the switch itself (the last photo in this post: https://modelingthesp.blogspot.com/2023/03/powering-few-more-switches.html ). It isn’t powered yet.

With the panel complete and wired, I could go ahead with mechanical installation of the MP1 switch machines. I will show that work in a future post.

Tony Thompson

Monday, January 23, 2023

Electrical wars, Part 19: more Juicers

 In this blog, I have described previously my projects to rebuild aging track switches for better electrical operation, and the use of Tam Valley Depot’s Frog Juicers to power them. [For more on their products, you can visit their site at: http://www.tamvalleydepot.com/support/whichfrogjuicer.html .] 

For a complete, illustrated description of my rebuilding process, you may read this: https://modelingthesp.blogspot.com/2016/12/electrical-wars-part-12-new-turnout.html . A follow-up, for a different switch problem on the layout, was summarized here: https://modelingthesp.blogspot.com/2021/08/electrical-wars-part-18.html .

The current topic is a somewhat different one, the three-way Peco switch in my layout town of Santa Rosalia. As I previously explained, this switch is designed to have its electrical needs taken care of with a Peco switch machine. Not wanting to have to bury one of these machines in the layout, I originally devised a way to electrically serve this switch, using a pair of toggle switches. I described that process, and the finished trackwork, in a blog post. (See it here: https://modelingthesp.blogspot.com/2017/01/electrical-wars-part-13-three-way.html ). 

The final result was a small control panel, which I showed in the post just mentioned, and below is a repeat of the photo from that blog that showed the panel.

The problem with this was that the electrical controls, and the switch point rail settings, could be combined in a way to create a short. I think there are nine possible combinations of switch point choices on the track, and electrical choices in the panel shown, and only one creates a short. However, it has not been particularly uncommon in operating sessions for crews to find that one combination that makes a short.

So although I do give crews a short tutorial on how not to make a short with this panel (set both toggles to center-off, choose the track you want by throwing the points, then power that track electrically with the appropriate toggle), this instruction obviously fail sometimes; and even when it works, it’s a degree of operating fussiness I would rather avoid.

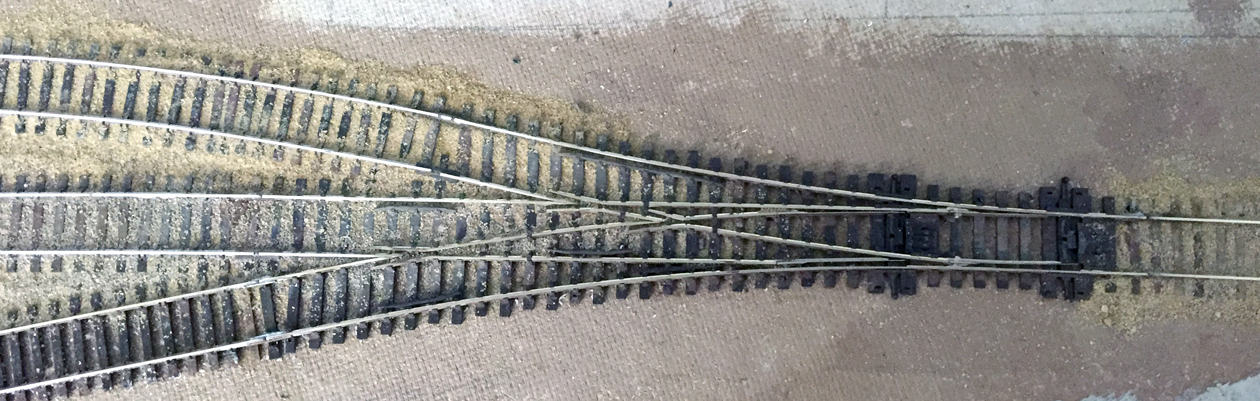
Shown below is the switch as installed. At top is the Santa Rosalia depot, with its freight platform at left. You can see the dark bits at rail joints, showing the dimensions of the switch itself.

It was my friend Jim Providenza who said one day, “Couldn’t you power this with Frog Juicers?” Not having thought of that, I replied that I had no idea, and Jim, challenged, said he would cogitate about it and send me a wiring diagram. He did, but I wasn’t convinced, so put the project to one side. But the realization that there might be a good solution to replace the panel shown above kept nagging at me.

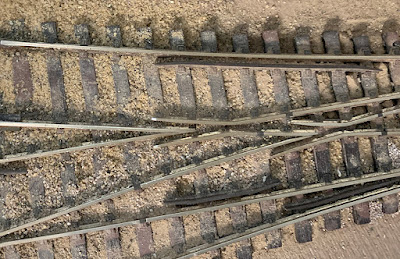
Finally I decided to dive into the electrical rabbit hole (note again the title of this series of posts). It didn’t actually take long to realize that Frog Juicers (a) certainly could work, and (b) that Jim’s idea that it would only take two of them was right. I thought it might take three, because there are three frogs, but the key is in the original Peco drawing showing the three wiring leads they provide (the drawing is flipped so that this is the view from above).

Note that they themselves show frog leads 2 and 3 as combined.  And when you spend a little time tracing the connections, it turns out that this is correct. There are three possible routes, but each one is part of a division between two possibilities. The Frog Juicer powers route choices, in effect, so it should only take two of them. One of them powers the choice of routes 1 or 2, the second powers the choices between routes 2 and 3. Those frog leads are the wires at lower right in the drawing above.

So I cut the wires from the panel toggles (shown at the top of the present post) and connected them to a pair of Tam Valley Depot Frog Juicers. The Juicers aren’t yet mounted to a supporting panel, and in this view still just hang from their wiring connections, but they certainly operate, and all three routes through the three-way switch work fine.

What a nice result! No more giving tutorials to operating crews, no more waiting to see if they find the one combination in nine that makes a short, and no more panel switches to look at and puzzle over. Thanks again, Jim, for the idea, and of course to Tam Valley Depot for the terrific product.

Tony Thompson

Saturday, March 12, 2022

The long snooze

 Like most modelers during the pandemic of the last two years, I have had a relatively inactive layout. At least I did have a few operating sessions with my granddaughter (see for example: https://modelingthesp.blogspot.com/2021/12/more-family-ops.html ). But these did not exercise the layout very extensively, as they were all “reduced-length” sessions. At least some wheels turned — but still, much of the layout has had a long snooze.

An obvious point is cleaning. All track, every bit, including staging, needed to be cleaned, and wheels of locomotives needed cleaning also. I also checked track gauge in places where there have been issues in the past. Yes, track can shift with time, as I have certainly learned.

In addition, I now know to check the gauge of all my Peco switches. I have seven of them on the layout, and all operate perfectly — except for track gauge on two of them (for a report: https://modelingthesp.blogspot.com/2018/07/trackwwork-wars-part-2.html ). Once again one of them is acting up by apparently shrinking the plastic parts, because where the track gauge used to be fine, now it is tight. This is through one part of a 3-way switch.

The problem area is the diverging route at the top of this photo, just as it clears the frog area. I have simply had to file the rail head here to get it into gauge. The Peco people claim they have “never heard”of such a problem, but having observed it with more than one of their switches, I regard their denial with some scorn.

At another switch, I found a gauge problem also, as you can pretty clearly see below at photo center. Here the rails are no longer aligned, for what reason I cannot imagine. But by spreading the tight-gauge part (upper rail) slightly, I was able to correct this.

In addition, of course, there were electrical issues. Long-time readers of this blog will recall a number of installments of my series, “Electrical Wars” (you can use that term in the search box at the top right of this post, to find examples). And there were a few that had arisen during the snooze.

I recently was sent the cartoon below, which expresses my own feelings quite well. It’s by Hal Kattau, who did cartoons for Model Railroader for years, but I can’t find that this one appeared there, going through my CD archive of the magazine. My source couldn’t remember where he got it, so my apologies for not citing the source.

Next I had to address the “population” of freight cars on the layout. Normally, these cycle from operating session to session, and move through the normal steps: arrival on the branch, spotting at destination, and later being picked up to move off the layout in turn. But during the snooze, many cars were arbitrarily added or removed, mostly added, so this all had to be thinned out.

In addition, waybills were entirely out of order. Many remained from much earlier sessions; a fair number of cars that were on the layout had no waybills present; and so on. I simply had to make all of that rational with an intensive waybill re-think and re-work, to set up the upcoming session.

It was nice that the result was a “lean” layout appearance, no more excess cars everywhere, and ready for this weekend’s operating session. And right now, everything seems to be working (until the dreaded “guests present” glitches occur).

Tony Thompson

Tuesday, August 10, 2021

Electrical wars, Part 18

This is another one of those posts with a series number, clearly showing that it relates to an ongoing experience. In this series, it refers to electrical problems on the layout. I don’t mean to imply that these are of such severity that the term “wars” is really appropriate, though sometimes it does seem that way. Maintenance is just what comes with advancing age of layouts, especially if they are “exercised” fairly regularly (by which I mean “used for operating sessions”). 

(Incidentally, if you would like to seek out prior posts in this series, the simplest way is to use “electrical wars” as the search term in the search box at right.)

The problems I describe today are examples of those intensely annoying ones, that are intermittent. It is, of course, much easier to track down consistent problems. The first of these was a track that sometimes lost power, in ways that did not seem at all obvious, let alone consistent. I am still not certain of all the reasons that may have contributed, but perhaps the solution will be interesting to readers, because I had to do three separate things.

First, I notice that one of the necessary electrical gaps did not seem to be very open. I have talked about this kind of problem before (see my post at this link: https://modelingthesp.blogspot.com/2018/10/electrical-wars-part-16.html ). That post, and my current work, involved making sure there was a gap all the way through the rail (sometimes a cut-off disk doesn’t quite cut the rail foot entirely).

The solution, of course, is to make sure it’s fully open, and then put a little slab of styrene in it, usually glued in place with canopy glue (though CA works fine too). You can see that below. The uppermost rail in the photo has its white styrene gap filler a little to the left of the photo center, and the rail below it in this view has its gap about two ties to the left of that. These will of course be painted so their white color doesn’t stand out.

But that was only insurance for a doubtful gap. I also had to check all the feeders to the track that had intermittent power, and found a wire loose and partly broken at a terminal strip under the layout. That was an easy fix, of course; re-strip the wire end and re-attach to the terminal strip. 

But that fix only helped part of the problem. I eventually realized that I was also experiencing intermittent operation of a Frog Juicer, not powering the Peco switch whose frog you see above, but for the turnout just to the right of the switch in the photo above.

Let me hasten to say that the Frog Juicer, made by Tam Valley Depot, is a superb product, and has for some years now, performed flawlessly for me on a number of switches on my layout. To date, I have only used the Mono Frog Juicer models, that is, a device to operate single switches (see a description of their product line, and considerable informative material, at their web site: https://www.tamvalleydepot.com/products/dccfrogjuicers.html .) 

But this particular Juicer, after years of service, did need to be repaired. The folks at Tam Valley Depot did the repair. With the above maintenance actions, and the repaired Juicer, all the track in that area worked perfectly. 

As an illustration, below you see the switcher that’s stationed at Shumala, spotting a flat car at the East Shumala team track (the crates were described in a previous post; see it at: https://modelingthesp.blogspot.com/2021/06/open-car-loads-crates-part-4.html ). The locomotive has just traversed the former problem area.

Meanwhile, the other problem was over at the switch in Shumala leading off the main line into the (railroad) east end of the siding. There I encountered another case of erratic operation of a Frog Juicer. But in this case it was due to two (presumably) independent problems. 

One problem was a separated bond wire from a stock rail to a point rail, easily re-soldered. The other was some kind of electrical leakage that had developed in the gaps at the frog. See below. This was discovered using a multi-meter.

You can see above that I did a poor job rebuilding this Shinohara switch for the Frog Juicer, because the cuts in the point rails, where they are  hinged with rail joiners to the frog rails, are awfully close to the electrical gaps in those frog rails (just to the right in the photo above — the upper one has white styrene freshly replaced in it). 

I avoided this mistake in subsequent rebuilds of other switches. But once I had cleaned and verified the two gaps shown above, and soldered that bond rail, all was well. The Frog Juicer worked perfectly, as it always had previously. Both these problems are in trackage that has been in use for years, and has been part of dozens of operating sessions, without problems. Now they develop. Sigh.

I am once again reminded of Jim Providenza’s advice on layout maintenance: “Trust nothing. Check everything.” Excellent advice, as always. And by applying that advice, I fixed both the problems described above. Back to operating!

Tony Thompson

Wednesday, June 24, 2020

Electrical wars, Part 17: staging

I have written a number of posts on the topic of finding and fixing electrical problems on my layout, as you can perceive from the series number of the title. (To readily find any of the previous posts in the series, use “electrical wars” as the search term in the search box at right. ) These posts do not represent any particular sequence or linked events, but describe separate electrical challenges I have dealt with.
     (I guess this series of posts is about “wars” because electrical problems make me feel like I am about to confront a challenging task. Luckily it’s not always that bad in the event.)
     This latest challenge arose in my layout staging, which is a 12-track transfer table. It has generally been pretty dependable since I built it, about ten years ago, based on a design by John R. Signor  (though some of the trackwork needed revision after some time operating with this staging, as I showed: https://modelingthesp.blogspot.com/2017/10/mind-gap.html ). Here is an overall view of the table, located beneath the town of Ballard on my layout.


This view shows the staging largely filled with freight cars, mostly consists of through trains, with only a few of them having locomotives. Since the photo was taken, this has evolved to where the majority of tracks contain complete, powered trains.
     When my staging tracks suddenly went dead recently, I started investigating what could be wrong. One problem I quickly discovered was that one of the staging tracks no longer had power at one end. Putting my trusty meter to work, I soon found the reason: a somewhat wide rail joint (foreground) had a broken solder connection, making it connect only intermittently. (That’s half an Atlas re-railer at left.)


This was quickly re-soldered and the track then functioned as it should. 
     But the larger problem recurred, essentially all tracks in the staging table going dead. It happened once, corrected itself, and then went very reproducibly dead. I then had to trace the path of power into the table and its distribution to the 12 tracks.
     Electrically, my control of the staging relies on a pair of 6-position rotary switches so that I can select any of the 12 tracks, with a switch between them to select which rotary is live. These controls were set up on a pretty simple panel (photo in this post: http://modelingthesp.blogspot.com/2011/02/staging-trackage-installation-4.html ). Shown below is the back of this panel, shown not because it is any kind of electrical marvel nor because of its incredibly neat workmanship, but only to illustrate the area in which I had to trace continuity,


The two rotary switches, at top, and the selector switch between them, are all evident. Below them is a pair of “on-off” switches, so that even when a track has been selected, it is not automatically powered unless I operate that switch.
     Power comes to this panel at the selector switch, then to the two “on-off” switches below, then to the rotaries. From the rotaries, the wires carrying power to each individual track head off to an array of terminal strips, as you see below, and thence to the tracks themselves, as are visible across the bottom of this photo. The view is looking up at the underside of the staging table.


The track numbers 1-12 are identified next to their part of the terminal strip and also by the feeders below them, through the plywood. The two multi-pin connectors visible (one of them end-on), bringing track power from the rotary switches, are so that the panel can be removed from the layout for work, without un-soldering or unscrewing anything.
     All this is documented in my “Layout Notebook” which contains many sketches of benchwork construction and of electrical arrangements, including identifying every wire by color and by its purpose in a particular area (I showed a page from this Notebook in an earlier post, which is at this link: http://modelingthesp.blogspot.com/2012/08/a-modeling-journal.html ).
     With this information in hand, I could start tracing the path of track power through all the complications shown above. I soon found a broken wire at one of the panel switches — how it was broken I don’t know — but readily re-soldered. Sure enough, the staging table then functioned perfectly.
     I tell this tale only to illustrate how one can trouble-shoot even complex wiring arrangements: if there is good access to that wiring, and if it is all documented so that you know what you are looking at, even ten years after you assembled all of it. That was this case for this problem.
Tony Thompson

Friday, October 19, 2018

Electrical wars, Part 16

In the previous post, number 15 in the series, I described adding feeders to a stretch of track which was exhibiting a really difficult defect: intermittent lack of power. An engine operating on this track would be fine for multiple moves in both directions, then the track would be dead for a  move or two, then the track would be live again. Though not certain of the reason for the problem, I attacked it with a solution that was shown in a previous post (you can see it at: https://modelingthesp.blogspot.com/2018/10/electrical-wars-part-15.html ).
     There is another problem, possibly related to my intermittent power issue, which has arisen a few times on my layout, and I have become vigilant in searching out places where it could happen in the future. This has to do with electrical gaps. I always cut them very narrow, both for appearance and smooth operation over them. But this raises the possibility that thermal expansion and contraction of rail, as well as the thermal and humidity expansion and contraction of the layout structure from season to season, can close one of these gaps. It may,of course, not be visually obvious at all.
     I showed in a previous post in the Electrical Wars series how gaps can be secured with a small piece of styrene glued into them. This is a technique demonstrated on my layout by Jim Providenza, as shown in that post (it can be found here: https://modelingthesp.blogspot.com/2016/09/trackwork-wars.html ).
     My previous work adding feeders to my intermittent-power track section should fix the problem, but I could not rule out problems arising with the gaps which define the track. Accordingly, I went back to each of the gaps, verified that it was open at the moment, and began by gluing some styrene into the gap, using CA adhesive. I usually use Evergreen scale 1 x 4-inch strip, or sometimes scale 2 x 4-inch strip if gaps are wider, as in the photo below.


     I allow plenty of time for the CA to cure, then use a fresh razor or hobby knife blade to slice off the styrene right at the rail head. Sometimes I add a little CA to fill any gaps that may remain.


Any styrene showing on the gauge side of the rail is carved off, and the sides of the insert painted medium or dark brown. The white styrene at the rail head is not very noticeable compared to the silver appearance of the surrounding rail. Shown below is an example of these kinds of filled gaps, right about at photo center, demonstrating that they are close to invisible.


     I don’t know that there were any gap-closure problems contributing to my intermittent power issues on the track in question. But at least now I know that gap problems cannot be a factor in that area in future.
Tony Thompson

Wednesday, October 10, 2018

Electrical wars, Part 15

It occurs to me, in writing the title for this post, that it must say something about me and model railroad layouts, that I am up to the 15th episode in describing my efforts to conquer electrical problems of all kinds. But that is just how it has gone. For anyone interested in previous posts in this series, the easiest way to find them is to use “electrical wars” as a search term in the search box over at the right of this top paragraph.
     There were two electrical faults which showed up in my last operating session, one from some recent trackwork, but the other from track first laid (and powered) over 20 years ago.The event in more recent track occurred in a single rail within a three-way turnout, which had operated properly for several years, but suddenly became intermittently dead. This problem was easy to fix: I simply soldered a short wire to connect the offending intermittent actor, and the appropriate stock rail. In the center of the photo below, you can see the two ends of the wire because of its orange insulation. This will all be painted dark brown, of course, but I wanted to photograph it so it was evident what I did. (You can click on the image to enlarge it if you wish.)


In the background is the Common Standard No. 22 depot at Santa Rosalia on my layout, familiar to SP modelers as an American Model Builders kit (and a delight to build, as I described in a series of posts awhile back; the conclusion is at this link: http://modelingthesp.blogspot.com/2015/05/sp-depot-santa-rosalia-part-4.html ).
     The first of these problems, the straight track that has been in place over 20 years (actually closer to 30 years) was a slightly different problem. Try as I might, I cannot find a loose wire or cracked solder joint or any other explanation for intermittent power to this track. But whether or not there may be a  problem, the simplest procedure is to simply place new feeders to the track in the offending area. The arrangement of gaps and feeders are the same as in the second of two diagrams on a prior post (you can find that post at: http://modelingthesp.blogspot.com/2012/09/electrical-wars-part-2.html ). I will repeat that description here.
     Here is how the layout was originally wired, with power routing through turnouts at the end of sidings. A full gap was cut at the center of sidings like this (using conventional symbols for gaps and feeders).


Especially if it is a long siding, it can become tedious to have to run down to the other end of the siding all the time, so that a turnout can be powered for movement in the middle of the siding. One also depends on the turnout effectively routing power every time. The simple answer, of course, is to replace the arrangement above with this:


     The first step is to cut the gaps, which I did with a cut-off disc in a  hobby tool. Then holes need to be drilled for the feeders that will be added.


Lastly, the wire feeds are soldered to the rails at each location.


     These additions should correct this track power problem, though since it has been intermittent during operating sessions, I can’t be certain yet. Next step will be to operate over the area as much as I can, and see if I can still obtain a failure. Of course, given the perversity of layouts (you know, of course, that they can smell fear), the next failure may simply wait for another operating session.
Tony Thompson

Saturday, March 18, 2017

Electrical wars, Part 14: slaying an elderly dragon

Yep, even those dragons that are long in the tooth sometimes crop up on a layout and have to be slain in their turn. Most of my prior posts about my “electrical wars” have had to do with newly arising problems, but occasionally, as in the present post, it’s an old one that somehow managed to keep out of sight. (And by the way, the easiest way to read earlier posts in this series, should you wish to do so, is to use “electrical wars” as a search term in the search box at the right.)
     The “old one” I refer to was in a track segment that has been on the layout at least 30 years. In the early days, when the layout was in Pittsburgh, PA, it hosted several industries at the rear of the town I then called Jalama. It was a regular feature of operating sessions, because one of its industries was a busy citrus packing house. Here’s a photo from that era, when this track was operated by a mythical short line, the Lompoc & Cuyama:


This structure could just accommodate two reefers at a time for loading, so that helped keep switch crews busy. The small structure at the right of the photo is the yard office.
     When I moved the layout to its present home in Berkeley, I decided to put an Associated Oil Company dealership in the location where Coastal Citrus is seen the photo above, and to move Coast Citrus to the end of the branch line, at the Pacific shore, thus better fitting its name. (Incidentally, I published a full account of designing and building that dealership, in the March 2014 issue of Model Railroad Hobbyist; you can read or download that or any issue of MRH, for free, at their website, www.mrhmag.com .) That bulk oil dealership also got its share of switching work, on that same track. Here’s a view of that dealership, in a photo taken with the yard office in the foreground:


     What then happened wasn’t recognized at first. I decided to improve the wiring in this whole area of the layout, by isolating all turnouts and then separately feeding all track between turnouts (as I described in a post in 2012: http://modelingthesp.blogspot.com/2012/09/electrical-wars-part-2.html ). This minimizes the role of turnouts in power routing, for one thing. I designed the new feeder locations carefully, installed them all, and then went back and cut all the new gaps that were needed. This was all fine, or seemed so. because, as I realize in hindsight, I was not very actively switching on the back track at Associated Oil. Very occasionally I would think of doing so, and would get a short, but since it wasn’t important at that moment, I let it go. “Must be something simple, it always worked before; I’ll fix that one of these days,” is the kind of comment I would make to myself.
     But when I got a little more serious, preparing for the BayRails operating weekend in recent days, I thought I surely could fix this little problem simply. But the short when the turnout was placed in the reverse orientation was stubborn. All gaps were clean, all power feeds in the right place — or so it seemed, as I checked and re-checked against my wiring notebook, where all electrical work and modifications are recorded. This turnout had its frog powered from a slide switch, thus electrically dependable, or should be.
     Suddenly I noticed that this particular frog wire was on the wrong side of a gap! The frog wasn’t being powered from the slide switch at all! I must have just missed the correct location when cutting that new gap. At least it was an easy fix. Snip off the feeder to the wrong place, re-locate and solder the same wire to the correct place. When done it looked like the photo below. The two gaps are indicated by the white arrows, and the purple arrow shows where the wrong frog wire went. The new frog wire, with yellow insulation, is obvious. With this change, the problem entirely disappeared.


I of course promptly painted that yellow wire a dark brown color to hide it.
     Though the eventual fix for my problem was easy, it was the devil to diagnose, as can easily happen with layout electrical problems. And in a way it was made worse by the existence of a wiring notebook, with careful sketches of exactly how the wiring changes were designed. Everything as written was impeccable. It just turned out that it was the implementation that was defective. Well, at least it’s a problem solved and maybe a lesson learned too.
Tony Thompson

Friday, January 27, 2017

Electrical wars, Part 13: three-way turnout

In this installment of my continuing series on electrical issues and (one hopes) their resolution, I identify another gremlin with which I have wrestled mightily and achieved a draw. Or maybe a narrow victory on points. The topic this time follows, in a sense, from a previous post about progress at my branchline-end town of Santa Rosalia, which can be found here: http://modelingthesp.blogspot.com/2016/12/progress-at-santa-rosalia.html .
     At the far end of my Santa Rosalia branch there is a switchback connection to an industrial spur and also a siding on the main line. The most compact way to switch this is with a three-way turnout. I used the Peco Code 75 asymmetrical turnout here, their number SL-E199. It’s an excellent product and mechanically it works flawlessly. It’s shown below installed, with some ballasting remaining to be done within the turnout itself. It’s called “asymmetrical” because the two throwbars, visible here, are at different locations, and the two side tracks diverge asymmetrically from the center track. On my layout, as this photo illustrates, the upper diverging track is a siding off the main, and the lower one is an industrial spur.


Peco supplies an instruction sheet for this, which can be found at: http://www.peco-uk.com/imageselector/Files/Instruction%20sheets/HO-OO%20Code%2075%203-Way%20SL-E199.pdf .
     Electrical connections with this kind of turnout are necessarily complex, with two sets of points in close proximity. Peco recommends using a pair of their own SPDT (single pole double throw) switches here, in combination with two of their switch machines (which they call “point motors”). I like their switch machines, which are sturdy and dependable, but they do require a rather mammoth hole in the layout to place them, and then they are buried under the track and scenery. Or you can excavate that big hole clear through the track support (Homasote plus plywood or whatever you use), and then the switch machines are accessible from below. I didn’t really want to follow either path.
     I had the thought that the turnout could remain hand-thrown, as Pecos are designed to be, and then I could do the electrical power routing with a couple of switches. But when I contacted Peco through their modelers’ online Q & A, they replied that it wasn’t really possible, but that you had to use their own switches and, preferably, their own switch machines. Since I didn’t want to do that, the situation immediately became a challenge, and I decided to see how I could do it.
     Checking my stash of electrical parts, I have a bunch of double-throw switches, but not SPDT ones, so I decided to just use what I have. As Peco themselves observe, there are a number of ways to wire this turnout, so I chose one that appeared like it could work for me.
     Below is the Peco diagram for this switch, which, please note, is viewed from the bottom. (That is why the drawing is, if you will, reversed in its asymmetry from the photo above.) The switch is delivered with the three wires (numbered 1, 2, and 3) already installed. This diagram shows the Peco SPDT switches installed, which I wasn't going to do.


     I decided to wire the contacts of two electrical switches. Essentially one pole of one switch connects the South track feed to both wires 2 and 3 (the siding), while the other pole connects the North feed to wires 1 and 3 (the spur). I used the second switch to serve the main (center) track, connecting North to wire 2 and South to wire 1. I used a DPDT (double pole, double throw) switch for the main track contacts, and a 4PDT switch to handle the siding and spur contacts (I could have used two DPDT switches but had a 4PDT one on hand).
     This of course made a bit of a maze of wire behind my small control panel (the construction and decoration of that panel are shown in a prior post (at: http://modelingthesp.blogspot.com/2016/12/progress-at-santa-rosalia.html ). But that’s just a matter of getting all the wires in the right places. Most of this is no. 22 wire, big enough for leads of three inches or so to the terminal strip.


     With this wiring complete, the panel could receive final installation on the layout edge at Santa Rosalia. Here is its completed appearance, with all lettering.


     The panel was apparently wired correctly, since tests with switcher SP 1423 were fine. Here is the switcher moving a PFE car to Coastal Citrus on the spur for the first time.


     It will be nice to have all the switching at Santa Rosalia enabled, and will bring three more industries into play, which is always interesting. I built the Coastal Citrus structure some years ago, and it’s been waiting for quite awhile for the railroad spur to reach it! Now it does.
Tony Thompson

Friday, December 2, 2016

Electrical wars. Part 12: new turnout parts

In the preceding post, Part 11, I described the electrical problems which can arise with an old Shinohara turnout, and a variety of ways to try and correct those problems (the post is at this link: http://modelingthesp.blogspot.com/2016/11/electrical-wars-part-11-better-power.html ). I should emphasize that the problems I enumerated are not characteristic of new Shinohara turnouts, but arise with age and oxidation of electrical contacts.
     That preceding post showed the removal of the point-rail assembly and cutting off of the closure rails, along with cleaning up the tie strip. The next steps were to install the new parts to replace the old, removed parts. The method described, I should explain, is suitable for turnouts already in place on a layout. Some of the required work is more easily done on the workbench, but usually one’s really old Shinohara turnouts are already installed in the layout. Work illustrated in the preceding post showed practicing on a turnout not installed, but the goal was to fix an installed turnout.
     As I showed in Part 11, all point rails were removed back to the area of the frog. The first step in applying new parts is to clean up the cut rail ends with a file, and install rail joiners that fit the rail size. This turnout in the SP main line on my layout is code 100, so that is the joiner size (you can click to enlarge).


This is a right-hand turnout, whereas some of the prior photos were for a left-hand turnout; but of course all the procedures are the same.
     Two pieces of rail, the code 100 size of the turnout, are now cut (overlength). One side is filed flat and the head of the other side also filed flat, to serve as points. Of course remember there is a “left-hand” and “right-hand” point, so don’t make the common error of making two alike (you can guess how I know). Then the stubs salvaged from the old point rails, as shown in Part 11, are soldered to the inside base of the point rail. Next a clearance hole is drilled in the stub to accept small assembly screws, such as 0-80, 00-90, or 1.2 mm (I used the latter). I will say more about assembly in a moment.


     I have a selection of small metric screws and metric tools (originally purchased to maintain brass steam locomotives), and these are nicely suitable for the turnout work I’m describing in this post. Shown below are the NorthWest Short Line packages of not only the screws, 1.2-mm panheads, but also the set containing a clearance drill, tap drill, and a 0.25-mm-pitch tap. These are not cheap but are fine for the job if you are not doing a great many of these tasks.


     Now the point rails, with the stubs attached, are used to locate the tap holes in a printed-circuit (PC) board throw bar. This is shown below, with the drilled hole extending through the new tie bar.


Next the hole under the second point is similarly located, of course setting the points at the correct spacing from the stock rails. The NMRA track gauge includes gauge tabs for this clearance, as shown below. You can see the overlength point rails at this stage, which can be cut to exact length after being attached to the throw bar.


Holes in the throw bar are then tapped and screws inserted. As always, a notch through the copper plating on the PC board throw bar is needed so there is no electrical continuity (and don’t forget the underside of the throw bar if you have PC board plated on both sides—don’t ask how I know).
     Some will say, why not solder the new point rails to the PC board? Anyone who has done this and then operated for awhile knows that eventually one or both solder joints breaks, because operation of the turnout exerts bending stress on that solder joint. And if you re-solder, eventually the copper may even de-bond from the PC board. Securing the points with screws prevents that.
     Now the correct-length point rails are inserted into the rail joiners and screwed to the throw bar. The assembly at this point still needs some more work, but the overall appearance of the new parts is clear.


To show a close-up of the screw heads and throw bar, the photo below shows this more clearly.


     An important step now is to use flexible wire and connect each stock rail to its adjoining point rail. This means the point rails are always correctly powered, and no longer depend on contact with the stock rail at the throw bar. Lastly, a new gap is needed next to the frog, which I cut with a cut-off disc in a motor tool.
     With all those steps complete, here is the rebuilt switch. The throw bar is not yet cut to length, or painted, nor are the new point rails painted, but you can see the completed arrangements.


The ground-throw obviously has not been re-installed, but that is a simple step.
     Now, as I stated in Part 11, I need to power the frog. This is an excellent spot for a Frog Juicer. As mentioned, these are made and sold by Tam Valley Depot (you can visit their site at: http://www.tamvalleydepot.com/support/whichfrogjuicer.html ). And with that, I now have a better-looking turnout which is electrically dependable without a lot of cleaning of the point rail contacts to the stock rail. I’m relieved and pleased! and I thank Jim Providenza for his help in working on my turnouts.
Tony Thompson