In the previous post on this topic, I showed some of the prototype photos and information I had found about California coastal fishing boats as well as the fishery itself in the area of the California coast that I’m modeling, and the beginning of the assembly of a Frenchman River Models fishing boat (you can read that post at: http://modelingthesp.blogspot.com/2015/06/a-fishing-boat-for-my-santa-rosalia.html ). To see some background about the locale of my layout, you may consult a post on that subject from a number of years ago (see it at: http://modelingthesp.blogspot.com/2011/01/layout-design-locale.html ).
In the previous post about my fishing boat model, the basic boat was almost ready for painting. I added a few more details which ought to be the same color as the hull of the model, and spray-painted the assembly white. This will permit a lot of weathering to make the boat look well used, while preserving a very common color for boats of this kind. Here it is at this stage.

The next assembly step was to install the mast. This was an area of concern to me in building the model, in the way the boom that attaches to the mast. I’m not an experienced ship modeler, but to me this attachment seemed to rely on a fairly small glued area. To counter any fragility there, I drilled through the mast and boom end so I could insert a brass wire of 0.028-inch diameter, which should considerably strengthen this joint. That said, I was impressed with the excellent way in which the mast inserts into the hull, very securely attached with CA.
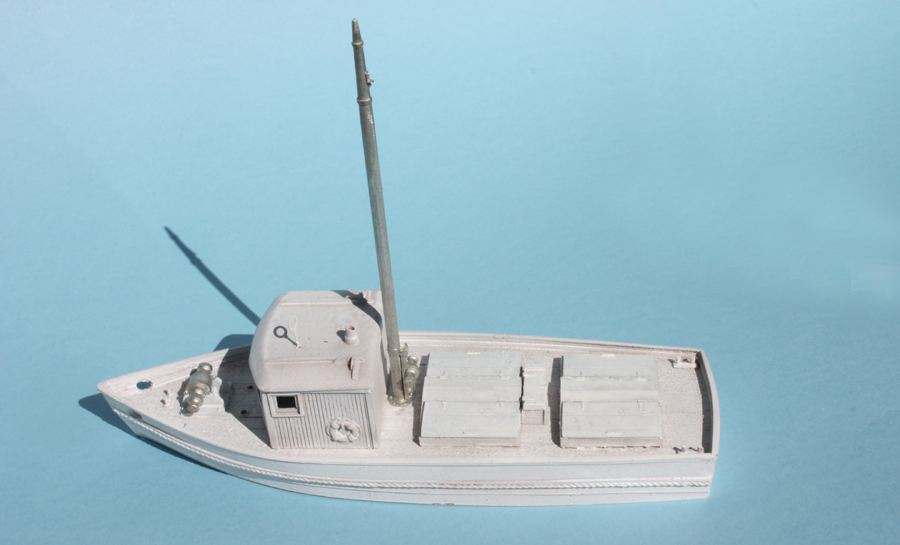
Note that the anchor winch on the foredeck and the mast winch at the base of the mast have been set in place also, though not permanently installed.
At this point, detailing begins to be added to the hull, so a decision needs to be made about trim colors. The Frenchman River kit illustrations show model boats with a trim color in addition to a basic gray or white body color, and most prototype California fishing boats show the same. I decided to use a medium gray, which could readily be brush painted, namely Tamiya “Imperial Japanese Navy Gray (Kure Arsenal)”, no. XF-75, for trim.
I began with the wheelhouse part (not yet attached to the hull), just to see how it looked. The result is below. I felt that this was about the right amount of trim color, and also felt that gray was a good background sort of color. Note that I have also started to dirty up the white color, to some extent. This will need to go further in the completed boat.

Next came the hull. Here I relied on the common appearance of boats like this, with essentially a single stripe along the hull sides. I simply masked either side of the chosen area and sprayed, using the same gray color. The result was what I had been aiming at, and the assembly now looked like this.

I haven’t decided how much rigging I want to do, for the boom and its winch. My present intent is to minimize rigging, since the boat will be depicted moored at the dock in Santa Rosalia harbor. More on detailing in a future post.
Tony Thompson
No comments:
Post a Comment