Wednesday, January 29, 2025

Refining scenery, Part 5

This series of posts about minor scenery refinements on my layout is not intended to present profound insights into scenery development, only to illustrate that even a largely complete layout like mine can benefit from some refinement and upgrading of scenery. 

The present post is a follow-on to my post about creating some ground texture in an area alongside the modest-size industry, Pismo Marine Services, in my layout town of Santa Rosalia (read that post at: https://modelingthesp.blogspot.com/2025/01/refining-scenery-part-4.html ).

At the end of that prior post, I mentioned that I had chosen the Tichy handcar shed for a storage shed structure to be placed in the area I had worked on. Like most Tichy products, this shed goes together very nicely and is easy to build. The first step is to glue walls together and add the floor. (The building’s footprint in HO scale is 12 x 20 feet.)

Following this step, the doors were added. I decided to paint the roof of the structure a different color at this stage, when it is easy to do so. I chose dark green, a common enough color for rolled roofing as is depicted on this kit. 

And after considering several shades of gray and tan for the structure’s walls, I decided to keep the molded color of the walls, and thus simply sprayed the body with clear flat, so it could be weathered. I will paint the underfloor support posts a darker gray after weathering .

My next step was weathering. I used my usual technique, washes made with acrylic tube paint, as described in the “Reference pages” linked at the top right corner of this post. The intent was to show a moderate amount of dirt, consistent with a fairly long time in service. On the roof, I added some Pan Pastel gray to soften the dark green.

You can see above that the doors are a little elevated, to accommodate tracks for a speeder. But this isn’t going to be that kind of shed, so I needed to add a little platform, making shed entry convenient. I just used some scrap Evergreen scribed styrene sheet with about 10-scale-inch board width, and assembled it with styrene cement, using scale 8 x 8-inch strip for inside corner reinforcement. I then dirtied it with Pan Pastels. I also added the name of the adjoining business on the doors.

Next the ground texture and some grass and small vegetation needed to be added to complete the scene. That is why, in the previous post’s last photo (see link in top paragraph, above), the center of the area between the two dirt piles was unfinished. Now it looks like this.

Although really quite a small project, this does complete an essentially empty layout area that had been unscenicked except for painting the Homasote. The area has now been put to some use, instead of being merely a blank spot. I suspect there are lots of layouts with occasional small areas that could be given improvements or upgrades like this.

Tony Thompson


Sunday, January 26, 2025

Car Service Rules, again

The Car Service Rules of the ARA and its successor, the AAR, are a topic of ongoing interest to many who attempt to mimic prototypical freight car handling. I’ve written about these rules before (see that post at: https://modelingthesp.blogspot.com/2012/01/car-service-rules.html ). The topic was large enough that I needed to complete the discussion in a follow-up post: https://modelingthesp.blogspot.com/2012/01/car-service-rules-2.html

Although those two posts were fairly thorough, there did arise further commentary some years later, as contained in a post discussing a comment to an earlier post; I wanted to clarify several aspects of the topic. (That post is here: https://modelingthesp.blogspot.com/2021/05/freight-car-handling-and-distribution.html ).

Just recently, I encountered several verbal discussions on the topic, most recently in the bar at the Cocoa Beach meeting two weeks ago (for a meeting summary, see: https://modelingthesp.blogspot.com/2025/01/cocoa-beach-2025.html ). As commonly occurs, there were several misconceptions and misunderstandings expressed in those discussion. Let me see if, once again,  I can clarify.

Let’s say you’re the Car Distributor at an Illinois Central yard in the St. Louis area. You have just received a car order for a 40-ft. box car to go to Seattle, to a consignee located on the Great Northern. The “empty” track in your yard has six box cars: two IC cars, and one each New York Central, MKT, Rock Island, and Western Pacific. What do you choose?

Let’s look at the rules. These were reproduced for decades in the back of each issue of the Official Railway Equipment Register, or ORER. You can click on this image to enlarge it if you wish.

As can be seen with a little thought, the purpose of these Rules was to reduce the number of empty miles run off by freight cars. If every railroad always loaded its own cars, and sent all foreign cars homeward empty, at least half the miles moved by the national fleet would be empty miles, of no benefit to anyone. In practice, these Rules were found to reduce empty miles to a little less than a third of all miles. In a sense, then, the Rules reduced the need for car purchases, through better utilization.

Now to our car order. Rule 1 says that you shouldn’t use the IC cars. For the further rules, you have to look back at the Bill of Lading, which includes the shipper-designated routing, via Wabash as far as Council Bluffs. That would be one railroad’s car you could use, the Wabash, so that the car could run off some miles on its own road, but you don’t have one. At Council Bluffs, the route designates UP, but you don’t have a UP car either. The routing designates UP as far as Portland, Oregon, then via GN to Seattle, but here again, you don’t have a GN car. This means you can’t follow Rule 2, 3 or 4.

We now consult Rule 5, to load a car to a Home District before or adjoining the destination District. Here is the official map (from the ORER), and the destination in District 1 adjoins Home Districts for the WP, in both Districts 2 and 5. So the right choice for this load is the WP car. The Rock Island car could be used also, as the adjoining District 5 of District 1 is a Home District for the RI.

What else may come into play? The empty NYC, MKT and RI cars could all be readily returned directly to their home rails in the St. Louis area, provided that there was no car shortage, so this could be a further reason to use the WP car for loading.

The example above is a little misleading, in only having a single car order to fill. In most situations, the IC Car Distributor would have several. From the Car Service Rules, you could expect the NYC car to be used for destination in the northeastern quadrant of the U.S., the Southern car for the southeastern quadrant, and the MKT car for the southwestern quadrant.

Modelers often think that a railroad would load the home-road car first, and that might be necessary on some occasions, but the Car Service Rules clearly prioritize using a car from quite far away from the originating point, as in the case described above. A consequence that may not be obvious is that on a layout like mine, an SP layout in California, loaded cars arriving from far away have a good probability of being SP cars, not cars from railroads in that faraway location.

For a somewhat different example, here is a Great Northern box car spotted at the type foundry on my layout (to learn what a type foundry is, you can consult this post: https://modelingthesp.blogspot.com/2018/05/whats-type-foundry.html ). The car came from Elizabeth, New Jersey and in accord with Car Service Rules, was routed to a Home District adjoining a Home District for the GN. The car, incidentally, has drifted a little into Alder Street, but should properly stand clear.

I should also mention a factor often overlooked by modelers: the state of the economy. When the economy is slack or in recession, each railroad tends to have more empties on hand than it needs, and priority goes to returning those empties; thus there are usually lots of empty cars to choose from in filling an order, and one can readily follow the Car Service Rules.

But when the economy heats up, cars tend to be in shorter and shorter supply. Then the Car Service Rules get ignored, in favor of getting your shipper the car that is needed. In such a case, you might fill the car order described above with an empty Southern box car, even though it would violate all six rules, if that was the only empty on hand. Railroaders sometimes called this provision “Rule Zero,” in reference to the Car Service Rules, as the most important rule: satisfy the shipper first.

Whether you choose to take these Rules into account in your model railroad layout, as part of car flow in operating sessions, is of course a personal matter, but it is one more component of achieving realistic operation.

Tony Thompson

Thursday, January 23, 2025

Starting a Yarmouth Model Works kit

Awhile back I purchased one of the very nice Yarmouth Model Works kits developed by Pierre Oliver. I was struck by his success in representing a common appearance in the earliest welded box cars: rippled side panels. In later years, the welding process was improved to minimize this effect, but in the 1950s it was often very evident. I bought a kit for an Atlantic Coast Line box car, built by American Car & Foundry.

But the model is interesting for several reasons beyond the welding ripples. It models two interesting variations on the usual boxcar components, variations which are called “carbuilder” ends and roof (“carbuilder” meaning a part used only by a particular car building company, in this case AC&F, at a time when components of that type were becoming industry standards, but the particular company used something else). 

The carbuilder ends in this case are essentially the Standard Railway Equipment Co. (SRE) Improved Dreadnaught end or IDE, but without the intermediate small ribs. The photo below shows these intermediate ribs between the large ribs, in the standard version of the  SRE IDE end.

The AC&F carbuilder end, however, though produced by SRE, omitted the small intermediate ribs between the major ribs. This can be seen in the prototype photo below of one of the ACL cars (AC&F photo). Note also the 8-foot door, unusual for a 1951-built box car. (For more background on these AC&F box cars, see the Railway Prototype Cyclopedia or RPC, volumes 26 and 29.)

Not visible above is the AC&F carbuilder roof. This was a really unusual design, with a pair of flattish ribs in each panel and a small raised area between the ribs at the outer end. I haven’t found a good prototype photo which shows these unusual features well, so I show below the model’s roof. I think the rib profiles can be seen here (you can click on the image to enlarge it).

The first step recommended in the kit instructions is to glue a pair of steel nuts inside the floor, before gluing the floor into the body. I used my usual choice, 5/8-11 nuts, attached with canopy glue. This is shown below, along with the body, prior to cleaning it up. You can see the rippled side sheets of the welded 12-panel sides.

But before putting the floor into the body, I drilled the bolster holes for truck screws, and tapped them 2-56. Meanwhile, I examined the kit directions, which merely advise, “Add the cross bearers, crossties . . .” with only an inconclusive model photo for guidance as to which ones are which. Luckily RPC 26 contains a very useful view (AC&F photo) of one of the AC&F cars, looking upward through the side door opening, and showing the underframe members at that location.

Clearly in the photo above, the two underframe cross-members at the door corners are cross bearers, and the one between them is a cross tie. I will show more about the model work on this point in a future post.

Tony Thompson

Monday, January 20, 2025

Role playing for operation

Whenever model railroad operating sessions are discussed, the topic of role playing usually comes up. By that, we mean fulfilling a role of a railroad employee, most visibly the engineer of a locomotive. And of course there are other roles too, from dispatcher to yardmaster to brakeman, and not least, conductor. And there are others. These roles are played during the session.  I’ve recently posted a blog about those kinds of roles (see it at: https://modelingthesp.blogspot.com/2025/01/realistic-layout-operation-part-3.html ).

But awhile back, my friend Jim Providenza pointed out some additional roles that end up being played, before and after operating sessions. These too are railroad jobs that have to be done, every bit as much as those that are pursued during operating.

An obvious one is track maintainer. It is a rare layout indeed that does not require maintenance, repair, upgrade or even replacement of track elements between operating sessions. (We also clean track, which the prototype does not need to do, so I don’t mean that part.) I’m referring instead refer to the rails and their correct arrangement.

As a person who has, to date, written fully 14 episodes on a continuing series of posts, all titled “Trackwork wars” in part, I know this well. (To check on that series, you can readily find them by using “trackwork wars” as the search term in the search box in the upper right of this post.) And I know from talking to many a layout owner, I am not alone.

I recognize, in my own layout, that there are areas that have been perfect in operation for years, but there are also trouble areas that I know will need work from time to time. The scene shown below, with an ancient NMRA Mark II gauge, is all too familiar.

Another kind of role, of course, is car maintainer and locomotive maintainer. Most cars and most engines are fine in any given session, but a coupler may be pulled out of alignment, or truck screws get too tight for trucks to rotate into curves, and so on. Between sessions, they have to be brought back up to standards.

On my layout, and I think on many, a significant time-sink of an off-session role is that of clerk. All the paperwork for a session, from train line-ups to notices of all kinds, have to be prepared, and of course whatever system of car forwarding is in use has to be exercised to provide the right waybills, car cards or other documents for the session.

Hopefully, of course, we don’t encounter an immense amount of such paperwork, so that setting up an op session doesn’t require a prototypical force of clerks (SP yard office photo).

Instead, we work through whatever our system requires, as it’s been developed for reasonably efficient resetting of the layout for the next session. As often as not, I find myself setting the waybills against the cars to make sure I have every one covered, and the bill is correct for the session. (Visiting operators are discouraged from doing this except at the outset of a session, when all cars need to be identified.)

What is shown above is not so different from the yard clerk attaching route cards to freight cars in the yard, as in this Missouri Pacific photo (courtesy Charlie Duckworth).  

So as Jim observed, we do play some roles between sessions, just as we play them during sessions. It may be a different kind of “play value,” but it’s mostly enjoyable just the same. And of course the core of all this is that you choose to have an operating session at all. My own sessions on the present layout are about to reach 100 in number.

Tony Thompson

Friday, January 17, 2025

Yet another Tony Koester book

I recently received a question about my book reviews, asking why I hadn’t reviewed Tony Koester’s 2019 Kalmbach book, Time-Saving Techniques for Building Model Railroads. I do own the book, and have enjoyed browsing in it, but probably because my own layout is already built, and fairly complete at this point, I didn’t feel an impulse to review it. But here goes. 

Tony K. has always advocated a number of specific approaches for layout building, and this book pulls a number of them together. I enjoyed seeing Doug Tagsold on the cover, renowned among operating people for his rapid and impressive layout building. He’s shown in the early days of at least his third (and present) layout.

The book, as was usual with Kalmbach Media books, is 8.5 x 11 inches in size, softbound, with 112 pages. As with all of Tony’s books, it is handsomely illustrated with informative photos.

The scope of the book is well demonstrated by names of the chapters. Here is the Contents page:

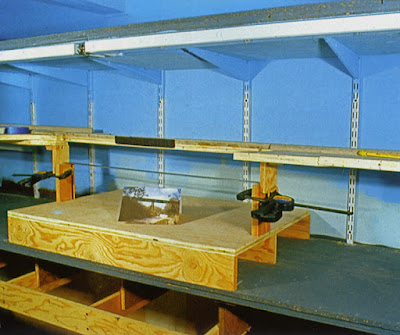
An interesting and certainly simplified approach to upper decks on double-deck layouts is to use shelving systems. Koester himself has done this, as you see below. Note that the steel brackets for the upper level are already painted sky blue. The backdrop will be notched to fit around them.

One interesting time-saving method described for a couple of layout is foam-base scenery. You see that in the book cover photo, at top. Here is another view of Doug Tagsold’s 1:72 layout, showing at left the fairly complete scenery contours accomplished with foam, and at right the scene when the usual materials are added.

Another person who has used this approach is Bill Darnaby. He has emphasized narrow track boards, and likes the flexibility of the foam (easily modified). At top is the 2-inch blue foam that is the foundation, being applied to wall brackets. Next below is trackwork being placed atop the foam, with easily-added ditches alongside, and at bottom we see a completed area.

I like this book, and have enjoyed reading and re-reading it. If I had to offer a criticism, it might be that there are too many photos of a finished layout (the author’s) and not enough in-progress views or views of more and different layouts. But it’s not a “step-by-step” book, it’s an idea book, and the points made about time-saving approaches are quite valid and clearly presented. That’s why I believe the book does what it was intended to do.

Tony Thompson


Tuesday, January 14, 2025

Cocoa Beach 2025

Yes, it’s a new year, and for freight car enthusiasts like myself, the year begins on a high note with the annual Prototype Rails meeting in Cocoa Beach, Florida. Originated and long directed by the late Mike Brock, it’s now ably directed by Mike’s long-time second in command, Marty Magregian. 

And as has always been the case, the meeting was well organized and ran smoothly throughout. This year the heavy snows in the Midwest and Northeast did lead to a whole bunch of last-minute cancellations for obvious reasons, but otherwise attendance was typical of this meeting at around 200, and every one appeared to be having a great time.

I always focus on the clinic program at a meeting like this. There is rarely a clinic time slot when I’m not sitting in one, and have presented one or more clinics at every one of these meetings I’ve attended (out of 24 of these meetings, I’ve just missed two). 

This year’s program, organized by Jeff Aley, was as usual, nicely varied and of uniform high quality. My talk this year was entitled “Creating Realistic Operation on a Small Layout,” and you can view the handout if you wish (it‘s at: https://modelingthesp.blogspot.com/2025/01/handout-for-realistic-operation-clinic.html ).

One clinic I enjoyed was Mont Switzer’s talk about freight cars associated with Muncie, Indiana. He opened his talk with a variation on a slide he often uses at this meeting, which includes an HO scale surf board:

For those not familiar with Cocoa Beach, the huge Ron Jon surf shop is a local landmark. Mont also brought along all the freight cars described in the clinic, and exhibited them in the ballroom’s display area.

Speaking of the ballroom, as always it was the location for model displays, manufacturer's tables, and hobby sellers, with many interesting things on view. Here’s an overall photo:

As he always does, Eric Thur brought some interesting freight cars, including several with very well-done loads. I will just show a single example, a load of Allis-Chalmers transformers. The loads are S scale transformers 3D-printed by Multi-Scale Digital. They were shown loaded on a hybrid model, a Funaro & Camerlengo Pennsylvania Class FM flat car body with Sunshine resin sides. A prototype photo of a very similar load of transformers was also displayed. 

For John Armstrong fans, it was fun to see exhibited a 3D-printed, O scale model of his “imagineered” 200-ton articulated cement car, called a “Cementipede,” built by Jim King of Smoky Mountain Model Works for David Vaughn’s Wit & Wisdom LLC (I understand kits are available; you can email to witandwisdommodels@gmail.com ). As you see below, there was also exhibited an O scale version of Armstrong’s famous re-creation of the diner in the Edward Hopper painting, Nighthawks.

There weren’t large numbers of relatively modern models exhibited, but I liked a Canadian National aluminum-ingot flat car by Bob De Stefano. The car, CN 618226, is from the early 2000s, as shown in the upper photo, and as evident in the model photo below, the load is removable. Impressive modeling.

Lastly, I liked a model that Fenton Wells displayed. To some passers-by, it may have looked like “simply” an Accurail 8500-series plug-door reefer, with a 1953 reweigh date and almost-new paint. But look again, and note the upgrades: the free-standing grab irons, sill steps, ladder, ice hatch latch bars, roof corner grabs, and door hardware. This is nice work.

All in all, another typically enjoyable and fun Cocoa Beach meeting. I always look forward to each one, and invariably find it just as good as I expected. Reminders for it are already blocked in on my calendar for the event in 2026.

Tony Thompson

Saturday, January 11, 2025

Refining Scenery, Part 4

In this series of posts, I am describing some quite minor refinements to my layout scenery, not because they are noteworthy projects, but to illustrate that even a nearly complete layout like mine still has some needs for scenery repair, upgrade or completion. The second of these was a good example, simply moving  two trackside details farther from a ground throw; it can be found at: https://modelingthesp.blogspot.com/2024/12/refining-layout-scenery-part-2.html . (It also contains a link to the first in the series.)  

In the present post, I don’t describe a correction to layout scenery, as I did in the first two of these posts; instead, I describe completing an area that has been “bare ground” (actually, brown-painted Homasote) for years. In the photo below, it is the area against the backdrop, identified with the arrow, to the left of the long, low gray building (Pismo Marine Service). The small yellow shed was a candidate for this area, but will be used elsewhere. There’s really nothing there but a tie pile (you can click to enlarge the image).

What I decided to do was to add some kind of a (different) shed in this area, along with some terrain character that would look as much like dirt piles as anything. I made a couple of low piles using Sculptamold paper mache, as you see below. Note also the distinctive texture of the Homasote “ground” in the area (you can click on the image to enlarge it if you wish). What used to occupy this area was the foreground stack of ties.

Obviously we don’t want to be presenting snow piles, located mere yards from the Pacific Ocean in central California, so these were promptly painted brown.

Then the same scenic technique described in the previous posts in this series was used to cover the piles in dirt and a little grass, leaving the space between the piles open. The area is now prepared for the next step.

The intent for the gap between the two dirt piles was to accommodate a shed of some kind, whether a railroad-owned shed or something associated with the warehouse business to the right, in the scenes above. The real purpose is to fill the empty area that you see above, which can’t accommodate an industry to be switched because it is alongside a turnout. My choice was the Tichy kit for a handcar shed, which follows a C&O prototype, though I won’t be representing a handcar facility, just a shed. But that will be the topic of a future post.

Tony Thompson


Wednesday, January 8, 2025

Handout for “Realistic Operation” clinic

The clinic is aimed at describing and illustrating my ideas of what it means to conduct realistic operations on a layout, whether large or small. In the clinic, I show numerous examples of realistic layouts; a number of examples of prototypical paperwork as developed for use by model railroaders; and show a number of real railroad jobs that an serve as prototypes for layout operating jobs. As a single example, one might think about the yard office clerk, chalking switching directions (not graffiti!) on a freight car. This photo is from the Richard Hendrickson collection.

For layout appearance, few would disagree with a choice of a view of operations at Caliente on the La Mesa Club’s famous Tehachapi layout.

I wrapped up my recommendations with several illustrations of how I have followed these ideas in developing the operating procedures on my own layout. Shown below are links to some blog posts of mine, with background about all this. In addition, I have included below a number of background links to internet resources, as well as a complete list of published material shown or mentioned in the clinic. As I usually do nowadays,  this handout is on-line only, so that the numerous internet resources are readily accessed.  

I will begin with links to three posts to my blog, which touch on the three principles I mentioned for realistic operation.

https://modelingthesp.blogspot.com/2024/11/realistic-layout-operation.html

https://modelingthesp.blogspot.com/2024/12/realistic-layout-operation-part-2.html

https://modelingthesp.blogspot.com/2025/01/realistic-layout-operation-part-3.html

Next is a listing of books and articles shown or mentioned in the clinic.

Armstrong, John H., The Railroad – What It Is, What It Does (Chapter 8, Railroad Operations), Simmons-Boardman Publishing, Omaha, 1982. [there are several subsequent editions with updates; the original is closest in time to the era I model] 

Bedwell, Harry, The Boomer, University of Minnesota Press, Minneapolis, 2006.

“Boomer Pete,”see under Kalmbach, A.C.

Chubb, Bruce, How to Operate Your Model Railroad, Kalmbach Books, Milwaukee, 1977.

_______, Compendium of Model Railroad Operations, Operations Special Interest Group, Downingtown, PA, 2017.

Coughlin, E.W., Freight Car Distribution and Handling in the United States, Car Service Division, Association of American Railroads, Washington, 1956.

Ellison, Frank, “The Art of Model Railroading,” six-part series in Model Railroader, 1944; reprinted in 1964, August to January 1965.

Ellison, Frank, Frank Ellison on Model Railroads, Fawcett Books, Greenwich, CT, 1954.

Fisher, Ralph E., Vanishing Markers, Stephen Greene Press, Brattleboro, VT, 1976.

Kalmbach, A.C. (writing as “Boomer Pete”), “Realistic Operation,” Model Railroader, March 1939, pp. 127–130.

Kalmbach, A.C. (writing as “Boomer Pete”), How to Run a Model Railroad, Kalmbach, Milwaukee, 1944 (revision of earlier book, Operating a Model Railroad, 1942).

Koester, Tony, “In search of the perfect waybill,” Model Railroader, February 2012, p. 82.

Koester, Tony, Realistic Model Railroad Operation, Kalmbach, Waukesha, WI, 2003 (2nd edition, 2013).

Morgenstern, Wes (Ed.), Working on the Western Maryland, Western Maryland Historical Society, Union Bridge. MD, 1999.

Morgenstern, Wes,and Leo Armentrout (Eds.), Working on the Western Maryland, Volume II, Western Maryland Historical Society, Union Bridge. MD, 2011. 

Niemann, Linda, Boomer, University of California Press, Berkeley, 1990.

_______, Railway Accounting Rules, Accounting Division, Association of American Railroads, Washington, 1950. [numerous editions exist; this one suits my era]

Rehwalt, Dan, Westsider, Grizzly Press, Oakridge, OR, 2004.

Roxbury, L.E., Let’s Operate a Railroad, High-Iron Publishers, Warwick, VA, 1957.

Smith, Doug, “The latest word on card operations,” Model Railroader, December 1961, pp. 52–62.

Sprau, David, and Steven King, 19 East, Copy Three, Operations Special Interest Group, WoodDale, IL, 2013, 

Thompson, Anthony, “Prototypical waybills for car card operation,” Railroad Model Craftsman, December 2009, pp. 71–77.  

Thompson, Tony, “Getting Real: A More Prototypical Waybill for Model Railroads,” Model Railroad Hobbyist, pp. 31–46, May 2012. 

Thompson, Tony, ”Getting Real: Operating with Prototypical Waybills,” Model Railroad Hobbyist, January 2018.  

Finally, several on-line articles by me, touching on the topics of the clinic.

Thompson, Anthony, “Contents of a Waybill,” The Dispatcher’s Office, Vol. 16, No. 2, pp. 17–24, April 2010.
[corrected version available at: modelingthesp.blogspot.com/2011/01/waybills-2.html ]

Thompson, Anthony, “Freight Car Handling and Distribution,” The Dispatcher’s Office, Vol. 17, No. 4, pp. 28–31, October 2011.
[corrected version available at: modelingthesp.blogspot.com/2011/09/my-article-in-dispatchers-office.html ]

Thompson, Anthony, “Progress with Prototypical Waybills for Modelers,” The Dispatcher’s Office, Vol. 22, No. 4, pp. 26–33, October 2016.
[corrected version available at: modelingthesp.blogspot.com/2017/11/yet-another-correction-of-dispatchers.html ]

Thompson, Tony, “Choosing and Modeling an Era,” https://modelingthesp.blogspot.com/2011/04/choosing-and-modeling-era.html

Thompson, Tony, “Handout: Operating like the Prototype,” https://modelingthesp.blogspot.com/2023/05/handout-operating-like-prototype.html

I hope presenting these resources on-line in this way will be at least as helpful as a paper handout, and in my opinion more convenient to use.

Tony Thompson


Sunday, January 5, 2025

A Richard Hendrickson freight car

After Richard passed away in 2014, I inherited most of his modeling projects and materials, along with all his unbuilt kits and existing freight car fleet. As some readers may remember, I conducted on-line auctions to sell the kits and some brass freight cars, while the Santa Fe Society handled an auction of his Santa Fe brass locomotives and passenger cars. I also handled gifting over 100 of Richard’s freight cars to many of his friends and associates.

[For anyone who does not know, or has forgotten, who Richard Hendrickson was, it might be of interest to read the memorial essay of tribute I wrote after he passed away in June 2014. That essay can be found here: http://modelingthesp.blogspot.com/2014/07/in-memoriam-richard-hendrickson.html .]  

A couple of his unfinished freight car projects could be completed with a reasonable amount of effort, such as his very interesting Santa Fe Class FE-25 automobile car (the concluding post in my description of that project is here: https://modelingthesp.blogspot.com/2018/11/hendrickson-auto-car-part-6.html ). More recently, I completed his model of a Georgia Railroad USRA box car that had been rebuilt (read my description here: https://modelingthesp.blogspot.com/2024/07/another-hendrickson-project.html ).

Another project to come to light was his partly converted gondola to be a C&O car. I know what he intended, because both a photo and decals were with the model. Here is the photo Richard had with this project. Evidence that I mention below indicates that this is an AC&F builder photo.

What was the prototype background? From 1930 to 1937, the Chesapeake & Ohio purchased 5000 new steel gondolas, with steel solid floors and fixed ends, numbered 40000–44999. The last 1000, built by AC&F, had different ends, changing from an angled heap shield to an oval one, as you see above. These were remarkably durable cars. In 1953, the year I model, the Official Railway Equipment Register or ORER shows 3974 out of 4000 cars with the angled heap shields, and 996 of the 1000 with oval shields. Only 30 out of 5000 cars had left the roster in the intervening 20 or so years. 

Below is a Cycopedia builder photo (again, by AC&F). These 40-foot, 70-ton gondolas with 9 side ribs have a distinctive appearance.

One way these cars can readily be modeled is the way Richard was doing, using the old Roundhouse metal high-side gondola. It was a cast white-metal kit. His model has at least the Roundhouse sides and floor, held together with small screws. He modified the Dreadnaught ends, and added the distinctive rounded C&O “heap shields” with styrene. The sides have the correct rivet rows inside to match the rib locations. Richard had added brass drop grab irons to the B end.

He also had built a fairly complete underbody, re-locating the brake gear from the Roundhouse original positions (you can see the scars below) and adding all rodding and also the lever carrier hangers. However, he chose to omit most of the piping, something I usually do too. The one thing he had not done on the underbody was to replace the Roundhouse narrow coupler boxes.Here you can clearly see the characteristic Roundhouse screw attachment of sides to floor, at each corner.

The B end of the car needs a brake platform and brake wheel, along with grab irons. I will continue with this project and complete the model, including a decision about the coupler boxes, then attend to paint and decals, followed by weathering.

Tony Thompson

Thursday, January 2, 2025

Realistic layout operation, Part 3

This is the third and final post in a series about what constitutes realistic layout operation. I doubt I am introducing any new ideas here, but rather offering a summary of my own views. To sum up: my core position is that realistic layout operation means following the prototype

In the first post in this series, I talked about layout appearance as one component of realistic layout operation. Of course the layout itself is passive, but provides what Frank Ellison called the stage on which the performance takes place. I pointed out that proto-freelanced layouts can readily be, and have proven to be, every bit as realistic in appearance as layout built with great fidelity to a particular railroad, place, and time. That post is here: https://modelingthesp.blogspot.com/2024/11/realistic-layout-operation.html .

In the second post, I described some of the essential tools to achieve realistic operation, which are items of paperwork, again following the prototype. And for the proto-freelanced railroad as much as for the prototypical one, the many prototype examples of relevant paperwork provide us with the models for what we use. That post can be found at this link: https://modelingthesp.blogspot.com/2024/12/realistic-layout-operation-part-2.html .

This concluding post is still about following the prototype, but now I want to turn to the topic of actual layout operations. I will summarize this point as procedures. Here a common point that is made is that we can add realism if we mimic the jobs that people did on the prototype. And as with so much in modeling, we are of course selective in this. We certainly can’t or don’t want to include jobs such as boilermaker, secretary to the division superintendent, supply clerk, redcap, or even locomotive fireman.

But it’s important that we know at least a little about what the jobs actually comprised that we do model, and how people went about them in the era we model. This is not easy to find out, particularly as a chosen model era is more and more distant from the present. If you model the 1920s, there are certainly no surviving railroaders to be interviewed.

But a great deal has been published, in magazines and books, about prototype railroad jobs. For example, we know a great deal about operators out on the line, like the Frisco operator shown below (Kalmbach Library) with the tools of his trade in 1939: headset, scissor-mounted telephone, telegraph key and sounder in the background, while he copies a train order.

By procedure I mean how things are done on the layout: how trains are run, how switching is conducted, and so on. Here following the prototype, unlike the case of layout appearance, enters a realm known by us as modelers, and not known to other observers. Of course the knowledge of individual modelers varies greatly, but all of us can aspire to learn more about how railroads actually work, or did work back in the day we have chosen to model.

Sometimes when I make this point, I can see some faces fall in the audience, and I know what at least some of them are thinking: “Oh no, more research to do.” As a person who enjoys learning things (as long as I’m interested in them), I only have a general understanding of this reaction. But yes, this is the area where you need always to learn more.

I can remember a time when visiting a layout for an operating session would involve the layout owner saying, “Okay, Tom, you run the coal train around the layout, and when it gets back, Joe, you run the passenger train in the other direction. And as soon as he finishes, Ed, you run the reefer block.” Let us gently pull a curtain over that era. This was not, shall we say, exactly what the prototype did or does.

Instead, trains have schedules and more specific tasks, including local trains doing switching along the line, and such other complications as helpers, or changing locomotives at intermediate terminals, and of course meets between opposing or overtaking trains. Each of those changes makes operation more complex and more realistic. So yes, you have to learn prototype operations, and in particular, you need to learn the operations of the specific prototype you model.

I would add that it’s also valuable to get some flavor of what it was like to do the jobs. Though such reminiscences have not been extensively published, there are certainly a number of good examples. One I often quote, because I have repeatedly enjoyed re-reading it, is Vanishing Markers (by Ralph E. Fisher, Stephen Greene Press, 1976) , and the excellent Dan Rehwalt and Linda Niemann books (see my initial post about such books, at: http://modelingthesp.blogspot.com/2012/06/railroad-stories.html and additional books following up at: https://modelingthesp.blogspot.com/2016/06/more-railroad-stories.html ).

I should mention the two volumes of Working on the Western Maryland, WM Historical Society, 1999 and 2011). I show the cover of Volume I below, and next to it the Contents page of Vol. II, typical of both volumes in the variety of job categories that are represented. Most of these are individuals’ summaries of their job histories, but many insights into railroad work are included. (You can click on the image to enlarge it.)

So to sum up what I’ve tried to say in these three posts, realistic operation of layouts large and small rests on three foundations: realistic appearance, use of prototype-style documents and paperwork, and following prototypical job procedures. And common to all three foundations is the principal point: follow the prototype.

Tony Thompson