I mentioned in the second post in this series, that streaking of car sides with the wash, even though less evident after the whole process is complete, can be subtly effective. Here I mostly mean streaking caused by drainage of water off the car, especially the roof. Here is another view of that being done, again prior to final weathering, when streaks like these will be somewhat muted. This is a Richard Hendrickson photo, from the weathering clinic we jointly designed and created, and then presented at several meetings, but what you see here is identical to my method. Subsequent weathering layers will subdue what may look like stark streaking at this point.

The same kind of streaking can be done on car ends, to represent the dirty water thrown up by the car wheels in wet weather.
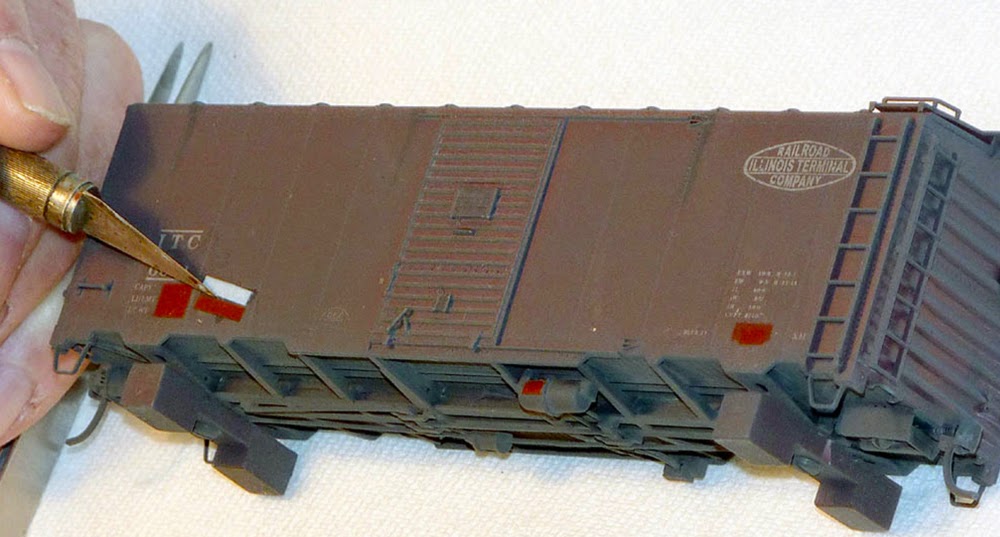
Once the weathering is completed to your satisfaction, you should in most cases add a reweigh paint patch and lettering, and if you are meticulous, also a repack stencil and even a brake reservoir stencil. For more information on the reweigh requirements for freight cars, you might wish to consult the article I wrote for Railroad Model Craftsman, a corrected version of which can be accessed at: http://modelingthesp.blogspot.com/2011/03/reweigh-article-from-rmc.html . As for the brake reservoir lettering, which is often neglected, I posted a summary of how that was indicated on freight cars at this link: http://modelingthesp.blogspot.com/2014/04/brake-service-rules-part-2.html .
One way to do show all these lettering modifications on a model is just to brush-paint an irregular patch over the NEW or weight date, and prototype photos certainly support such an appearance, or you can make a careful rectangle, most easily with decal sheet of boxcar red, black, orange, or whatever car color you have. This is another Richard Hendrickson photo, showing the decal process. Note the paint patch on the reservoir, to accept that stencil also.
The other detail I add to almost all my cars is the route card, which was also discussed in the post just cited. Here is a small square of paper being applied to a PFE refrigerator car, in the common location near the door. Another common location was near the bolster at the bottom of the car side on wood-sheathed cars. On steel cars, of course, the route card would have to be tacked on the route card board, but on wood cars, clerks could and did place them all over. Most route cards appear to have been white or manila in color, but there are photos which clearly show pink, yellow, blue and green, so occasional cars having route cards of those colors would be realistic.

This car also has a reservoir stencil to indicate brake system servicing.
Prototype photos frequently show that fragments of prior route cards remain on the car side or route card board, sometimes torn partly away. This is easy to reproduce with irregular little pieces of paper, as in this example.

Note also the “compressed gas” warning placard on the placard board, and the scuffing to the right of the door where the paint has been scraped.
Once those kinds of details are added you should in most cases also add chalk marks. These marks were made by clerks or switchmen, and certainly were not graffiti, but were intended to provide information to switching or train crews. I have written about this aspect in an earlier post; you can see it at: http://modelingthesp.blogspot.com/2011/11/chalk-marks-and-route-cards.html .
Here is the process of making these marks on a model, again using a Prismacolor pencil sharpened almost to a needle point to accomplish HO-scale handwriting. In another Hendrickson photo, you can see this process, and visible here are the reweigh and brake reservoir stencils also. The route card board on the car door has already received a small paper square as a route card. You can click on the image to enlarge it.Prototype photos frequently show that fragments of prior route cards remain on the car side or route card board, sometimes torn partly away. This is easy to reproduce with irregular little pieces of paper, as in this example.
Note also the “compressed gas” warning placard on the placard board, and the scuffing to the right of the door where the paint has been scraped.
Once those kinds of details are added you should in most cases also add chalk marks. These marks were made by clerks or switchmen, and certainly were not graffiti, but were intended to provide information to switching or train crews. I have written about this aspect in an earlier post; you can see it at: http://modelingthesp.blogspot.com/2011/11/chalk-marks-and-route-cards.html .

These details are among the things that make a routine sort of weathering job jump up to a higher level, and these details can really make a difference. In a forthcoming Part 10 I will wrap up all the features of my acrylic weathering method.
Tony Thompson
No comments:
Post a Comment