In the last post, I was ready to add the cleverly-designed “peel-and-stick” trim boards to the depot, and here is how the structure looked with them added:

In the view above, you can see that kit provides a cross wall, from the right edge of the bay (as seen in this view), extending to the back wall. This is about the location of a corresponding wall in the prototype. But the prototype also had longitudinal walls in the second story. Here is a sketch floor plan of the second story of a “right-handed” depot (adopted from Bender’s book, page 132). The areas with small white circles are chimney ducts, so this sketch also shows the approximate chimney locations; the ones at right vent the stove in the waiting room below.

At the least. it seemed to me that a view block should be added to represent these walls (if desired, the doorway locations could be left open). Further, as mentioned in the previous post, I wanted to add the second floor itself.
The simplest way to do this seemed to be the addition of styrene strips which would support a floor. As the floor would carry no weight, these strips need not be massive. I used canopy glue to attach them (you can read about this glue at: http://modelingthesp.blogspot.com/2013/05/a-few-words-in-praise-of-canopy-glue.html ), and used reversed clothes pins as clamps. These effectively have a deep jaw, as you can see here.
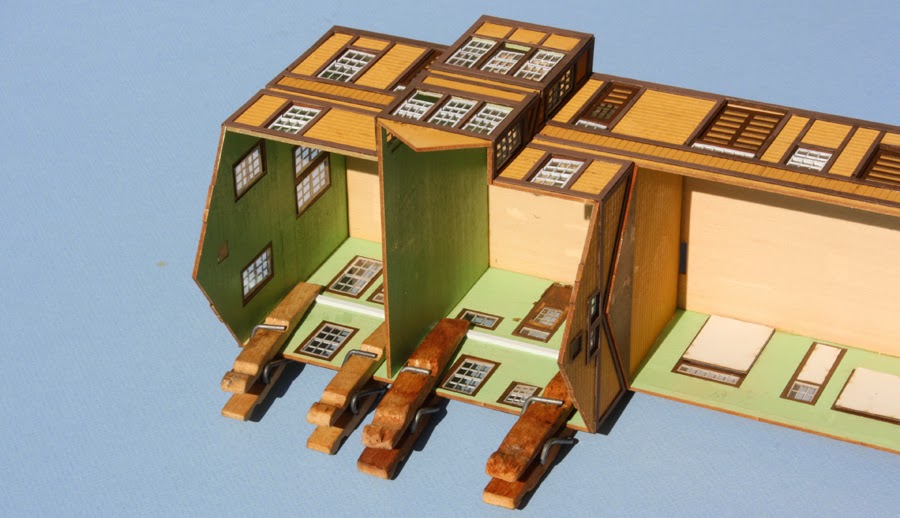
I simply cut pieces of 0.020-inch sheet styrene to fit for the floors, which were not glued in place but rest by gravity on the supports shown above. If I make the roof of the two-story section removable, that would permit me to go back later and furnish interior details on either floor, and perhaps lighting. And I think I need to take pity on the upstairs occupants and replace the institutional green with cream or some other color easier on the eyes <grin>.

These floors, as mentioned, are loose in the structure, and remain to be painted. I will also add the longitudinal walls, using styrene sheet, to make the prototype’s four rooms.
I was also building at the same time the freight dock which goes with the depot; here it is in assembled form. The untrimmed side wall at right will be against the depot wall and thus not visible in the completed structure.

The dock surface was painted with Star Brand “seasoned brown wood” color, their number STR-11. It remains to be weathered.
Roof construction came next. Here I chose to diverge from the kit instructions. With any kind of “stick-on” shingles, I feel strongly that they have to be well pressed down to avoid the raggedy “abandoned shack” look, and since the kit suggests adding all rafter tails before the shingles, I decided the reverse the order. That way I can press the shingle surface while the underside of the roof is still flat. More on that when this series continues.
Tony Thompson
If ever SP had a Signature Structure, this is it. I'd enjoy reading a post that explores other signature structures of SP, in the same way that your recent MRH article covered signature freight cars of various lines.
ReplyDeleteI agree, Chris, and certainly all the depots are candidates. SP also had standard designs for signal towers, sand houses, section crew quarters, and so on and on, many of them reproduced in the five volumes of the Steam Age Equipment series. But in many cases a specific example of one of these structures had variations from the "standard" design, indicating that the standard drawing was only a starting point for the carpenters in the field. So SP structures cannot be quite as well-defined "signatures" as, say, freight cars.
ReplyDeleteTony Thompson
I'm using the AMB Type 22 kit to make a reasonable model of the Type 22 Guadalupe depot as it was in1954, and the detail differences are surprisingly numerous: shorter upper storey with less windows, toilets extension at one end of ground floor, double doors on the longer freight house that open onto the much larger freight dock, different type of doors etc. The research has been very enjoyable.
ReplyDelete