The underframe work was my standard procedure with Athearn tank cars: to remove the triple-compartment outlets, separate the coupler box covers so they can be attached with screws, and use the Athearn brakewheel stand to fill the hole into which it fits, then cut it off flush. Finally, brake rodding is added (I used Plastruct styrene rod in the 0.010-inch size), along with the piping from the valve to the cylinder, the only really visible piping on a car like this. For details, see the article first cited above.
One easy refinement is to use the Tichy ratchet and pawl for the handbrake staff, a part included in their Tank Car Detail Set, part no. 3007. It is shown below on the Athearn end sill (arrowed). You can click on this image to enlarge it.

Here you can see the white Plastruct brake rods and the brass wire pipe to the cylinder. I also have filled the ladder holes in the running board on the right side, where there will be no ladder. The same Tichy set includes a nice brake wheel, which I attached to a brass wire staff of 0.019-inch diameter.
Body work included adding brass wire grab irons at all four corners of the tank, and one grab on the side of the dome which has the dome walk. I normally use 0.012-inch brass wire for this. I then made a new handrail, all one piece, using brass wire of 0.022-inch diameter. The original Athearn pieces make a good pattern to work from. The correct size would be 0.019-inch wire, corresponding to the outside diameter of the 1.25-inch pipe used for handrails, but it is preferable to the half-handrails of roughly 0.023-inch steel wire supplied by Athearn.
The virtue of the one-piece handrail is evident in this view of the non-dome-walk side. Note here that the handrail supports have not yet been added on the overlay sections of the tank. After this photo, I simply harvested these from scrap Athearn tank car bodies, and applied them to this tank with Plastruct’s very effective “Plastic Weld” solvent cement.

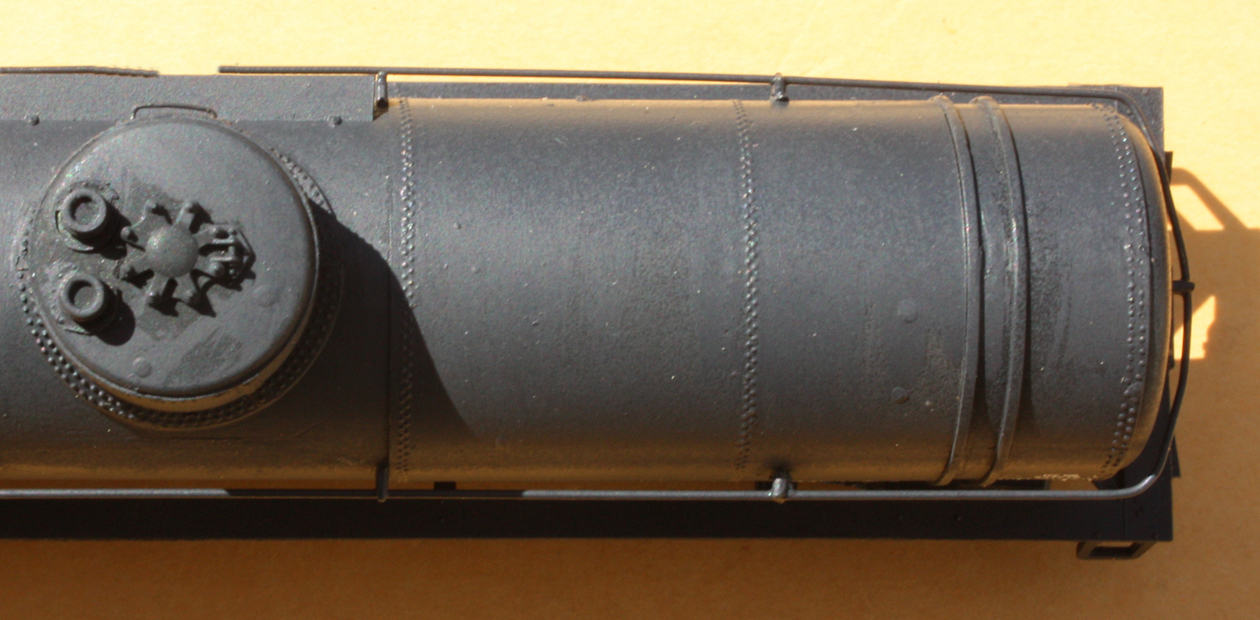
Note that with the clear styrene overlays, the former locations where outboard domes were cut away on the Athearn triple-compartment model can be seen. The Archer rivets have been applied.
My next step was to airbrush the car with a lightened black color, which helps later when weathering is being applied. I keep on my paint shelf a mix of Floquil colors, mostly black but with some white and brown, which I sometimes use for tank cars, but for this one I just sprayed it with Grimy Black. At this point, it is easier to appreciate the refinement of the Archer rivets.
This car was easy to letter because I had made up SP tank car decals last year (this was described in an earlier post on that topic, at: http://modelingthesp.blogspot.com/2011/05/sp-tank-car-decals.html ). There were only two SP tank car classes with both dome-top safety valves and circumferential tank sheets, classes O-50-10 and O-50-11, and I had already modeled a car of Class O-50-10, so this one ought to be an O-50-11. (The reader of my Volume 5 with a retentive memory may recall Class O-50-7, which did indeed have both this type of safety valve and these tank sheets, but it was a car with a shorter and fatter tank, and can’t be modeled with an Athearn tank car.)
Here is the completed car, using a pre-1946 lettering scheme (tank cars were not repainted as often as most other freight cars).

This was an interesting project, just as a way to see how Archer rivets would work for this kind of tank car. And this sort of modeling was exactly what I had in mind when I researched the rivet size and spacing for Archer to produce their set no. AR88031 (that set is shown in the Tank Sheet post, cited second at the top of this post). I’m glad to see it all come together.
Tony Thompson
No comments:
Post a Comment